Prepare Target to Install ECI Deb Packages¶
The section is applicable to:

To leverage all ECI features, the target system should meet the recommended system requirements. Also, the target system must have a compatible OS so that you can install ECI Deb packages. This section explains the procedure to install a compatible OS on the target system.
Please note, some feature compatibility (ex: integrated graphics) is dependent on the OS distribution installed on your Intel platform.
Use the table below to determine which ECI supported OS distribution(s) you should use with your Intel® platform to achieve best results:
Distribution |
Distribution Version |
< Intel® platforms > |
||||||||
|---|---|---|---|---|---|---|---|---|---|---|
Series 3 Core™ Ultra for the Edge (WCL) Wildcat Lake |
Series 3 Core™ Ultra (PTL) Panther Lake |
Series 1/2 Core™ Ultra (MTL/ARL) Meteor / Arrow Lake |
7000 Series Intel Atom® (ASL) Amston Lake |
14th/13th Gen Core™ (RPL) Raptor Lake |
12th/11th/9th/8th Gen Core™ (ADL/TGL/CFL/WHL) Alder / Tiger / Coffee / Whiskey Lake |
Xeon® D-1700 (ICL-D) Ice Lake D |
6000E Series Intel Atom®™ (EHL) Elkhart Lake |
|||
< Debian > |
Debian 12 (Bookworm) . |
✔ |
✔ |
✔ |
✔ |
✔ |
✔ |
|||
Debian 11 (Bullseye) . |
✔ |
✔ |
✔ |
|||||||
< Canonical® Ubuntu® > |
Canonical® Ubuntu® 24.04 (Noble Numbat) . |
✔ ‡ |
✔ ‡ |
✔ |
✔ |
✔ |
✔ |
✔ |
✔ |
|
Canonical® Ubuntu® 22.04 (Jammy Jellyfish) . |
✔ |
✔ |
✔ |
✔ |
✔ |
|||||
< Red Hat® Enterprise Linux® > |
Red Hat® Enterprise Linux® 9.3 (Plow) . |
✔ |
✔ |
✔ |
✔ |
✔ |
||||
Key |
Symbol |
|---|---|
‡ |
Do the following to prepare the target system:
Install the AMD64 variant of either Debian 12 (Bookworm), Debian 11 (Bullseye), Canonical® Ubuntu® 24.04 (Noble Numbat), Canonical® Ubuntu® 22.04 (Jammy Jellyfish), or the ECI installation images on to the target system. Refer to the following table for details:
Attention
Please review Canonical Intellectual property rights policy regarding Canonical® Ubuntu®. Note that any redistribution of modified versions of Canonical® Ubuntu® must be approved, certified or provided by Canonical if you are going to associate it with the Trademarks. Otherwise you must remove and replace the Trademarks and will need to recompile the source code to create your own binaries.
Distribution
Description
Where to Download
Instructions
Debian
Open-source Debian 12 (Bookworm)
Open-source Debian 11 (Bullseye)
⚑ ECI installation image for
core-bookwormN/A
Canonical® Ubuntu®
Open-source Canonical® Ubuntu® 24.04 (Noble Numbat)
Open-source Canonical® Ubuntu® 22.04 (Jammy Jellyfish)
⚑ ECI installation image for
core-nobleN/A
Note: ⚑ These ECI installation images enable you to quickly get started with a blank canvas ready for customization. They are minimal builds of Debian or Canonical® Ubuntu® with the ECI Linux Intel LTS PREEMPT_RT kernel already installed and boot parameters already configured.
To achieve real-time determinism and utilize the available Intel® silicon features, you need to configure certain BIOS settings. Reboot the target system and access the BIOS (press the delete or F2 keys while booting to open the BIOS menu).
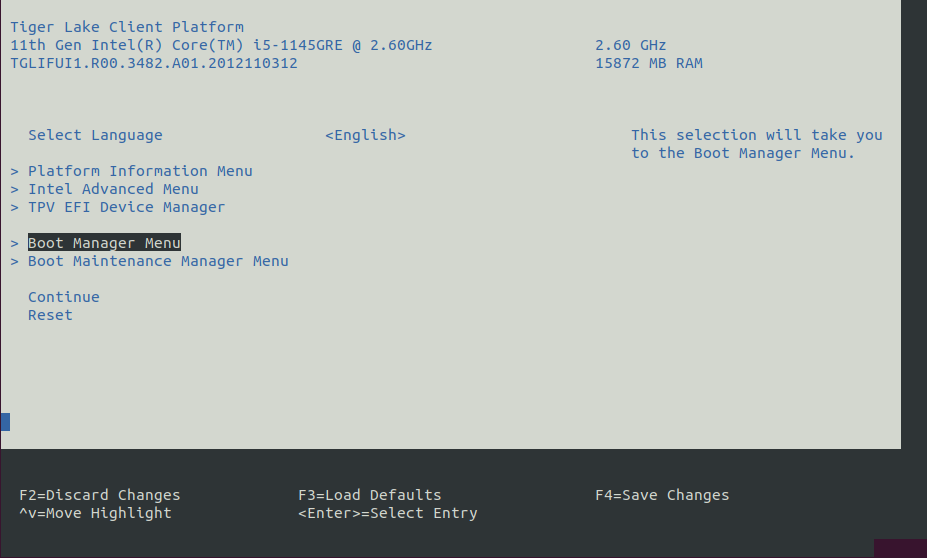
Select Restore Defaults or Load Defaults, and then select Save Changes and Reset. As the target system boots, access the BIOS again.
Modify the BIOS configuration as listed in the following table.
Note: The available configurations depend on the platform, BIOS in use, or both. Modify as many configurations as possible.
Setting Name
Option
Setting Menu
Hyper-Threading
Disabled
Intel Advanced Menu ⟶ CPU Configuration
Intel Virtualization Technology (VT-x)
Disabled* (see footnote)
Intel Advanced Menu ⟶ CPU Configuration
Intel(R) SpeedStep
Disabled
Intel Advanced Menu ⟶ Power & Performance ⟶ CPU - Power Management Control
Turbo Mode
Disabled
Intel Advanced Menu ⟶ Power & Performance ⟶ CPU - Power Management Control
C States
Disabled
Intel Advanced Menu ⟶ Power & Performance ⟶ CPU - Power Management Control
HWP Autonomous EPP Grouping
Disabled
Intel Advanced Menu ⟶ Power & Performance ⟶ CPU - Power Management Control
RC6 (Render Standby)
Disabled
Intel Advanced Menu ⟶ Power & Performance ⟶ GT - Power Management Control
MC6 (Media Standby)
Disable
Intel Advanced Menu ⟶ Power & Performance ⟶ GT - Power Management Control
Maximum GT freq
Lowest (usually 100MHz)
Intel Advanced Menu ⟶ Power & Performance ⟶ GT - Power Management Control
SA GV
Fixed High
Intel Advanced Menu ⟶ Memory Configuration
VT-d
Enabled* (see footnote)
Intel Advanced Menu ⟶ System Agent (SA) Configuration
PCI Express Clock Gating
Disabled
Intel Advanced Menu ⟶ System Agent (SA) Configuration ⟶ PCI Express Configuration
Gfx Low Power Mode
Disabled
Intel Advanced Menu ⟶ System Agent (SA) Configuration ⟶ Graphics Configuration
ACPI S3 Support
Disabled
Intel Advanced Menu ⟶ ACPI Settings
Low Power S0 Idle Capability
Disabled
Intel Advanced Menu ⟶ ACPI Settings
Native ASPM
Disabled
Intel Advanced Menu ⟶ ACPI Settings
Legacy IO Low Latency
Enabled
Intel Advanced Menu ⟶ PCH-IO Configuration
PCH Cross Throttling
Disabled
Intel Advanced Menu ⟶ PCH-IO Configuration
Delay Enable DMI ASPM
Disabled
Intel Advanced Menu ⟶ PCH-IO Configuration ⟶ PCI Express Configuration
DMI Link ASPM
Disabled
Intel Advanced Menu ⟶ PCH-IO Configuration ⟶ PCI Express Configuration
Aggressive LPM Support
Disabled
Intel Advanced Menu ⟶ PCH-IO Configuration ⟶ SATA And RST Configuration
USB Periodic SMI
Disabled
Intel Advanced Menu ⟶ LEGACY USB Configuration
VT-xandVT-dare required by most virtualization solutions (KVM, RTH Hypervisor, ACRN Hypervisor, etc.), so set toenabledfor greatest compatibility. However, if you know that virtualization will not be used, you can safely setVT-xandVT-dto disabled.
Setting Name
Option
Setting Menu
Logical Processor
Disabled
Processor Settings
Uncore Frequency RAPL
Disabled
Processor Settings
Local Machine Check Exception
Disabled
Processor Settings
System Profile
Custom
System Profile Settings
Optimized Power Mode
Disabled
System Profile Settings
Turbo Boost
Disabled
System Profile Settings
C1E
Disabled
System Profile Settings
C-States
Disabled
System Profile Settings
Uncore Frequency
Maximum
System Profile Settings
Dynamic Load Line Switch
Disabled
System Profile Settings
Energy Efficient Policy
Performance
System Profile Settings
CPU Interconnect Bus Link Power Management
Disabled
System Profile Settings
PCI ASPM L1 Link Power Management
Disabled
System Profile Settings
Workload Configuration
IO Sensitive
System Profile Settings
Setting Name
Option
Setting Menu
Active Efficient-cores
All
Intel Advanced Menu ⟶ CPU Configuration
Active LP Efficient-cores
0
Intel Advanced Menu ⟶ CPU Configuration
X2APIC
Enabled
Intel Advanced Menu ⟶ CPU Configuration
C-states
Enabled
Intel Advanced Menu ⟶ Power & Performance ⟶ CPU - Power Management Control
Intel(R) Speed Shift
Enabled
Intel Advanced Menu ⟶ Power & Performance ⟶ CPU - Power Management Control
Intel(R) SpeedStep
Enabled
Intel Advanced Menu ⟶ Power & Performance ⟶ CPU - Power Management Control
HWP Autonomous EPP Grouping
Disabled
Intel Advanced Menu ⟶ Power & Performance ⟶ CPU - Power Management Control
RC6 (Render Standby)
Disabled
Intel Advanced Menu ⟶ Power & Performance ⟶ GT - Power Management Control
MC6 (Media Standby)
Enabled
Intel Advanced Menu ⟶ Power & Performance ⟶ GT - Power Management Control
Disable Turbo GT frequency
Disabled
Intel Advanced Menu ⟶ Power & Performance ⟶ GT - Power Management Control
Maximum GT frequency
Default Max Frequency
Intel Advanced Menu ⟶ Power & Performance ⟶ GT - Power Management Control
Resource Priority Feature
Disabled
Intel Advanced Menu ⟶ Power & Performance ⟶ GT - Power Management Control
ACPI D3Cold support
Enabled
Intel Advanced Menu ⟶ ACPI Settings
Low Power S0 Idle Capability
Disabled
Intel Advanced Menu ⟶ ACPI Settings
Page Close Idle Timeout
Disabled
Intel Advanced Menu ⟶ Memory Configuration
Power Down Mode
Disabled
Intel Advanced Menu ⟶ Memory Configuration
Legacy IO Low Latency
Enabled
Intel Advanced Menu ⟶ PCH-IO Configuration
SA GV
Disabled
Intel Advanced Menu ⟶ PCH-IO Configuration
ASPM
Disabled
Intel Advanced Menu ⟶ System Agent (SA) Configuration ⟶ PCI Express Configuration
L1 Substates
Enabled
Intel Advanced Menu ⟶ System Agent (SA) Configuration ⟶ PCI Express Configuration
PTM
Enabled
Intel Advanced Menu ⟶ System Agent (SA) Configuration ⟶ PCI Express Configuration
TC-VC Mapping
Enabled
Intel Advanced Menu ⟶ System Agent (SA) Configuration ⟶ PCI Express Configuration
What Next after Preparing Target¶
After preparing the target, host the ECI Deb packages.