Intel® FIDO Device Onboard
Note
Intel® FIDO Device Onboard (Intel® FDO) is independent of the Intel® ECI release lifecycle.
This guide is a simplified tutorial, with the goal of introducing the user to Intel® FIDO Device Onboard. For a more complete guide, please see the Intel® FIDO Device Onboard documentation located in the ECI release archive. Follow the steps below to access the Intel® FIDO Device Onboard documentation:
Use the Intel edgesoftware utility to download the ECI release archive, if not done already.
The Intel® FIDO Device Onboard documentation is located in the ECI release archive within the
Support/Bare-Metal-Onboardingdirectory. Verify the directory contains the following:└── Support └── Bare-Metal-Onboarding ├── Intel_User_Guide-FDO.pdf └── setup_Node0_#.#.#.sh
Open the “Intel_User_Guide-FDO.pdf” in a modern web browser or PDF viewer.
FIDO Device Onboarding of ECI Images
This section explains the FIDO device onboarding of ECI images to support DMS using Intel® In-band Manageability.
With a properly configured infrastructure, Intel® FIDO Device Onboard (Intel® FDO) can be leveraged to autonomously deploy Intel Edge Controls for Industrial (Intel ECI or ECI) images on networked target systems. This section describes the setup necessary to enable and use Intel® FDO.
Infrastructure Prerequisites
The following section is applicable to:

Required Infrastructure for Node 0:
Compute platform with Intel® 6th Generation or newer CPU (minimum four cores)
RAM - 16 GB or more
SSD Storage - 250 GB or more (additional storage is recommended for mirroring OS repositories and building images locally)
Required Software
For a full zero-touch OS image installation and onboarding on to the DMS and orchestration, the following is required:
BMO setup Script
Binaries provided for pre-defined profiles
Binaries provided for FDO Bare-Metal-Onboarding
Binaries provided for FDO Intel-DAL-Client
Ubuntu-minimal-desktop (20.04 or 22.04 LTS preferred)
Install Required Software Packages
Run the following command to install the required software packages:
$ sudo apt install -y git build-essential openssh-server net-tools wget curl docker docker-compose haveged
Node 0 Components and Services
The BMO setup script will automatically pull the open-source components from the GitHub* software development platform and use the provided binaries to set up the infrastructure. The BMO script will install the following services:
FDO All-In-One container (AIO)
The integrated Manufacturer Toolkit
Owner Service
Automatic TO0 Client, which discovers the New Ownership vouchers in the SCT database, extends them with the owner public key, and then registers automatically to the RV service
Rendezvous-service Container (RV)
Reseller Toolkit
AIO-TB-plugin container
Edge Software Provisioner (ESP)
web-servicecontainergitea-servicecontainerregistry-servicecontainersquid-servicecontainerdnsmasq-servicecontainersmb-servicecontainercore-servicecontainer
ThingsBoard container
For OS image installation on bare-metal platforms, ESP is required as it offers a PXE boot service to perform FDO device onboarding on COTS White Labeled Boxes.
For ease and visualization of voucher extension and profile selection, ThingsBoard open source DMS is used.
Set up Node0 Infrastructure
Step 1: Configure the Node0 setup script
Use the Intel edgesoftware utility to download the ECI release archive, if not done already.
Copy the node0 script setup_Node0_#.#.#.sh from the ECI release archive (release-eci_#.#.zip) to the Linux build system. The BMO release content is located in the ECI release archive within the Support/Bare-Metal-Onboarding directory as follows:
└── Support
    └── Bare-Metal-Onboarding
        ├── Intel_User_Guide-FDO.pdf
        └── setup_Node0_#.#.#.sh
Step 2: Make BMO executable
Make the BMO setup script executable:
$ chmod +x setup_Node0_#.#.#.sh
Step 3: Exceute the script
Execute the setup_Node0_#.#.#.sh script as root:
$ sudo ./setup_Node0_#.#.#.sh
Follow the on screen prompts and answer them carefully
This set up may take up to 30 minutes depending on the resources available on the host machine and network connectivity.
Use Infrastructure
Step 1: Access ThingsBoard DMS
Open the ThingsBoard DMS set up on Node 0. The URL is http://<IP_Address>:9090. For instance,
http://localhost:9090.Log in using the credentials defined in the
application.propertiesfile of the ThingsBoard FDO plugin. The file is in~/ThingsBoardBMO/ocswfm/.From the left pane, navigate to Dashboards.
Select ECS Node Build Type.
Step 2: Initialize Worker Node
This section explains the process to prepare COTS hardware for deployment and orchestration.
Device initialization will be performed on the selected hardware via PXE boot. After completion of device initialization, the device will shutdown. A new entry will be added to the DEVICES dashboard. The device name will be the new UUID related to FDO.
From the ECS Node Build Type Dashboard, select the generated device/devices and the following:
BS-BMOThingsBoard: To choose the base OS image
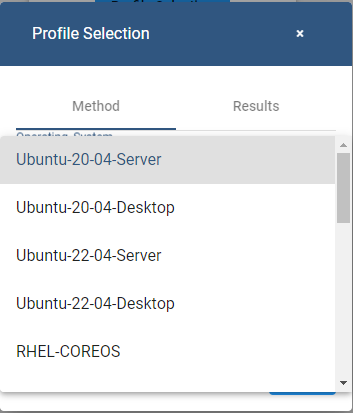
After selecting the options, click ECS BUILD TYPE. From the pop-up, select the desired image type.
Click Send and close the pop-up. Click the Result tab to check if the submission was successful. Selected devices will now be ready for multistage deployment.
Step 3: Deploy Worker Node
Make sure that the device is connected to the same network segment.
Power ON the device.
The following processes will occur:
The device will boot from the EFI partition and will automatically provision with FDO.
After provisioning, the device will install the corresponding OS.
After the installation is complete, the node will reboot.