Inter-VM Communication via Shared Memory
To enable Microsoft Windows* OS as a guest, refer to the ACRN project documentation.
For inter-VM communication, a shared memory region can be utilized which is managed by the SOS. The shared memory is provided to a VM as a memory region of a PCI device. By device model configuration, the PCI device is assigned to the Guest OS. For more details, refer to the ACRN project documentation.
ivshmem Driver for Windows
A ivshmem driver must be installed in the Microsoft Windows* Guest-OS to use the shared memory. The sources for the driver are available at: https://github.com/virtio-win/kvm-guest-drivers-windows/tree/master/ivshmem/. For detailed information on how to build and install Microsoft Windows* driver, refer to the Windows hardware developer documentation.
Note: For Microsoft Windows* 10 and later, drivers must be signed by an official authority.
Build Driver
To build the driver, install the Microsoft Windows* Driver Kit and associated dependencies on the Microsoft Windows* build machine:
Install Window Driver Kit (WDK).
Install Microsoft Windows* Visual Studio.
Install Microsoft Windows* SDK (10.0.19041.1).
See WDK documentation on how to install the SDK with Visual Studio.
Clone the source repository to commit:
edda3f50a17015aab1450ca09e3263c7409e4001and apply patch file0001-Ivshmem-SDK10.patch.# git clone https://github.com/virtio-win/kvm-guest-drivers-windows.git # cd kvm-guest-drivers-windows # git checkout edda3f50a17015aab1450ca09e3263c7409e4001 # patch -p1 < <path to 0001-Ivshmem-SDK10.patch>
Note: For Microsoft Windows* build hosts, use third-party tools like GnuWin of CygWin.
Open the
ivshmem.slnsolution in Visual Studio.Check whether the patch file has modified the solution to SDK10.
In the Solution Explorer of Visual Studio, right-click project ivshmem, click Properties, and check that Configuration Properties|General|Platform Toolset shows WindowsKernelModeDriver10.0 and Configuration Properties|General|Windows SDK Version shows 10.0 (corresponding to the installed SDK version).
If this cannot be selected, re-target the project - right-click project ivshmem, click Retarget Projects, and select Windows SDK Version 10.0 (corresponding to your installed SDK version).
In the Solution Explorer of Visual Studio, right-click project ivshmem-test, click Properties, and check that Configuration Properties|General|Windows SDK Version shows 10.0.
If this cannot be selected, re-target the project - right-click project ivshmem, click Retarget Projects, and select Windows SDK Version 10.0 (corresponding to your installed SDK version).
Microsoft Windows* 10 (and later) installs signed drivers only. Refer to Microsoft Driver Development documentation for details. As a sanity check test, do the following to enable signing:
In the Solution Explorer of Visual Studio, right-click project ivshmem and click Properties.
Make sure that Run Inf2Cat is set to yes in Inf2Cat|General.
Set Sign Mode to Test Sign in Driver Signing|General.
Select <Create Test Certificate…> for Test Certificate entry. The name of the test certificate will appear in the field of the form CN=”WDKTestCert <USER>, <NUMBER>”|<NUMBER>. Memorize the certificate name for later export operation.
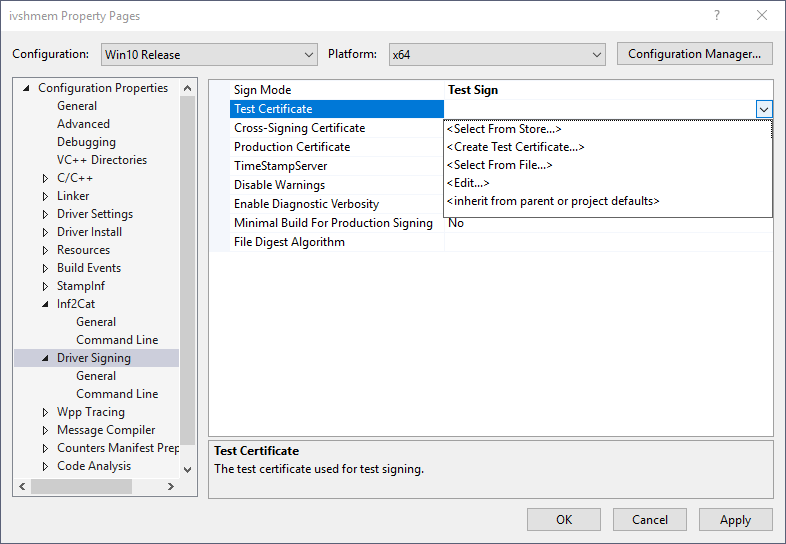
Click OK to close the Property page.
Follow the menu path Build > Build Solution. The driver files are stored in the
<repo path>\\kvm-guest-drivers-windows\\ivshmem\\Install\\Win10\\amd64directory.
Launch Window Guest VM with IVSHMEM
The shared memory region must be enabled at startup of the Microsoft Windows* guest VM. Adapt the launch script located in /var/lib/machines of the root file system of the SOS by adding:
|
This adds a shared memory device of size 128MB with the
name shmem as slot 6 (only the device type ivshmem
is a fixed parameter). The size and name parameters must be the same
among the |
Install Driver
Export the certificate:
Open
certmgr.msc(Press Windows + R and typecertmgr.msc).From the left page, double-click Personal and then double-click Certificates. The certificates will be displayed on the right pane.
Right-click the certificate that matches the certificate name that you memorized earlier.
From the context menu, select All Tasks > Export….
In the Certificate Export Wizard, select No, do not export private key and click Next.
Select DER encoded binary X.509 (.CER) and click Next.
Input a file name to store the certificate. (Recommendation: Choose the install directory of the other driver files).
Click Next and Finish.
Copy all files in the installation directory (including the exported certificate file) to the Microsoft Windows* guest (for example, via USB thumb drive if USB is allocated to the Microsoft Windows* guest or via a share if network connection is established).
Enable test-signing for the Microsoft Windows* guest VM. Open a command window as administrator and type the following:
bcdedit /set testsigning onImport the certificate:
Open
certmgr.mscon the Microsoft Windows* VM.Right-click Personal and select All Tasks > Import… from the context menu. Click Next.
Enter the certificate file. Click Open.
Make sure that Personal is provides as Certificate Store.
Click Next and Finish.
Reboot the VM to activate the test signing mode.
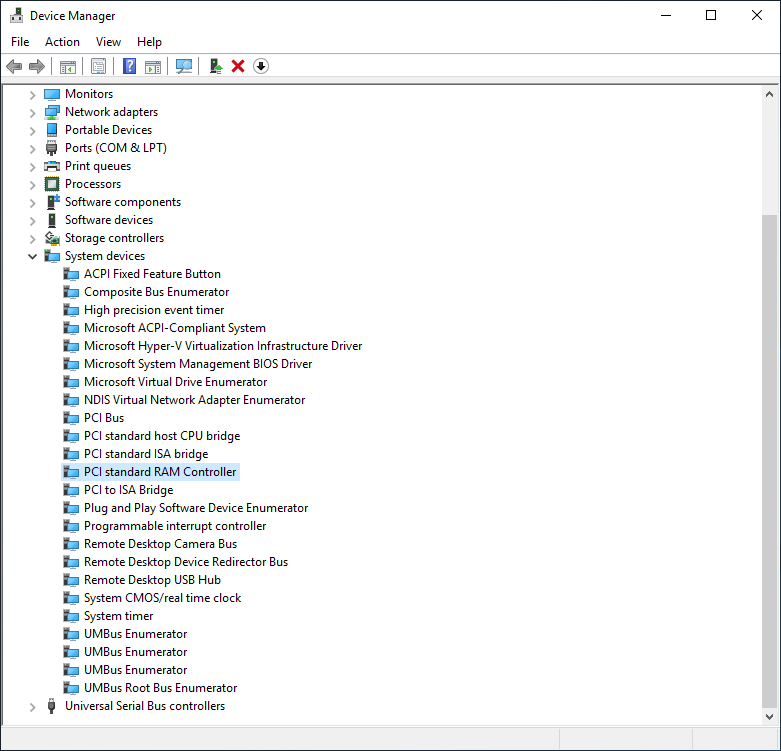
Open the Device Manager. Expand System Devices and right-click RAM Storage Device. Select Update driver.
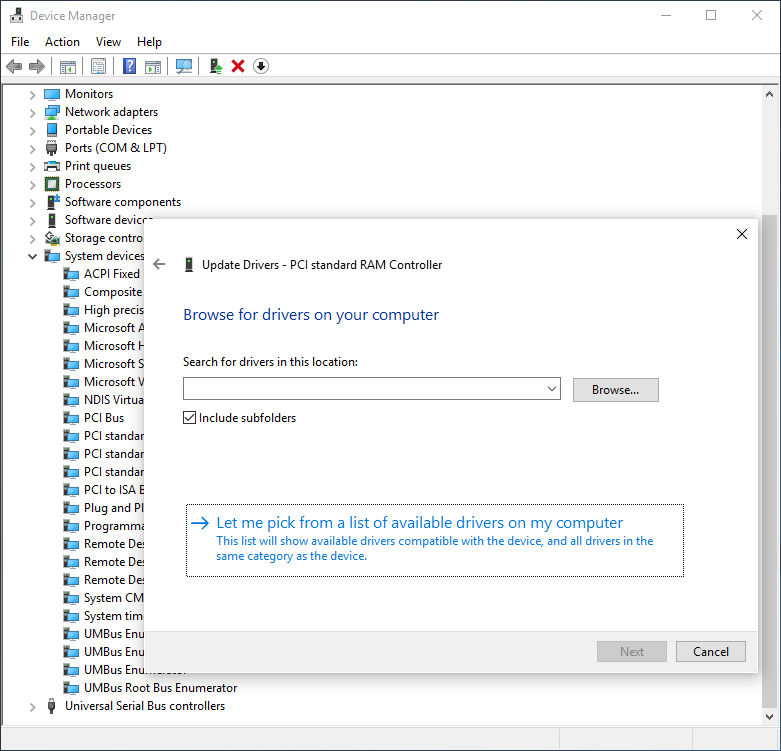
In the popup window, select option Browse my computer for driver software. Then, select the option Let me pick from a list of available drivers in my computer.
Click Have Disk and enter the location of the certificate file. In the file select box, select
ivshmem.inf, click Open, and then click OK. Now, select IVSHMEM under Model and click Next.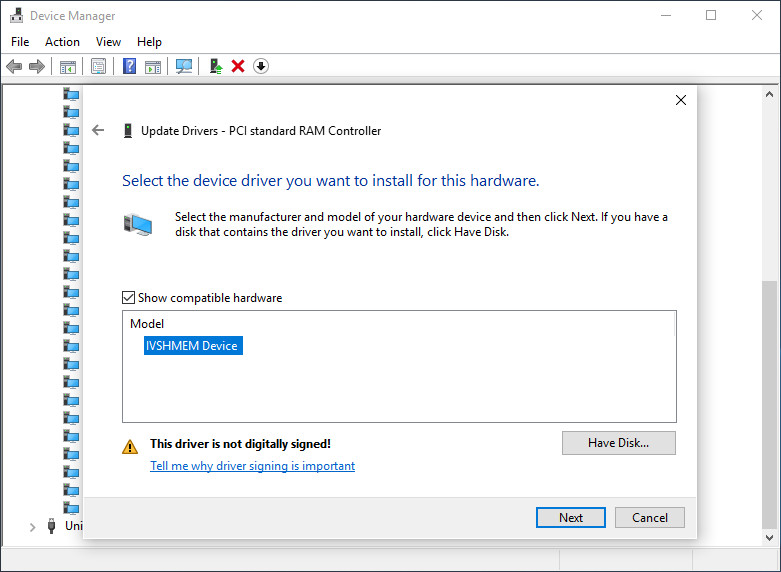
Accept to install unsigned driver.
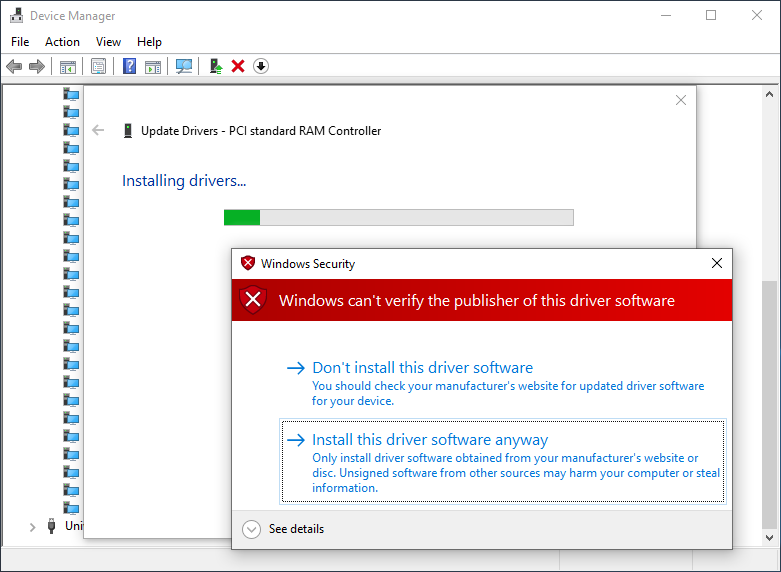
The installation of the driver is now completed. IVSHMEM should now appear in the Device Manager under System Devices.
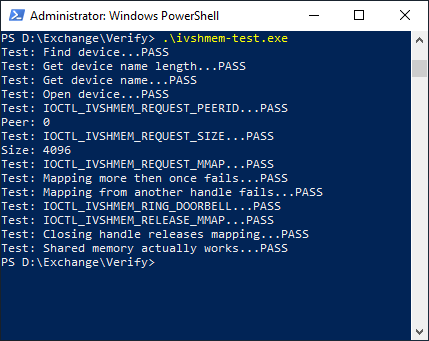
Local Driver Test
Run ivshmem-test.exe as a sanity check to see if the access to the shared memory works.