ECI Development Practices
ECI Build Engine
The ECI build engine is used to build ECI targets from source (see Build ECI). The ECI build engine can generate Deb packages and bootable images for virtual and real targets.
ECI uses Integration System for Automated Root (ISAR) v0.9 for Debian*-based filesystem generation.
At the core of ISAR, the bitbake (BB) build engines use Debian* Schroot interactive shells to build every ECI custom package individually from third-party software vendors. Intel Edge Control softwares and Intel LTS Linux BSPs are build from open source stable reference.
Image generators assemble a Debian* chroot from both Linux* distribution official mainline and custom packages APT repositories.
Note: ECI 2.x poky Legacy used for Yocto bitbake (BB) build leverages layer from OpenEmbedded (OE) core universe with the meta-intel and BSPs.
ECI Source Code
Source code for ECI components is located in the release archive: eci-release/targets/layers. This directory is organized by bitbake meta-layer.
Each meta-layer contains bitbake recipes that correspond to various components included as ECI custom Deb packages.
Within the recipe directory are files with the following bitbake ISAR recipes file extensions :
*.deb- Component redistributable Deb package*.tar.gz- Component source code
Note
Other recipe directory provide a minimal ECI 2.x Legacy bitbake Poky recipes :
*.tar.gz- Component pre-compiled binaries*.src.tar.gz- Component source code
Develop Deb Packages
This section explains the steps to create and build bitbake ISAR recipes.
The following steps are applicable to:

Step 1: Set up Build System
This step will prepare your build system for development.
Download the ECI release archive, if not done already.
Copy the
eci-release.tar.gzarchive from the ECI release archive (release-eci_#.#.zip) to the Linux* build system. Make sure that there are no spaces in the directory path. For example, copy the archive to ~/Desktop. Theeci-release.tar.gzarchive is located in the ECI release archive within theEdge-Controls-for-Industrialdirectory as follows:└── Edge-Controls-for-Industrial ├── Codesys_Example_Applications.zip ├── Dockerfiles.tar.gz └── eci-release.tar.gz
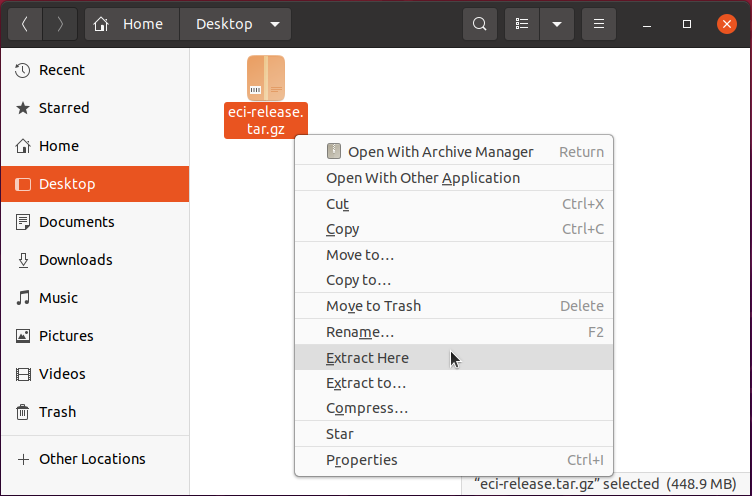
Extract the archive. In Canonical Ubuntu*, right-click the archive and select Extract Here.
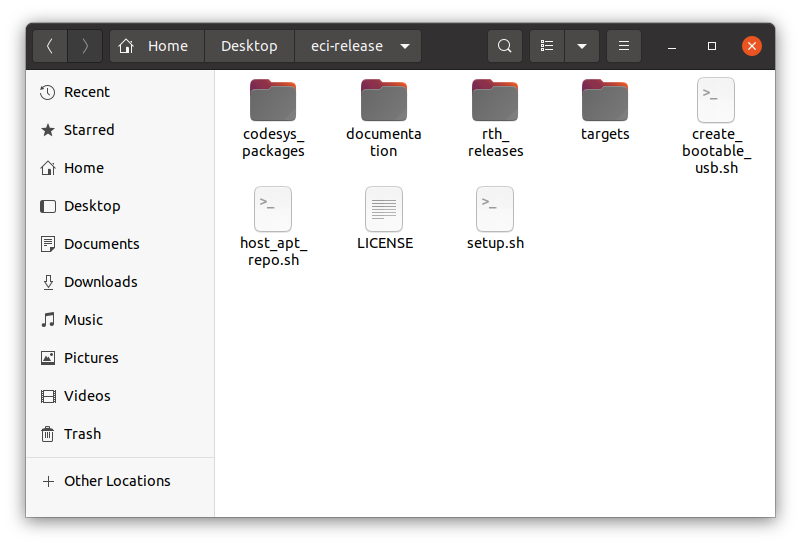
The directory contents should be similar to the following:
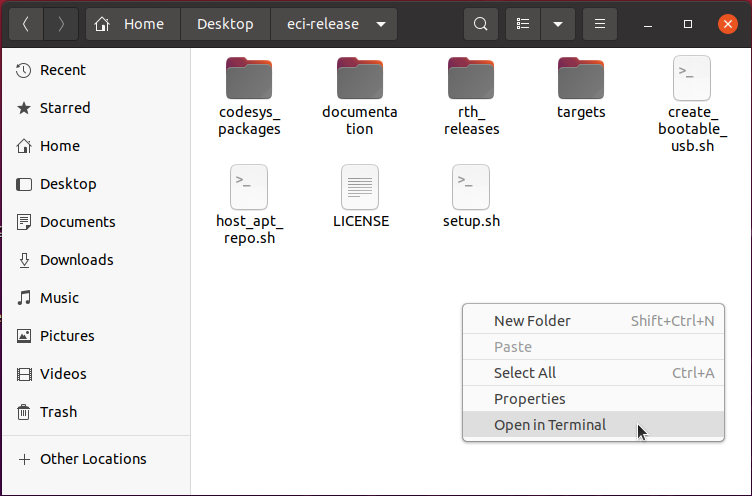
In a development system (example Canonical Ubuntu*), open a terminal to the eci-release directory. Right-click anywhere in the directory explorer and select Open in Terminal.
Step 2: Create a Meta-layer
This step describes the procedure to create a bitbake meta-layer, which will hold custom bitbake recipes for building Deb packages. It is a good practice to create a new meta-layer for development, so as not to contaminate the existing ECI meta-layers.
Open a terminal to the eci-release directory, and create the following directory structure under
targets/layers/:$ mkdir -p targets/layers/meta-vendor-application/conf/ && touch targets/layers/meta-vendor-application/conf/layer.conf $ mkdir -p targets/layers/meta-vendor-application/recipes-application $ tree targets/layers/meta-vendor-application
targets/layers/meta-vendor-application
├── conf
│   └── layer.conf
└── recipes-application
Edit the BB layer configuration file to define the meta-layer structure:
$ vi targets/layers/meta-vendor-application/conf/layer.conf
Copy the following configuration example to the
layer.conffile. This example configuration is compatible with ISAR >= v0.6 .# We have a conf and classes directory, add to BBPATH BBPATH .= ":${LAYERDIR}" # We have recipes-* directories, add to BBFILES BBFILES += "${LAYERDIR}/recipes-*/*/*.bb \ ${LAYERDIR}/recipes-*/*/*.bbappend" BBFILE_COLLECTIONS += "vendor-application" BBFILE_PATTERN_vendor-application := "^${LAYERDIR}/" BBFILE_PRIORITY_vendor-application = "7" LAYERSERIES_COMPAT_vendor-application = "v0.6"
Create a meta-layer YAML file for the KAS tool:
$ touch targets/kas/meta-vendor-application.yml
$ vi targets/kas/meta-vendor-application.yml
Copy the configuration example below to the
meta-vendor-application.ymlfile.# # Vendor layer # header: version: 3 repos: meta-vendor-application: path: targets/layers/meta-vendor-application
Step 3: Create a Recipe
This step describes the procedure to create a custom bitbake recipe, which defines the steps to build a Deb package.
Create a new recipe named
myexampleapp_1.0.bbin themeta-vendor-application/recipes-applicationdirectory:$ touch targets/layers/meta-vendor-application/recipes-application/tutorial/tutorial_1.0.bb $ tree targets/layers/meta-vendor-application
targets/layers/meta-vendor-application
├── conf
│   └── layer.conf
└── recipes-application
    └── tutorial
        └── tutorial_1.0.bb
In this example, the Debian* hello package will be built. Edit the
tutorial_1.0.bbrecipe with the following contents:inherit dpkg SRC_URI="apt://hello"
Step 4: Start a bitbake Environment
This example will show the steps to start a bitbake environment for packages-bullseye, which can be used to debug during development.
Run the
setup.shscript and selectpackages-bullseyeas the ECI target to build (See Build ECI Targets for reference).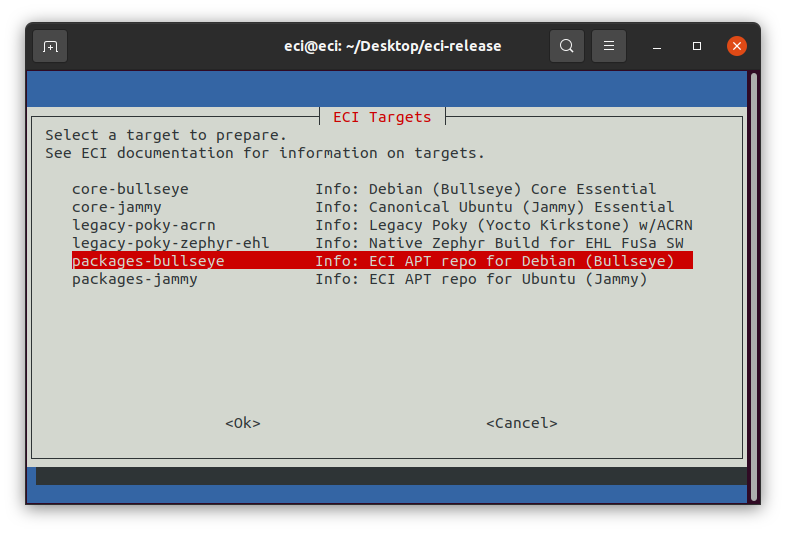
After setting up the build target, the script will present a menu. Since the goal is to build a custom component, the menu will not be used. Select the
Exitbutton to exit the menu.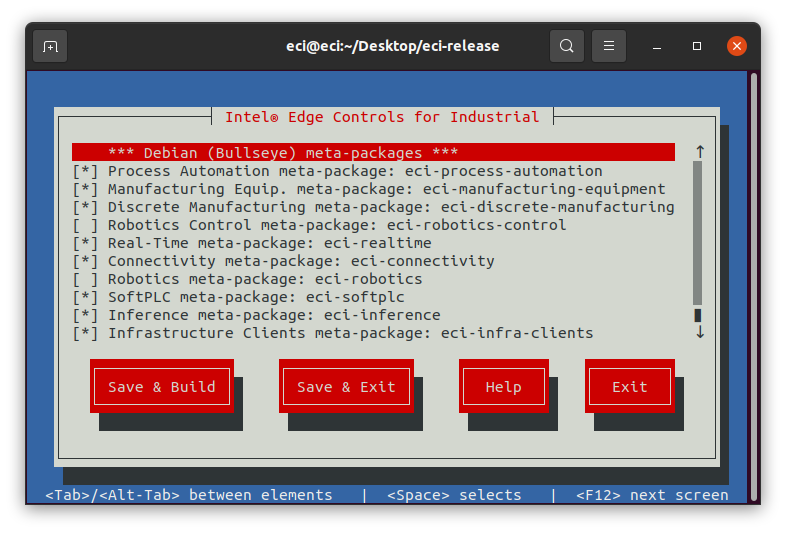
Unlike the
packages-*targets, thecore-*targets can be setup in manual mode and will output commands to initiate a bitbake environment. This feature will be used to help initiate a bitbake environment forpackages-bullseyeas well. Run thesetup.shscript again, but this time selectcore-bullseyeas the ECI target to build.
After setting up the build target, the script will prompt:
Do you want to run an automated build? [Y/n].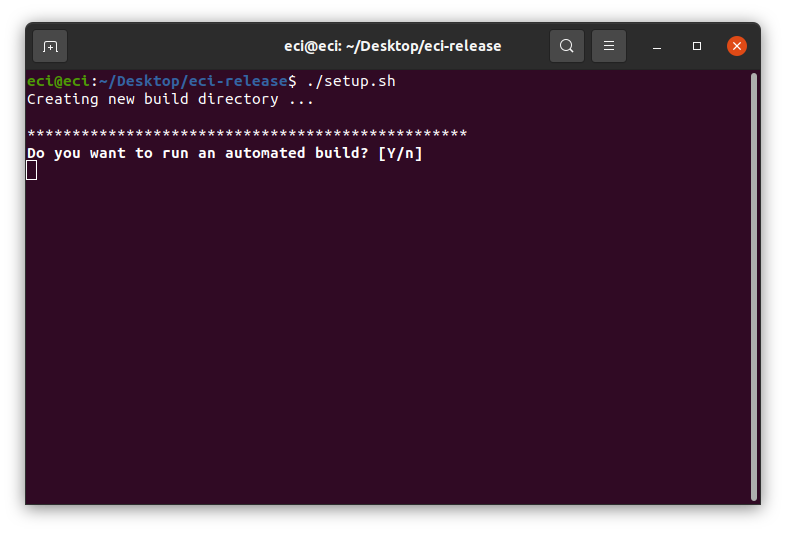
Press n at the prompt to choose a manual build.
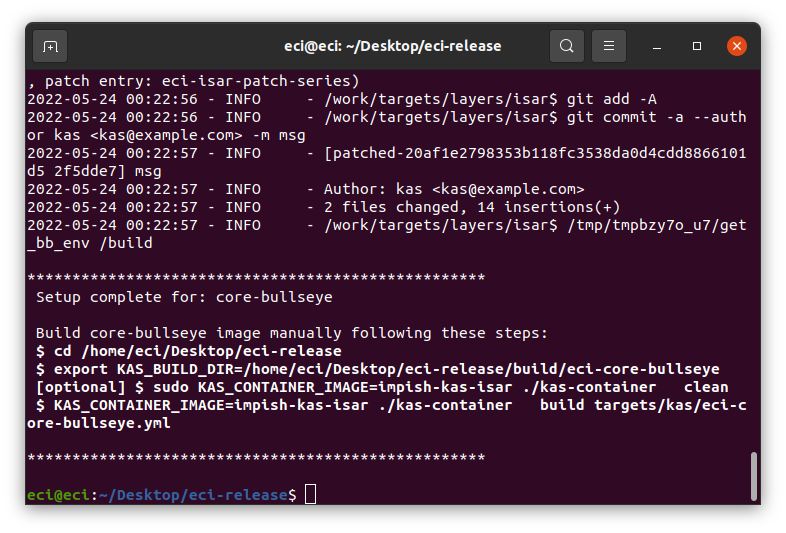
Run the commands output by the script, but modify them to change all instances of
core-bullseyetopackages-bullseye, andbuildtoshell. Then, append the path of the meta-layer YAMLmeta-vendor-application.yml:$ cd /home/eci/Desktop/eci-release $ export KAS_BUILD_DIR=/home/eci/Desktop/eci-release/build/eci-packages-bullseye $ KAS_CONTAINER_IMAGE=jammy-kas-isar:3.0.2 ./kas-container --git-credential-store ${HOME}/.git-credentials shell targets/kas/eci-packages-bullseye.yml:targets/kas/meta-vendor-application.yml
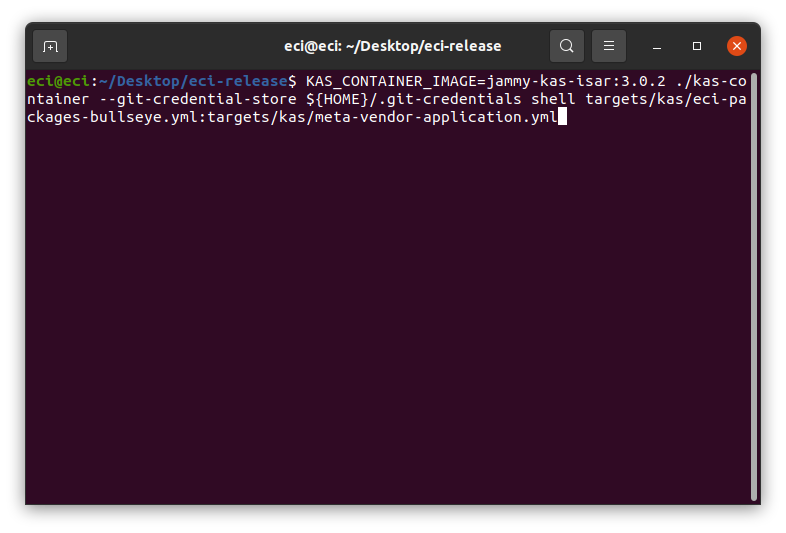
After executing the
kas-containercommand, a bitbake environment should be available: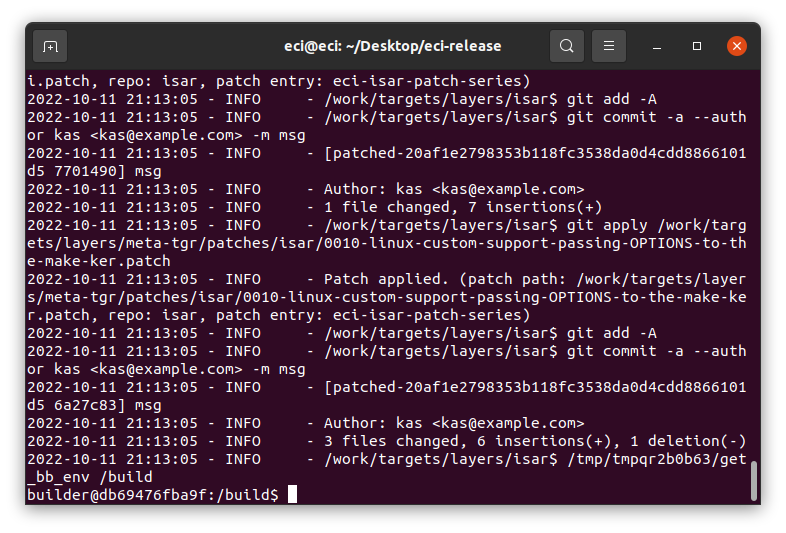
See also
Refer to bitbake Command Reference for common bitbake commands and their usage.
Step 5: Build a Recipe
This example will show the steps to build a bitbake recipe into a Deb package.
From the bitbake environment, execute the
bitbakecommand to build a recipe. This example will build thetutorialrecipe:$ bitbake tutorial -v
ISAR will first instantiate a build environment, which can take a few minutes. Eventually, the bitbake recipe will build, and you should see a success message:
NOTE: Tasks Summary: Attempted 37 tasks of which 0 didn't need to be rerun and all succeeded.Exit the bitbake environment with the
exitcommand.Verify whether the Deb package was built. In this example, the
packages-bullseyebuild is examined:$ tree build/eci-packages-bullseye/tmp/deploy/isar-apt/eci-bullseye-amd64/apt/eci-bullseye/pool/main/
The
helloDeb package is now available, as specified in thetutorial_1.0.bbrecipe:└── h └── hello ├── hello_2.10-2_amd64.deb └── hello-dbgsym_2.10-2_amd64.deb
Debian Package Development Concepts
This section will cover some of the more fundamental concepts of developing Deb package recipes. Before completing this section, it is recommended to become familiar with ISAR and the bitbake environment by completing the Develop Deb Packages section. The following concepts will be visited:
Bitbake and ISAR Variables - Recipe variables which control the creation of Deb packages
Raw Copy Reference Recipe - Deb package which installs content not requiring compilation
Upstream APT Reference Recipe - Deb package sourced from distribution APT repository
Upstream Maintained Reference Recipe - Deb package sourced from maintainer GIT repository
Custom Kernel Module DKMS Recipe - Deb package which installs kernel module using DKMS
See also
For additional guidance on developing Deb packages using ISAR, refer to the ISAR User Manual.
Bitbake and ISAR Variables
Many of the standard bitbake variables are available for use with the ISAR build tool. The following list is not comprehensive, and only represents some of the commonly used variables:
DEBIAN_DEPENDS- Deb packages that the package depends on. These dependencies will be installed by the APT package manager when the Deb package is installed.DEPENDS- Lists a recipe’s build-time dependencies (that is, other recipe files).MAINTAINER- The maintainer of the Deb package.PR- The revision of the recipe.PV- The version of the recipe.SRC_URI- The list of source files — local or remote. This variable tells BitBake which bits to pull for the build and how to pull them.
See also
For a complete list of bitbake variables, refer to the bitbake variables glossary.
Raw Copy Reference Recipe
This example demonstrates how to build a package that does not compile source and only needs to install content.
Open a terminal to the eci-release directory.
Create the following directory structure under
targets/layers/:$ mkdir -p targets/layers/meta-vendor-application/recipes-application/myexampleapp && touch targets/layers/meta-vendor-application/recipes-application/myexampleapp/myexampleapp-raw_1.0.bb $ mkdir -p targets/layers/meta-vendor-application/recipes-application/myexampleapp/files && touch targets/layers/meta-vendor-application/recipes-application/myexampleapp/files/content.md $ tree targets/layers/meta-vendor-application
targets/layers/meta-vendor-application
├── conf
│   └── layer.conf
└── recipes-application
    └── myexampleapp
        ├── files
        │   └── content.md
        └── myexampleapp-raw_1.0.bb
Edit the
content.mdfile with an example message:$ echo "Example content for the myexampleapp-raw recipe" > targets/layers/meta-vendor-application/recipes-application/myexampleapp/files/content.md
Edit the
myexampleapp-raw_1.0.bbrecipe with the following contents:inherit dpkg-raw DESCRIPTION = "Example raw installation package" MAINTAINER = "Your name here <you@domain.com>" DEBIAN_DEPENDS += " \ apt, \ " SRC_URI += " \ file://content.md \ " do_install_append() { install -v -d ${D}/opt/mycontent/ install -v -m 644 ${WORKDIR}/content.md ${D}/opt/mycontent/ }
Start a bitbake environment and build the recipe:
$ bitbake myexampleapp-raw
Upstream APT Reference Recipe
This example demonstrates how to build an existing package by sourcing from the distribution APT repository.
Open a terminal to the eci-release directory.
Create the following directory structure under
targets/layers/:$ mkdir -p targets/layers/meta-vendor-application/recipes-application/myexampleapp && touch targets/layers/meta-vendor-application/recipes-application/myexampleapp/myexampleapp-apt_1.0.bb $ tree targets/layers/meta-vendor-application
targets/layers/meta-vendor-application
├── conf
│   └── layer.conf
└── recipes-application
    └── myexampleapp
        └── myexampleapp-apt_1.0.bb
For this example, the Debian* hello package will be used. Edit the
myexampleapp-apt_1.0.bbrecipe with the following contents:inherit dpkg SRC_URI="apt://hello"
Start a bitbake environment and build the recipe:
$ bitbake myexampleapp-apt
Upstream Maintained Reference Recipe
This example demonstrates how to build an existing package by sourcing from the distribution maintainer GIT repository.
Open a terminal to the eci-release directory.
Create the following directory structure under
targets/layers/:$ mkdir -p targets/layers/meta-vendor-application/recipes-application/myexampleapp && touch targets/layers/meta-vendor-application/recipes-application/myexampleapp/myexampleapp-git_1.0.bb $ tree targets/layers/meta-vendor-application
targets/layers/meta-vendor-application
├── conf
│   └── layer.conf
└── recipes-application
    └── myexampleapp
        └── myexampleapp-git_1.0.bb
In this example, edit the
myexampleapp-git_1.0.bbrecipe with the following contents:HOMEPAGE = "https://salsa.debian.org/dictoss-guest/hello" PROVIDES = "hello" inherit dpkg PV= "2.11" PR = "-1" SRC_URI = " \ git://salsa.debian.org/dictoss-guest/hello.git;protocol=https;branch=main \ " #hello (2.11-1) SRCREV = "6ae3e385fd13da34bff2c07885cba7ae977fc22c" S = "${WORKDIR}/git"
Note: You may inherit
dpkg-gbpwhen rebuilding packages maintained with the Debian* Git build package (gbp.conf).For example, the Debian* lmbench package:
# Package lmbench since it is non-free and not available in Debian APT by default
HOMEPAGE = "https://salsa.debian.org/ahs3/lmbench.git"

PROVIDES = "lmbench lmbench-doc"

inherit dpkg-gbp

PV= "3.0"
PR = "a9+debian.1-3"

SRC_URI = " \
   git://salsa.debian.org/ahs3/lmbench.git;protocol=https;branch=debian \
"

#version 3.0-a9+debian.1-3
SRCREV = "d4b9366e733cfd52801a961eedea3a96a610d449"

S = "${WORKDIR}/git"
Start a bitbake environment and build the recipe:
$ bitbake myexampleapp-git
Custom Kernel Module DKMS Recipe
Note: Intel® ECI makes generic assumptions that any Linux* Out-Of-Tree (OOT) kernel module will install using DKMS - Dynamic Kernel Module Support
Open a terminal to the eci-release directory.
Create the following directory structure under
targets/layers/:$ mkdir -p targets/layers/meta-vendor-application/recipes-kernel/mydrivers/mydevice $ cp mydevice-driver-1.0.tar.gz targets/layers/meta-vendor-application/recipes-kernel/mydrivers/mydevice/ $ touch targets/layers/meta-vendor-application/recipes-kernel/mydrivers/mydevice/dkms.tmpl $ touch targets/layers/meta-vendor-application/recipes-kernel/mydrivers/mydevice_1.0.bb $ tree targets/layers/meta-vendor-application
targets/layers/meta-vendor-application
└── recipes-kernel
   └── mydrivers
      ├── mydevice
      │   ├── dkms.tmpl
      │   └── mydevice-driver-1.0.tar.gz
      └── mydevice_1.0.bb

3 directories, 3 files
Edit the
mydevice_1.0.bbrecipe with the following contents:SUMMARY = "mydevice linux OOT driver" DESCRIPTION = "mydevice driver for linux" require recipes-kernel/linux-module-dkms/linux-module-dkms.inc SRC_URI += "\ file://mydevice-driver-${PV}.tar.gz \ file://dkms.tmpl;subdir=debian \ " S = "${WORKDIR}/mydevice-driver-${PV}" TEMPLATE_FILES += " \ debian/dkms.tmpl \ " # Module source directory # and kernel module Makefile DKMS_INSTALL_FILES = "\ Makefile \ src \ " # DKMS_MODPROBE_CONF_FILES variable can append more # kernel module configuration files # for example: blacklist-mydevice.conf # DKMS_MODPROBE_CONF_FILES += ""
Edit the
dkms.tmplrecipe with the following contents:PACKAGE_NAME="${DKMS_PACKAGE_NAME}" PACKAGE_VERSION="${DKMS_PACKAGE_VERSION}" CLEAN="make -C ${kernel_source_dir} M=${dkms_tree}/${DKMS_PACKAGE_NAME}/${PACKAGE_VERSION}/build clean" BUILT_MODULE_NAME[0]="mydevice" BUILT_MODULE_LOCATION[0]="." DEST_MODULE_LOCATION[0]="/updates/dkms" MAKE[0]="make -C ${kernel_source_dir} M=${dkms_tree}/${DKMS_PACKAGE_NAME}/${PACKAGE_VERSION}/build modules" AUTOINSTALL="no"
Start a bitbake environment and build the recipe:
$ bitbake mydevice
bitbake Command Reference
Here are a few commonly used command line options for bitbake:
Command Lines
Meaning
bitbake <recipe>Builds the <recipe> under Debian* Schroot environment
Builds the <recipe> under Debian* Schroot environment show verbose output
Instantiates the <recipe> under Debian* Schroot environment interactive shell
Builds the <recipe> under Debian* Schroot environment then exit when
dpkg-buildpackagecompletesCleans previously built artifacts of the <recipe>
Cleans both previously built artifacts and APT repository packages SSTATE cache of the <recipe>
Cleans both artifacts previously built, APT repository packages SSTATE and download caches of the <recipe>
Shows individual bitbake variable values
bitbake --helpGets usage help
Custom Debian* Live System Image containing ECI Deb Packages
Debian* offers a live system ISO image, which can be used to install Debian* to target systems. This installation method can be automated, and is often preferred over other methods. Follow these instructions to create a Debian* live system ISO image containing the ECI Deb packages.
The following steps are applicable to:
Download the ECI release archive, if not done already.
Copy the
eci-release.tar.gzarchive from the ECI release archive (release-eci_#.#.zip) to the Linux* build system. Make sure that there are no spaces in the directory path. For example, copy the archive to ~/Desktop. Theeci-release.tar.gzarchive is located in the ECI release archive within theEdge-Controls-for-Industrialdirectory as follows:└── Edge-Controls-for-Industrial ├── Codesys_Example_Applications.zip ├── Dockerfiles.tar.gz └── eci-release.tar.gz
Extract the archive. In Canonical Ubuntu*, right-click the archive and select Extract Here.
The directory contents should be similar to the following:
On the Linux* build system, open a terminal to the eci-release directory. In Canonical Ubuntu*, right-click anywhere in the directory explorer and select Open in Terminal.
Build a Docker* image for the containerized build environment:
$ docker build ./targets/docker/eci-create-debian-live -t eci-create-debian-live --build-arg http_proxy
Generate the Debian* live system ISO:
$ docker run -it --rm -v "$PWD":"$PWD" -e DIR_ECI="$PWD" -e http_proxy="$HTTP_PROXY" --pid=host --privileged eci-create-debian-live
A message will be printed if the build is successful:
P: Build completed successfully
Once the generation is complete, the Debian* live system ISO containing ECI packages will be available at: build/official-bullseye-live-image/live-image-amd64.hybrid.iso.
You can write this image to a USB stick, and boot from it to start the Debian* live system installer.