Configure ADAM Profinet Device with CODESYS
The following section is applicable to:

Configure ADAM with IP Address
Download and install the ADAM Net Utility software. This software allows reconfiguration of the ADAM Profinet device.
Download the ADAM unit GSD files. Extract downloaded archive to a temporary directory.
If you want to modify the Profinet configuration of Profinet slave devices, download ProfinetCommander (optional). You need to register to download the software. You can also use other software that perform the same function.
Note: If the PC has only a single network interface, disconnect it first before performing the following step. Otherwise, select an unused network interface to host the Profinet traffic.
Configure Microsoft Windows* to use a static IP address. Choose an address on the same subnet that Profinet will use. In this example, the Profinet subnet is
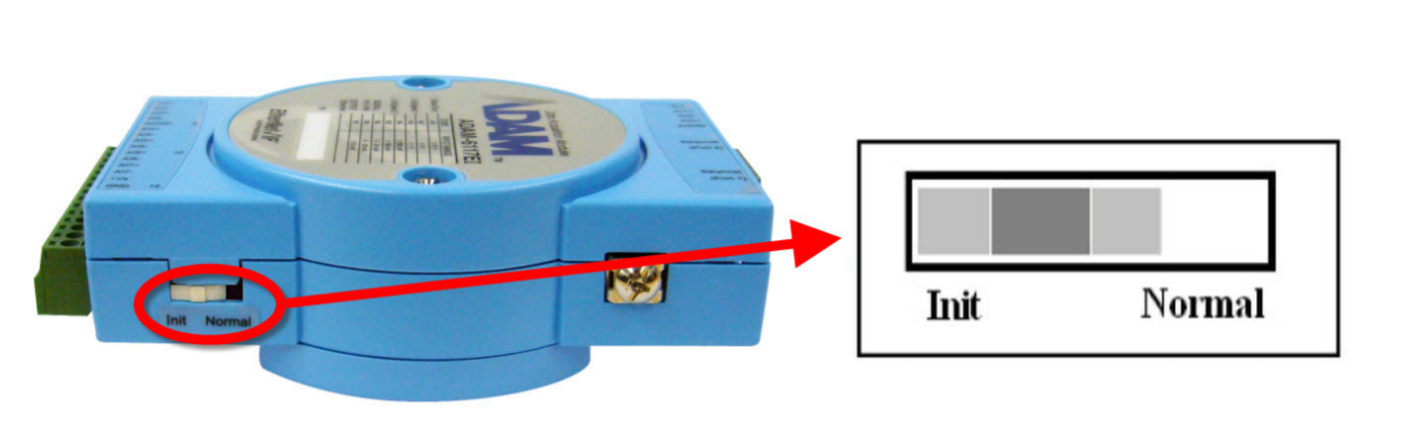
10.11.12.xand Microsoft Windows* is configured to use a static IP address of10.11.12.50. It is also recommended to use a subnet mask of255.255.255.0.Make sure that the ADAM unit is in Init mode using the switch on the side.
Power ON the ADAM unit and connect it to your PC (or through switch) via Ethernet cable to the interface configured previously.
Open the ADAM Net Utility software:
From the left pane, expand Ethernet. Right-click the IP address that was configured for Profinet and select Search Device from the pop-up menu.
The ADAM device should be displayed. If not, power cycle the ADAM unit and try again. You may also need to disable Microsoft Windows* firewall.
Select the ADAM device from the left pane. On the right pane, go to the Setting tab.
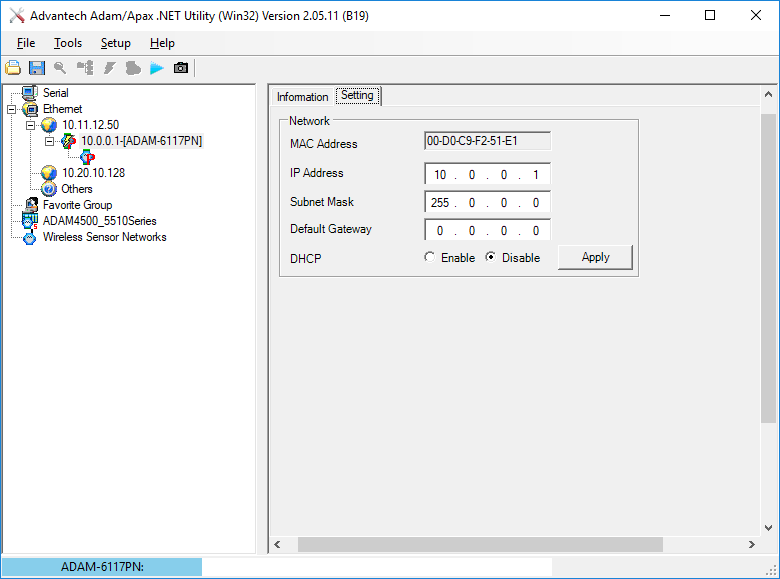
Set the following values:
IP Address: A unique IP address on the Profinet subnet. This IP address will be statically assigned to the ADAM unit and will be used by CODESYS* to communicate to the unit.
Subnet Mask: Same value used for Microsoft Windows* earlier.
Default Gateway: 0.0.0.0 (default)
DHCP: Disable (default)

Click Apply to write the settings to the ADAM unit. Check for the confirmation message. Close the ADAM Net Utility software. Power OFF the ADAM device and change the switch on the side to “Normal”. Power ON the ADAM device.
Open Profinet Commander software, select Open Free Version:
Click the Browse icon.
Select Profinet NIC from the NIC Selection drop-down list.
Click DCP Identify All. The ADAM device will be displayed in the PROFINET Device List.
Double-click the ADAM device entry from the device list. The ADAM device IP Address should appear in the IP Address input field. Make sure that the IP Address and Subnet Mask are correct.
In the field next to DCP Set Name button, enter a string that will be used as the Profinet station name. This name must adhere to the specified Profinet rules.
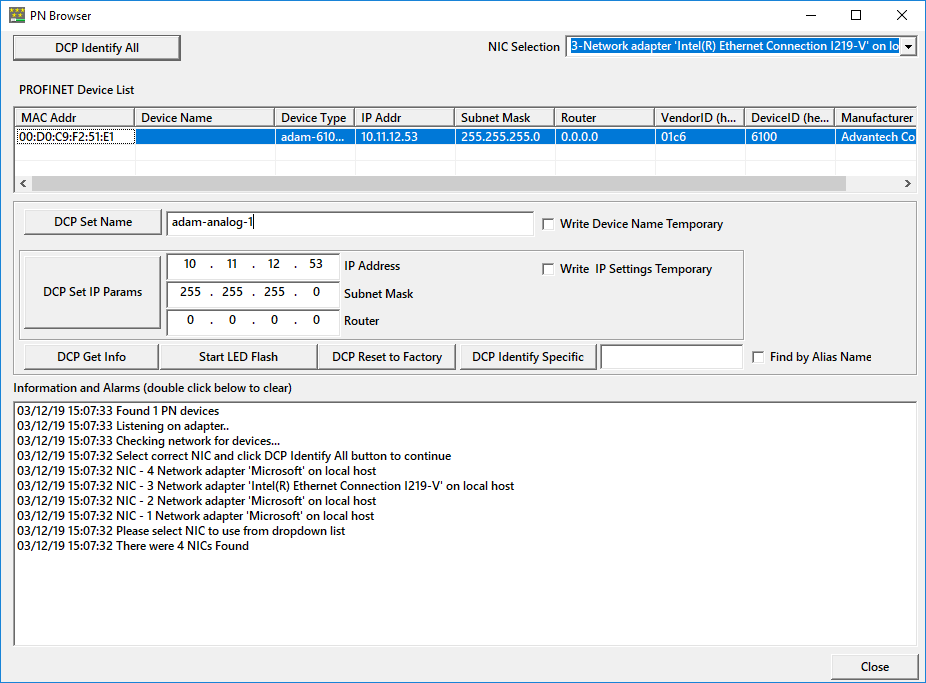
Click DCP Set Name to write the value to the ADAM device. Close the Profinet Commander software.
CODESYS* requires the software library WinPCap to communicate via Profinet. Install WinPCap (included with Wireshark), if not already installed.
Open CODESYS* software and start a Standard Project.
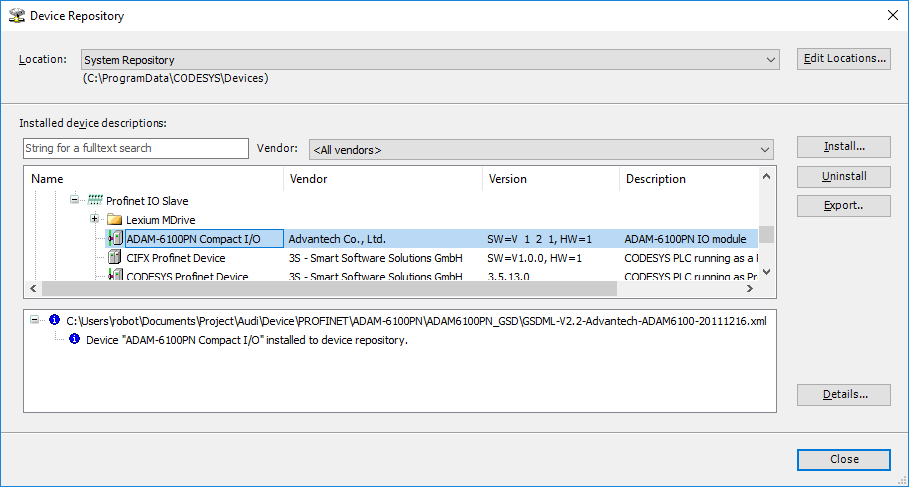
Select Tools > Device Repository… > Install… and open the XML file included in the ADAM GSD download package. This will enable CODESYS* to understand the internal registers of the ADAM device.
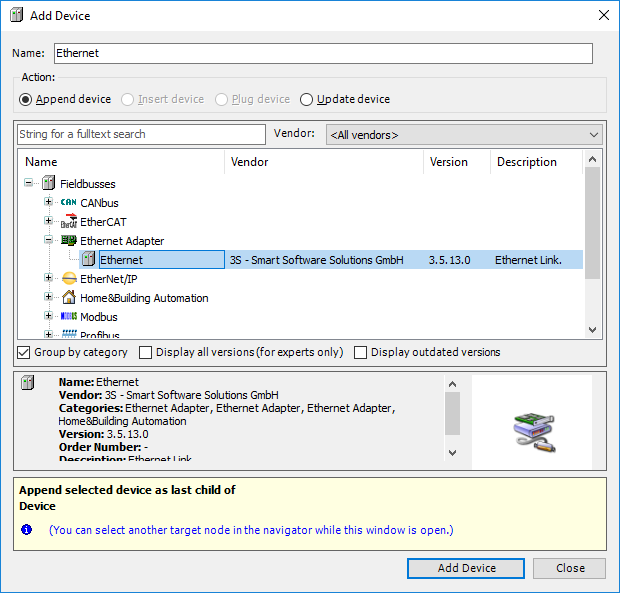
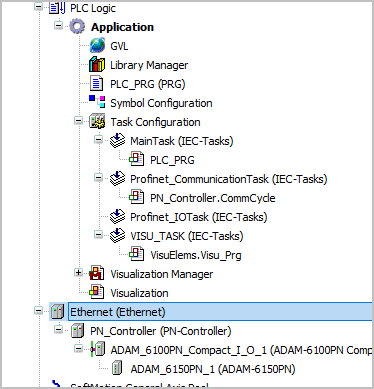
From the Devices tree, right-click Device and select Add Device…. In the Add Device dialog, expand Fieldbuses, Ethernet Adapter and select Ethernet. Click Add Device. Keep the dialog open.
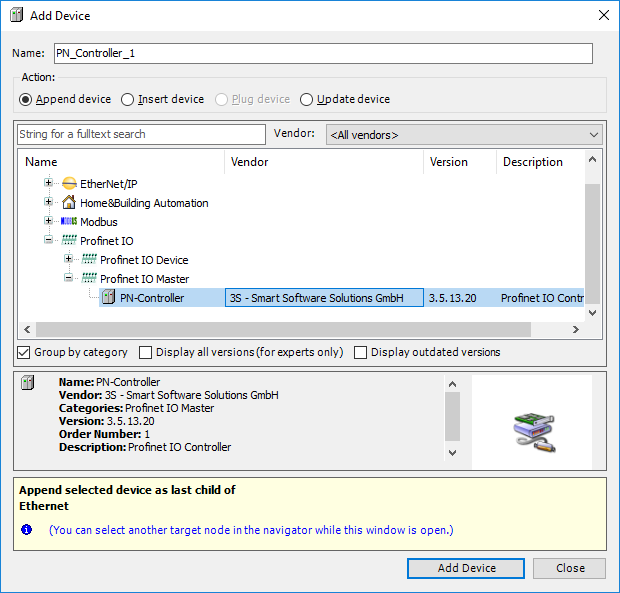
From the Devices tree, click the newly added Ethernet device. The dialog box will display the available device options. Expand Profinet IO > Profinet IO Master and select PN-Controller. Click Add Device. Keep the dialog box open.
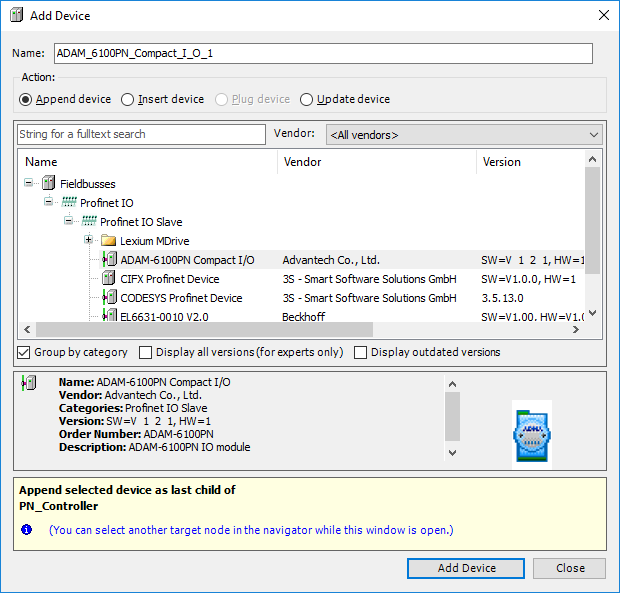
From the Devices tree, click the newly added PN_Controller device. The dialog box will display the available device options. Expand Profinet IO > Profinet IO Slave and select ADAM-6100PN Compact I/O. Click Add Device button. Keep the dialog box open.
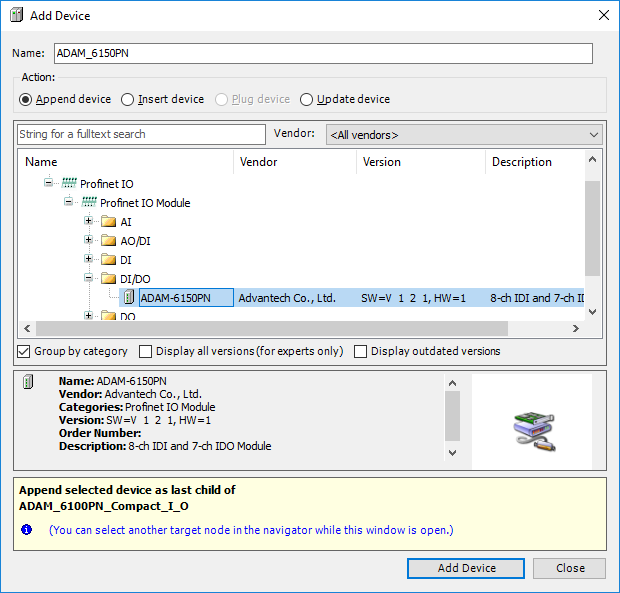
From the Devices tree, click the newly added ADAM_6100PN_Compact_I_O device. The dialog box will display the available device options. Expand Profinet IO > Profinet IO Module and select the device corresponding to your ADAM unit. Click Add Device. Close the dialog box.
Configure Ethernet Interface for CODESYS
Note: The CODESYS Soft PLC is run on Linux*.
Assign a static IP address to the network interface on the Linux* system in the same subnet as that of the Adam device (for example, 10.11.12.53) (Refer to Configure ADAM with IP Address).
$ ip addr add 10.11.12.40/24 dev enx00e03e710ab7
Power ON the ADAM device. Ping from the Linux* system and check if it works.
$ ping 10.11.12.53
The output should similar to the following:
PING 10.11.12.53 (10.11.12.53) 56(84) bytes of data.
64 bytes from 10.11.12.53: icmp_seq=1 ttl=64 time=2.69 ms
64 bytes from 10.11.12.53: icmp_seq=2 ttl=64 time=1.20 ms
Double-click the Device Scan Network.
Select the Linux* system running CODESYS* Soft PLC (for example,
kadasd402). Click OK.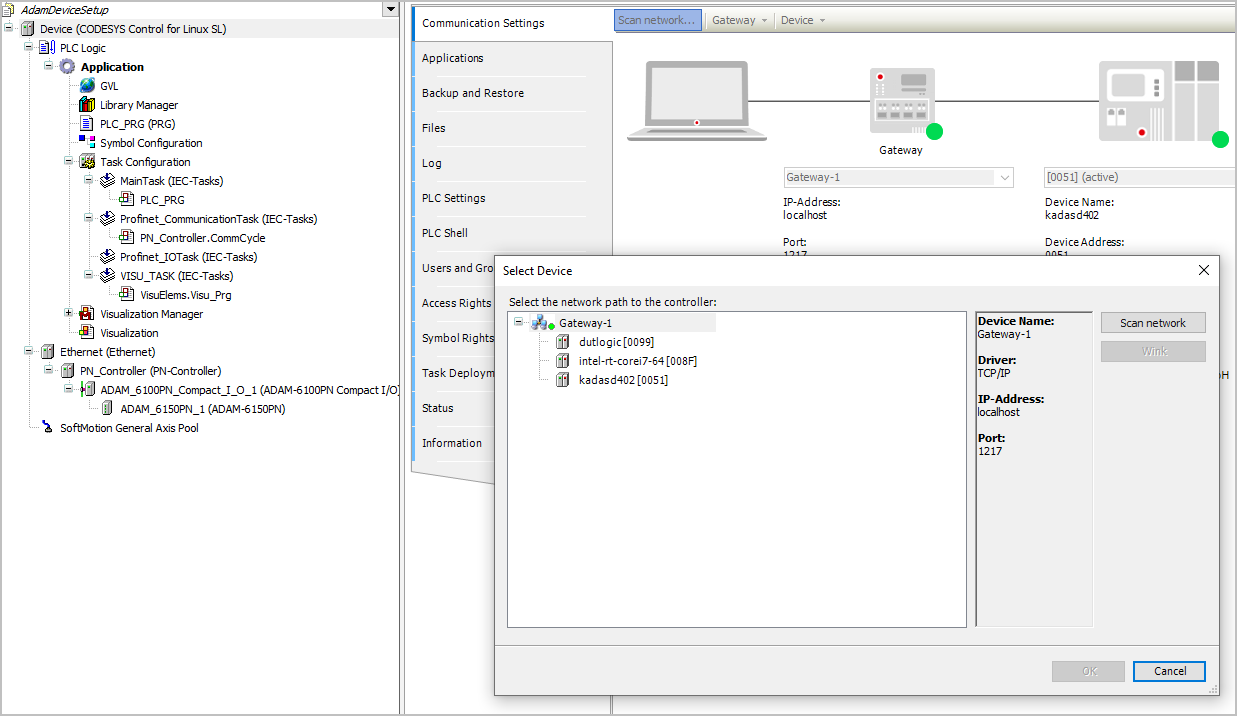
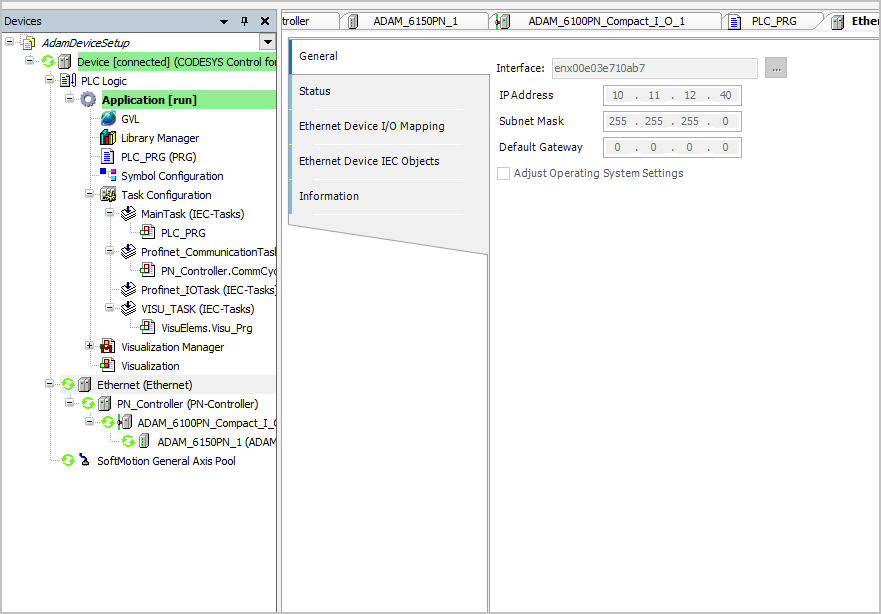
Double-click Ethernet.
Click ‘…’ to open available adapters.
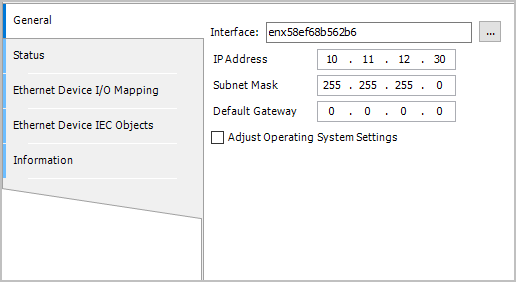
Select the correct interface on the Linux* system (
enx**, in this example).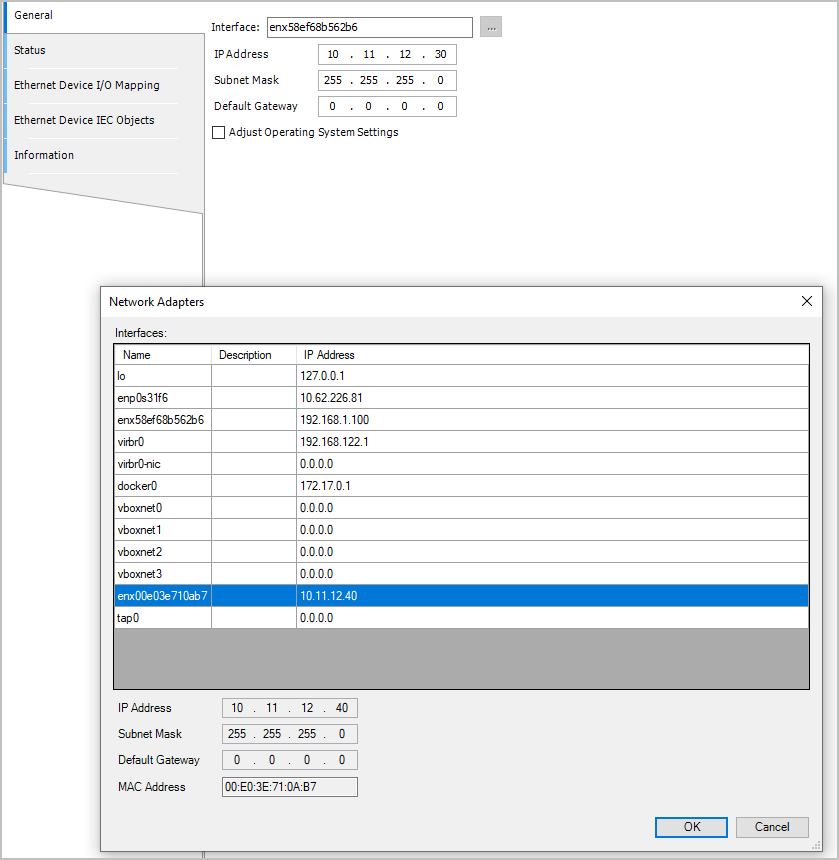
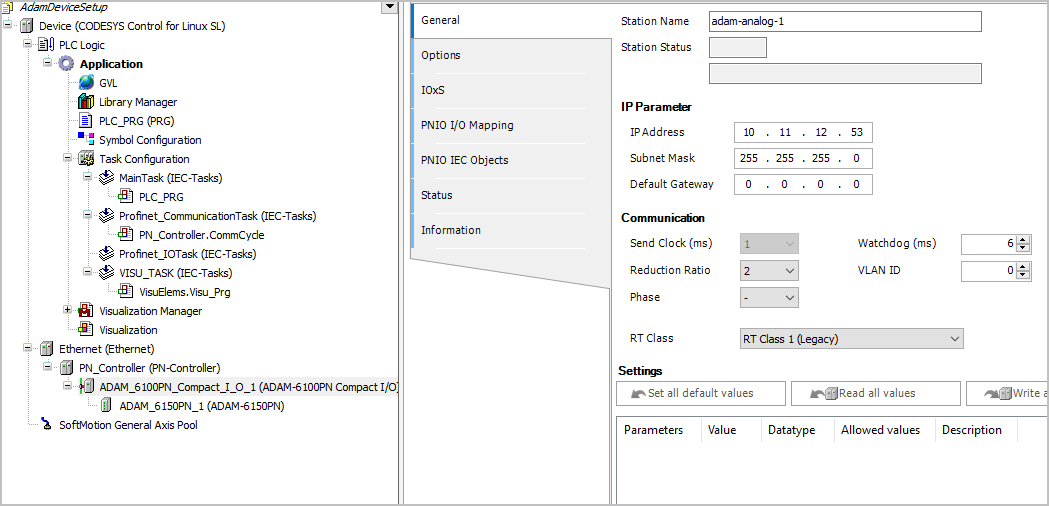
Configure PN controller:
Double-click PN-Controller.

Configure ADAM Device.
Station Name: adam-analog-1, which is the name given while setting up the ADAM device
IP Address: 10.11.12.53, which is the example IP address assigned while setting up the ADAM device
Compile the application.
Click Login (Alt + F8).
Click run or press F5.
The following image shows that a successful communication is established with ADAM.