Host Private ECI Repository
This section will help you privately host the ECI repository on your own local network with packages you built or packages from the ECI release archive.
Attention
The private ECI repository only supports Debian and Canonical® Ubuntu®. There is no available private ECI Repository for Red Hat® Enterprise Linux®.
![]()
![]()
This section explains the procedure to use the Linux build system to privately host the ECI APT repository on the local network and configure the APT package manager to use the privately hosted ECI APT repository.
Before setting up the Linux build system, make sure that:
The Linux build system meets the recommended system requirements.
Docker (version 19.03.15 or higher) is installed and the user is part of the
dockergroup. For information on installing and configuring Docker, refer to the following:
Note: If you are behind a proxy, make sure that you set the following environment variables: HTTP_PROXY, HTTPS_PROXY, and NO_PROXY.
The section is applicable to:

Do the following to set up a Linux build system:
Download the ECI release archive, if not done already.
Copy the
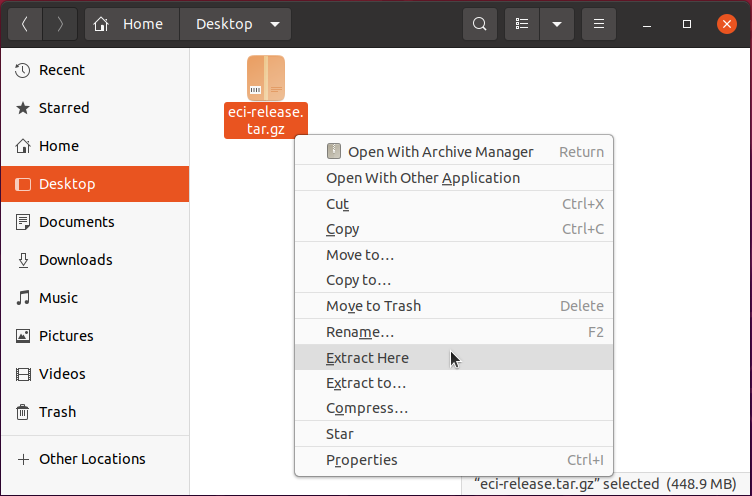
eci-release.tar.gzarchive from the ECI release archive (release-eci_#.#.zip) to the Linux build system. Make sure that there are no spaces in the directory path. For example, copy the archive to ~/Desktop. Theeci-release.tar.gzarchive is located in the ECI release archive within theEdge-Controls-for-Industrialdirectory as follows:└── Edge-Controls-for-Industrial ├── Codesys_Example_Applications.zip ├── Dockerfiles.tar.gz └── eci-release.tar.gz
Extract the archive. In Canonical® Ubuntu®, right-click the archive and select Extract Here.
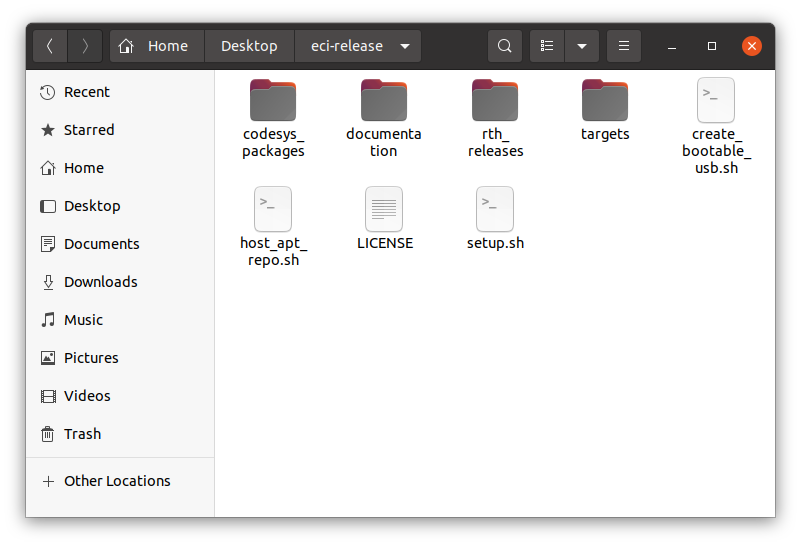
The directory contents should be similar to the following:
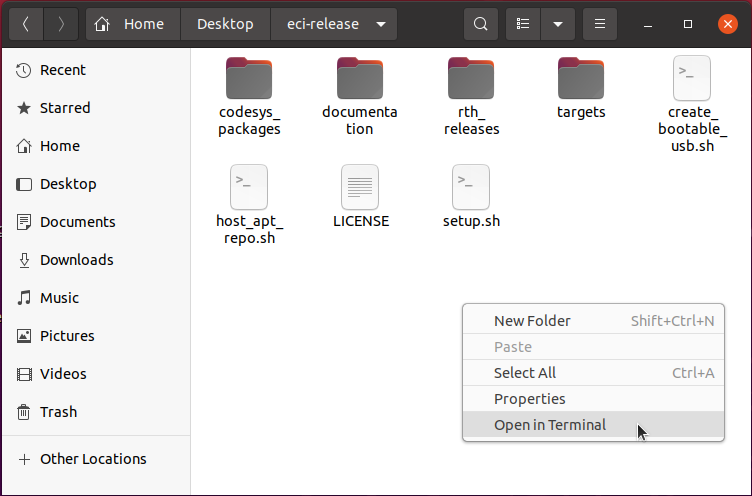
On the Linux build system, open a terminal to the eci-release directory. In Canonical® Ubuntu®, right-click anywhere in the directory explorer and select Open in Terminal.
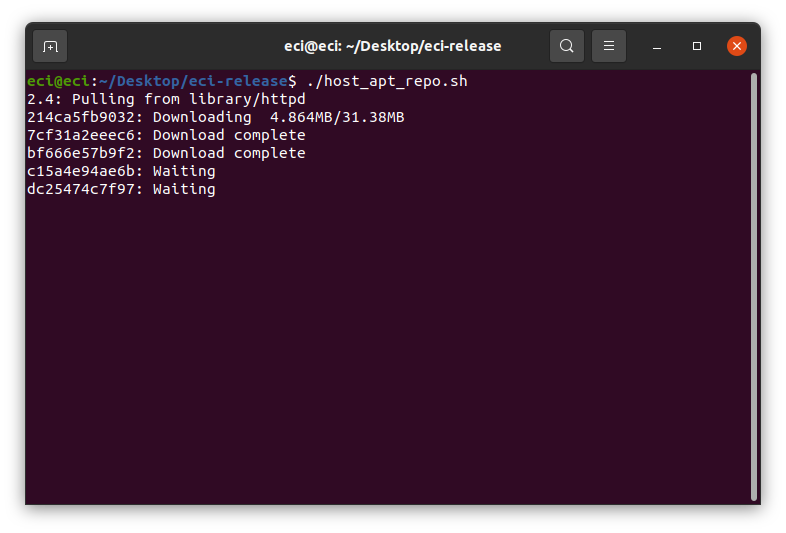
At the terminal prompt, run the
host_apt_repo.shscript without any parameters:$ ./host_apt_repo.sh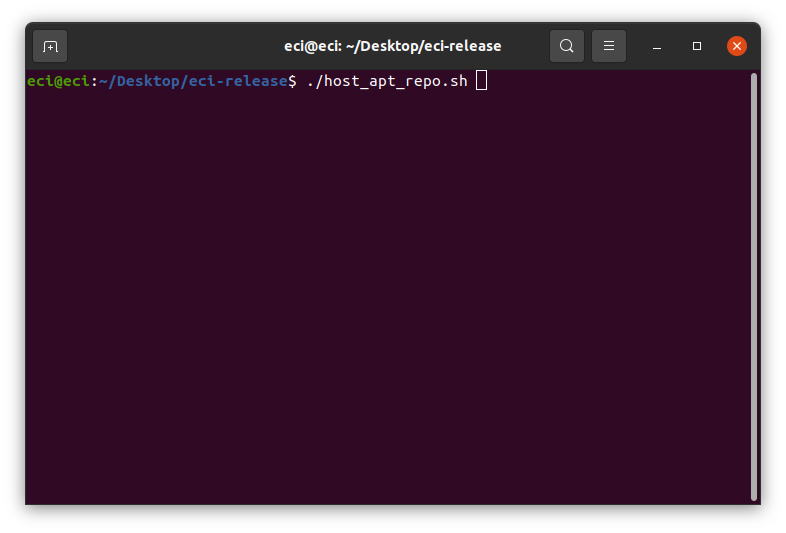
A menu will be displayed based on either of the following scenarios:
You are installing ECI Deb packages provided with the ECI release
You are installing ECI Deb packages from a local build
Click the corresponding tab to continue.
The menu will display APT repository options for both Debian and Canonical® Ubuntu®:
ECI packages forbookworm: ECI Deb packages provided with the ECI release for Debian 12 (Bookworm)ECI packages forjammy: ECI Deb packages provided with the ECI release for Canonical® Ubuntu® 22.04 (Jammy Jellyfish)
Select an option corresponding to the OS installed on the target system (Bookworm or Jammy Jellyfish).

The menu will display the APT repository options for both Debian and Canonical® Ubuntu®.
If you have built either core-bookworm or core-jammy, select the corresponding option:
ECI packages forbookworm: ECI Deb packages provided with the ECI release for Debian 12 (Bookworm)ECI packages forjammy: ECI Deb packages provided with the ECI release for Canonical® Ubuntu® 22.04 (Jammy Jellyfish)
The
Local buildoptions are available only if you have built ECI targets packages-bookworm or packages-jammy.Local build (packages-bookworm): ECI Deb packages created from building packages-bookworm locally for Debian 12 (Bookworm)Local build (packages-jammy): ECI Deb packages created from building packages-jammy locally for Canonical® Ubuntu® 22.04 (Jammy Jellyfish)
Select a
Local buildoption corresponding to the OS installed on the target system (Bookworm or Jammy Jellyfish).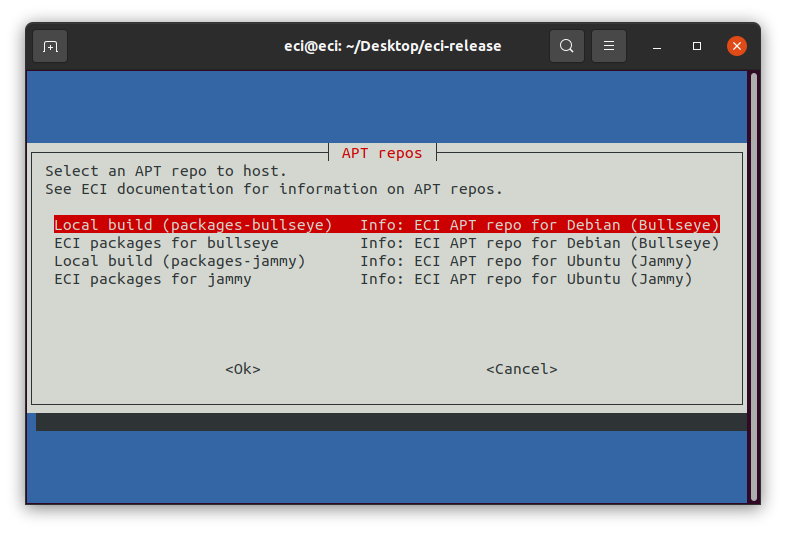
A Docker container with the Apache HTTP web server will open port 8080 and host the ECI APT repository on the network. If port 8080 is in use or restricted, edit the script and change the port assigned to the
HTTPD_PORTvariable (available at the beginning of the script). If any errors regarding Docker occur, refer to Setup Notifications for common resolutions.Attention
Hosting APT repositories using this method is not inherently secure! Production deployments should use security measures according to the environment and exposure.
When the APT repository server is ready, the script will display a few commands. In a later step, these commands will be executed on a target system.
Note: The target system must be connected to the same network used by the APT repository server and be able to connect to the port in use (default 8080).
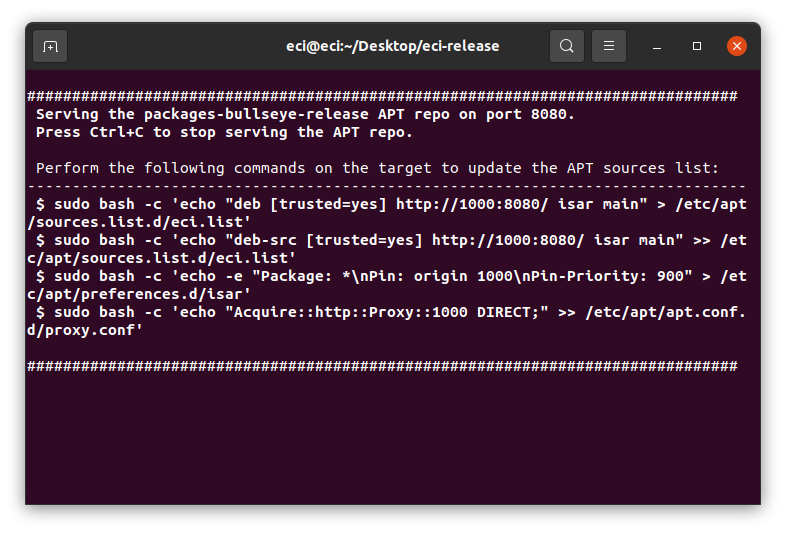
The APT repository server will continue to run until you stop it. When stopped, target systems will not be able to download ECI Deb packages from this APT repository server. To stop the APT repository server, press Ctrl + C on the keyboard.
The section is applicable to:

If not already completed, prepare the target to install ECI Deb packages.
Copy the GPG key
GPG-PUB-KEY-INTEL-ECI.gpgfrom the eci-release directory to the target system. This enables the ECI APT repository to be integrity-verified, enhancing security.$ sudo cp GPG-PUB-KEY-INTEL-ECI.gpg /etc/apt/trusted.gpg.d/
Note: It is not mandatory to add the GPG key. However, without the key, the APT package manager will display a warning that it could not verify signatures:
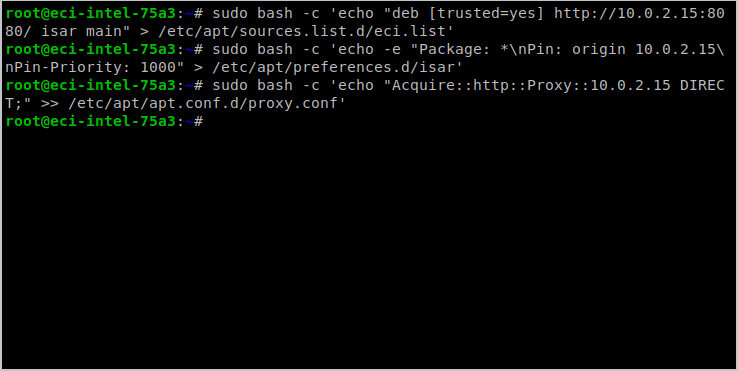
W: GPG error: http://10.0.2.15:8080/ isar Release: The following signatures couldn't be verified because the public key is not available: NO_PUBKEY 6350B922F48AD0FCRun the commands, displayed by the
host_apt_repo.shscript on the target system.In this example, the following commands were executed:
sudo bash -c 'echo "deb [trusted=yes] http://10.0.2.15:8080/ isar main" > /etc/apt/sources.list.d/eci.list'
sudo bash -c 'echo "deb-src [trusted=yes] http://10.0.2.15:8080/ isar main" >> /etc/apt/sources.list.d/eci.list'
sudo bash -c 'echo -e "Package: *\nPin: origin 10.0.2.15\nPin-Priority: 1000" > /etc/apt/preferences.d/isar'
sudo bash -c 'echo "Acquire::http::Proxy::10.0.2.15 DIRECT;" >> /etc/apt/apt.conf.d/proxy.conf'
What Next after Hosting Private ECI Repository
After hosting the private ECI repository, proceed to install ECI packages.