CODESYS ST-Fragment
The following section is applicable to:

ST-Fragment Project Archive
Note
Please make sure you have installed the correct version of the CODESYS IDE first. Refer to CODESYS IDE for additional details.
Extract the “CODESYS_Example_Applications.zip” archive provided with the ECI bundle. Navigate to the Benchmark directory.
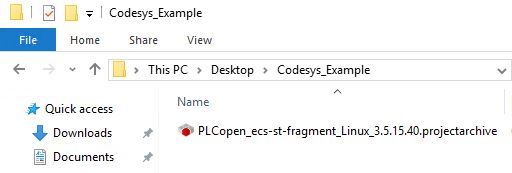
Double-click on PLCopen_ecs-st-fragment_Linux_3.5.XX.XX.project to open the project with CODESYS.
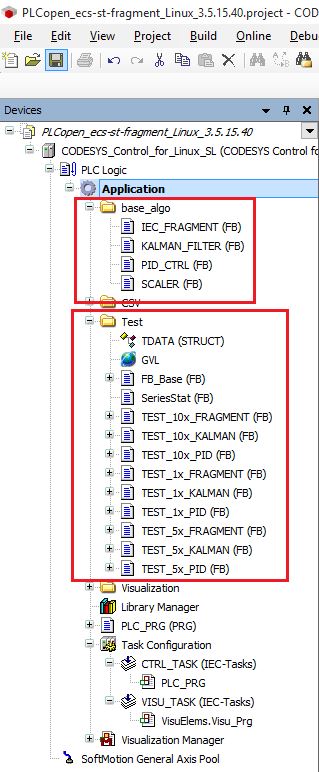
This project provides a basic set of ST-Fragment algorithms (base_algo) and tests (Test):
Download (execute) directly to the target
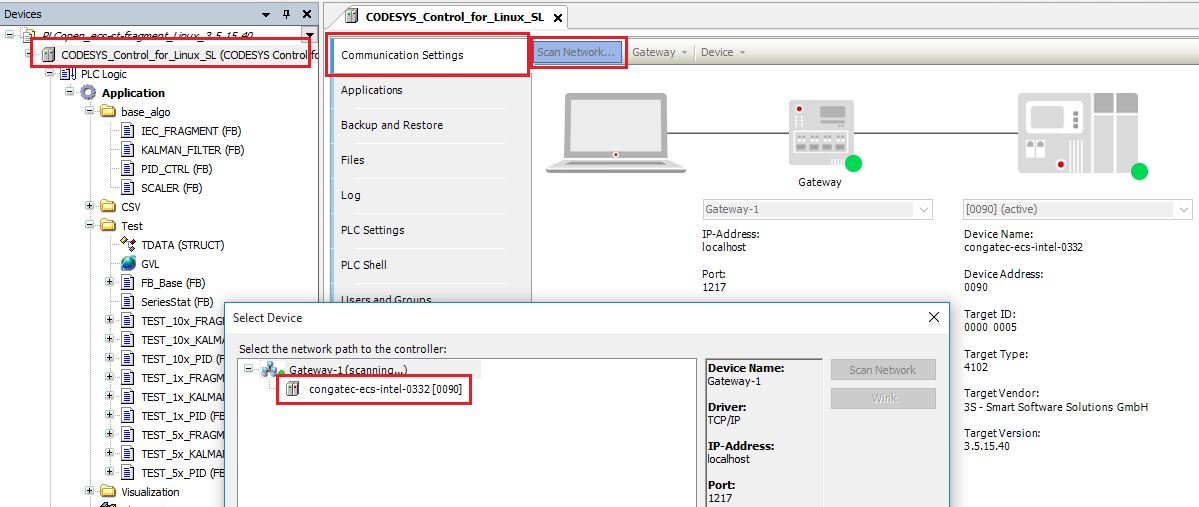
To download the application directly to a target, double click on the ‘device’ (CODESYS_Control_for_Linux_SL). Open the Communications Settings tab, select a gateway, and scan the network for active targets.
Once a target is detected, double click on it to select and establish a connection.
Note
Make sure that the Codesys PLC runtime is up and running on your target!
When the connection is established, click on the login button (or Alt + F8). If you are prompted for Click Yes to download the latest code…, select Yes. Next, click start (or F5) to start the execution of the application. Once the application is running, [stop] will change to [run].

SSH into the target and check location
/var/opt/codesys/PlcLogic/for the results file (.txt):root@eci-intel-0332:~# ls /var/opt/codesys/PlcLogic/ | grep .txt IEC-61131-3_process-automation_scorecard2020-2-12-18_14.txt root@eci-intel-0332:~# cat /var/opt/codesys/PlcLogic/IEC-61131-3_process-automation_scorecard2020-2-12-18_14.txt --- PLCopen 61131-3 Process Automation testcase scorecard --- Target: Id 5 Type 4102 Version 3.5.15.40 Test at: 2020-2-12-18_14 Platform: IEC 61131-3 workload - Control Function Block Extern: Extern Code: Ram Measured timer resolution [ns]: 61 Measured overhead of SysTimeGetNs [ns]: 59.9632 Test (all values in ns) Avg Min Max StdDev Num Calls -------------------------------------------------------------------------------- PID 1x (REAL) 121.082 106.038 1517.037 39.364 24023 PID 5x (REAL) 391.802 369.038 9065.037 81.344 23067 PID 10x (REAL) 804.014 770.038 2984.037 87.164 22027 KALMAN 1x filter (REAL) 307.249 266.038 3761.037 73.689 23430 KALMAN 5x filter (REAL) 1330.85 1270.037 5260.037 105.735 20571 KALMAN 10x filter (REAL) 2587.099 2493.037 8200.037 138.303 18009 Logic+Arith 1K fragment 9131.948 8837.037 28886.04 657.531 10949 Logic+Arith 5K fragment 43352.83 42700.04 57913.04 1104.249 4000 Logic+Arith 10K fragment 86019.04 85064.04 100248.04 1337.769 2497
After the .txt file is created, stop execution using the Stop button (or Shift + F8) or keep the application running and only Logout (or Ctrl + F8) from the target.
Create a Boot Application (.app/.crc files)
Instead of connecting to the target via the Codesys IDE, you can also simply create boot application files and deploy your application via other ways. For example you can insert these files later to the target if running CODESYS in a container.
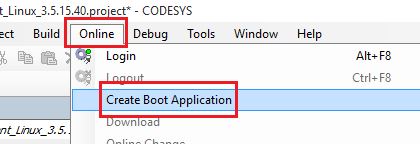
In order to create the boot application files, click on Online - Create Boot Application:
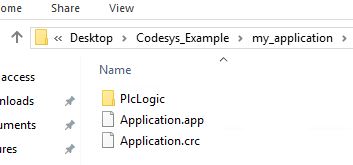
Save the application to e.g. a new folder. Name it ‘my_application’, for example:
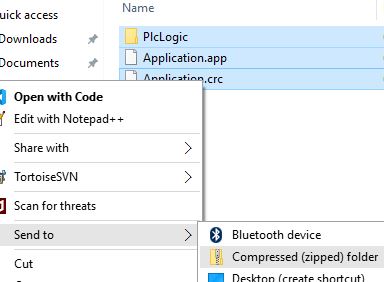
For easier handling/distribution, zip these files as a .zip file by simply selecting all the files (Ctrl + a), right-click and select Send to - Compressed (zipped) folder. Rename the zip to your needs.
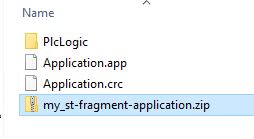
Boot application files as a .zip file:
Deploy a Boot Application (.app/.crc files)
In this section only deployment via a Docker container will be explained. You may double check Microservice Architecture section as well for additional details and pointers.
To deploy a boot application to Docker, make sure that the target of interest contains the codesys-control-apploader docker image.
Existing docker images can be checked with the
docker imagescommand on the target:root@eci-intel-0332:~# docker images REPOSITORY TAG IMAGE ID CREATED SIZE codesys-control-apploader v0.2 68303ee0e33b 9 hours ago 248MB codesys-control v0.2 e33c68e9aa19 30 hours ago 242MB debian buster 1b686a95ddbf 3 weeks ago 114MB
Connect again to the target (e.g. via SSH) and create a folder structure where the boot application will be copied to. Also transfer the boot application (e.g. .zip) to the target (e.g. via SCP). For example:
scp my_st-fragment-application.zip root@192.168.1.10:/home/root
ssh root@192.168.1.10

root@eci-intel-0332:~# unzip my_st-fragment-application.zip
root@eci-intel-0332:~# mkdir PlcLogic/Application
root@eci-intel-0332:~# cp Application.app PlcLogic/Application/
root@eci-intel-0332:~# cp Application.crc PlcLogic/Application/

root@eci-intel-0332:~# docker run -d --rm --name my_container --privileged -v /home/root/PlcLogic:/var/opt/codesys/PlcLogic/ -e SOURCE_CODESYS_APP_NAME=Application codesys-control-apploader
bdd40c147dbb9669efe5e0cc831f86d6860387bf00b05101c8b2ceef8366e524

root@eci-intel-0332:~# docker ps -a
CONTAINER ID        IMAGE                       COMMAND                CREATED             STATUS              PORTS               NAMES
bdd40c147dbb        codesys-control-apploader   "/run-codesysapp.sh"   6 seconds ago       Up 3 seconds                            my_container

root@eci-intel-0332:~# ls -la PlcLogic/
total 36
drwxr-xr-x 8 root root 4096 Jun 30 19:32 .
drwx------ 9 root root 4096 Jun 30 19:30 ..
drwxr-xr-x 2 root root 4096 Jun 30 19:30 Application
-rw-r--r-- 1 root root 1292 Jun 30 19:32 IEC-61131-3_process-automation_scorecard2020-6-30-17_32.txt
drwxr-xr-x 2 root root 4096 Jun 30 19:32 _cnc
drwxr-xr-x 2 root root 4096 Jun 30 19:32 ac_persistence
drwxr-xr-x 2 root root 4096 Jun 30 19:32 alarms
drwxr-xr-x 2 root root 4096 Jun 30 19:32 trend
drwxrwxrwx 2 root root 4096 Jun 30 19:30 visu

root@eci-intel-0332:~# cat PlcLogic/IEC-61131-3_process-automation_scorecard2020-6-30-17_32.txt
--- PLCopen 61131-3 Process Automation testcase scorecard ---

Target: Id 5 Type 4102 Version 3.5.15.40
Test at: 2020-6-30-17_32
Platform: IEC 61131-3 workload -  Control Function Block
Extern: Extern
Code: Ram
Measured timer resolution [ns]: 90
Measured overhead of SysTimeGetNs [ns]: 86.8312

Test (all values in ns)              Avg       Min       Max    StdDev Num Calls
--------------------------------------------------------------------------------

PID 1x (REAL)                     198.75   153.168  383141.2  2204.627    111725
PID 5x (REAL)                    671.154   513.168 6538235.0  21624.23     92601
PID 10x (REAL)                  1296.243  1113.169  186760.2  2986.557     70028
KALMAN 1x filter (REAL)          463.961   385.168  149259.2  1822.708     98754
KALMAN 5x filter (REAL)         2074.018  1767.169  866158.2   6091.34     54644
KALMAN 10x filter (REAL)        4061.857  3481.169  595034.2  5853.398     35561
Logic+Arith 1K fragment         25245.01 12310.169     1.318 1180123.0     12438
Logic+Arith 5K fragment         71906.81  61137.17 2381378.0  48442.89      2913
Logic+Arith 10K fragment        143135.7 122236.17  650948.2  35581.53      1504

root@eci-intel-0332:~# docker stop my_container
As provided in previous commands, start a docker container
docker run ...and mount the boot application to the container-v /home/root/PlcLogic:/var/opt/codesys/PlcLogic/.Verify that the container is running using the docker ps -a command.
While the container is running, check frequently for the .txt results file using e.g.
ls -la PlcLogic/command. Once the results file appears, stop execution of the containerdocker stop my_continerand check the results filecat IEC-61131-3*.txt. It is also possible to SCP the results file to a PC for additional evaluation and/or visualization.
Extend/Modify ST-Fragment Tests
Extending ST-Fragment tests won’t be discussed in detail, i.e. how to create and add completely ‘new’ function blocks (FB) to folders base_algo & Test as you can find in ST-Fragment-Algorithms. However, we will use an existing test and extend it to show the principle.
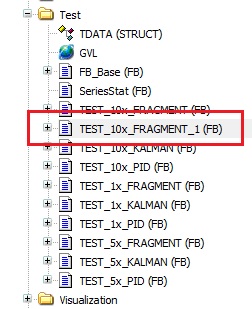
For instance, right click TEST_10x_FRAGMENT (FB) and select Copy. Now right click on the Test folder and select Paste. You should see a copy of the TEST_10x_FRAGMENT (FB) as TEST_10x_FRAGMENT_1 (FB):
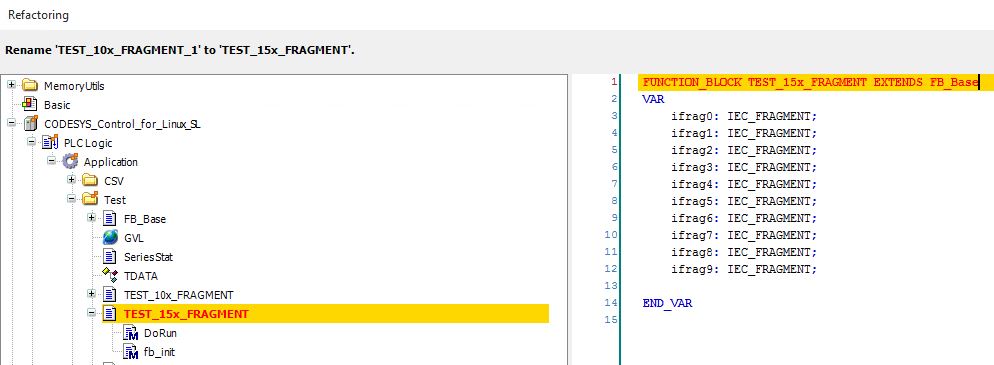
Lets rename it to TEST_15x_FRAGMENT (FB) by right clicking on TEST_10x_FRAGMENT_1 (FB) - Refactoring - Rename ‘Test_10x_FRAGMENT_1’…

Confirm the Refactoring with OK:
Double click on the TEST_15x_FRAGMENT (FB) function block to open it in the editor as structured text (ST). Add 5 more additional
ifragfunction calls: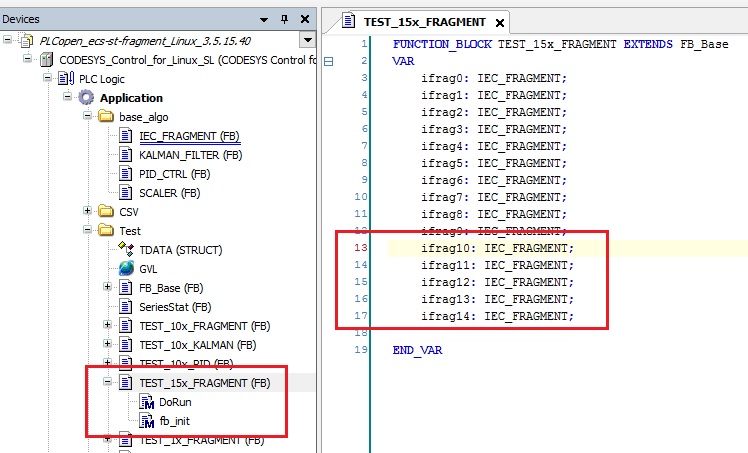
i.e., the code should look like in above picture:
FUNCTION_BLOCK TEST_15x_FRAGMENT EXTENDS FB_Base
VAR
    ifrag0: IEC_FRAGMENT;
    ifrag1: IEC_FRAGMENT;
    ifrag2: IEC_FRAGMENT;
    ifrag3: IEC_FRAGMENT;
    ifrag4: IEC_FRAGMENT;
    ifrag5: IEC_FRAGMENT;
    ifrag6: IEC_FRAGMENT;
    ifrag7: IEC_FRAGMENT;
    ifrag8: IEC_FRAGMENT;
    ifrag9: IEC_FRAGMENT;
    ifrag10: IEC_FRAGMENT;
    ifrag11: IEC_FRAGMENT;
    ifrag12: IEC_FRAGMENT;
    ifrag13: IEC_FRAGMENT;
    ifrag14: IEC_FRAGMENT;
END_VAR
It might be that your editor window is split into two sections. The upper part just indicates the Variables section, and the lower part the Code section! Above code should be edited in the Variables section.
Double click on the method
DoRununder TEST_15x_FRAGMENT (FB) and add 5 times theifragfunction calls into the Code section. For example, like in this snippet:... ifrag9(In_B1:=A, In_I1:=B,In_R1:=C,In_R2:=D); R1:= ifrag9.Out_R1; I1:= ifrag9.Out_I1; B1:= ifrag9.Out_B1; ifrag10(In_B1:=A, In_I1:=B,In_R1:=C,In_R2:=D); R1:= ifrag10.Out_R1; I1:= ifrag10.Out_I1; B1:= ifrag10.Out_B1; ifrag11(In_B1:=A, In_I1:=B,In_R1:=C,In_R2:=D); R1:= ifrag11.Out_R1; I1:= ifrag11.Out_I1; B1:= ifrag11.Out_B1; ifrag12(In_B1:=A, In_I1:=B,In_R1:=C,In_R2:=D); R1:= ifrag12.Out_R1; I1:= ifrag12.Out_I1; B1:= ifrag12.Out_B1; ifrag13(In_B1:=A, In_I1:=B,In_R1:=C,In_R2:=D); R1:= ifrag13.Out_R1; I1:= ifrag13.Out_I1; B1:= ifrag13.Out_B1; ifrag14(In_B1:=A, In_I1:=B,In_R1:=C,In_R2:=D); R1:= ifrag14.Out_R1; I1:= ifrag14.Out_I1; B1:= ifrag14.Out_B1; SysTimeGetNs(st2); udiTime_ns := ANY_TO_UDINT(st2 - st1) ; udiNumOps := 1 ;
Double click on the method
fb_initunder TEST_15x_FRAGMENT (FB) and change thetdata.txtfrom Logic+Arith 10K fragment to Logic+Arith 15K fragment. i.e.:tdata.txt := 'Logic+Arith 15K fragment ' ;
Add the extended/modified test to the test structure under the GVL global variable:
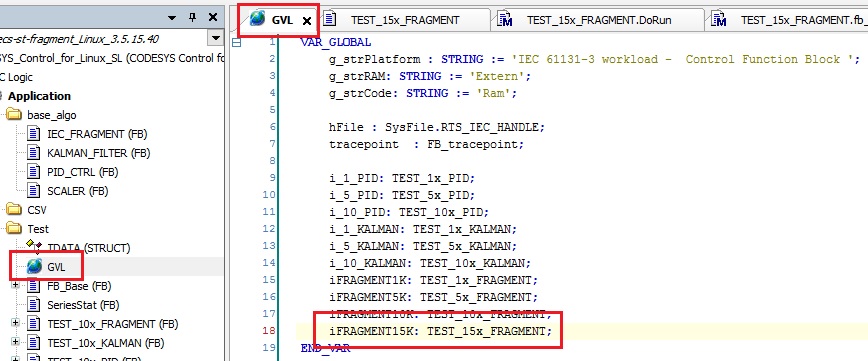
i.e. code of the Variable section looks as follows:
VAR_GLOBAL
    g_strPlatform : STRING := 'IEC 61131-3 workload -  Control Function Block ';
    g_strRAM: STRING := 'Extern';
    g_strCode: STRING := 'Ram';

    hFile : SysFile.RTS_IEC_HANDLE;
    tracepoint   : FB_tracepoin

    i_1_PID: TEST_1x_PID;
    i_5_PID: TEST_5x_PID;
    i_10_PID: TEST_10x_PID;
    i_1_KALMAN: TEST_1x_KALMAN;
    i_5_KALMAN: TEST_5x_KALMAN;
    i_10_KALMAN: TEST_10x_KALMAN;
    iFRAGMENT1K: TEST_1x_FRAGMENT;
    iFRAGMENT5K: TEST_5x_FRAGMENT;
    iFRAGMENT10K: TEST_10x_FRAGMENT;
    iFRAGMENT15K: TEST_15x_FRAGMENT;
END_VAR
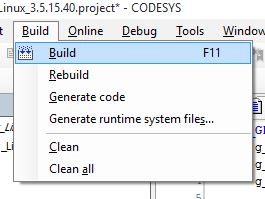
Verify the changes by building the project, i.e. Build - Build or F11
And double check the error(s), warning(s) and message(s) window

In order to test your Application you can again follow section Download (execute) directly to the target or sections Create a Boot Application (.app/.crc files) / Deploy a Boot Application (.app/.crc files).
The results file (IEC-61131-3_process-automation_scorecard*.txt) will then have a additional entry. (See last entry)
--- PLCopen 61131-3 Process Automation testcase scorecard ---

Target: Id 5 Type 4102 Version 3.5.15.40
Test at: 2020-7-1-22_21
Platform: IEC 61131-3 workload -  Control Function Block
Extern: Extern
Code: Ram
Measured timer resolution [ns]: 61
Measured overhead of SysTimeGetNs [ns]: 60.0672

Test (all values in ns)              Avg       Min       Max    StdDev Num Calls
--------------------------------------------------------------------------------

PID 1x (REAL)                    115.865   105.938  1781.933    30.424     24113
PID 5x (REAL)                    388.961   366.938  16443.93   195.049     23051
PID 10x (REAL)                   800.809   766.938  9499.933   124.999     22010
KALMAN 1x filter (REAL)          301.763   268.938  8786.933   117.475     23431
KALMAN 5x filter (REAL)         1320.059  1263.933  8268.933   119.977     20612
KALMAN 10x filter (REAL)        2599.164  2471.933 13181.933   179.799     17916
Logic+Arith 1K fragment         9244.016  8985.933  28530.93   616.327     10667
Logic+Arith 5K fragment         43830.39  42844.94  63562.94  2369.021      4000
Logic+Arith 10K fragment        86871.29  85159.93 114983.93  3323.186      2496
Logic+Arith 15K fragment       129889.08 128254.93  148228.9  2826.522      1500
Enable Tracing
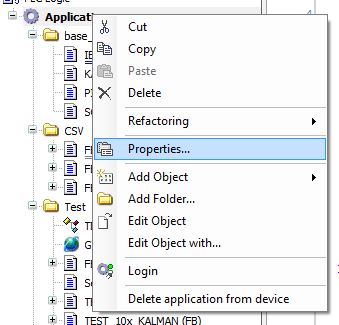
To enable tracing functionality within the Codesys application, right click on Application and select Properties…
Select the Build tab within the Properties window and add
enable_ftraceto the Compilerdefines. Confirm by clicking Apply and OK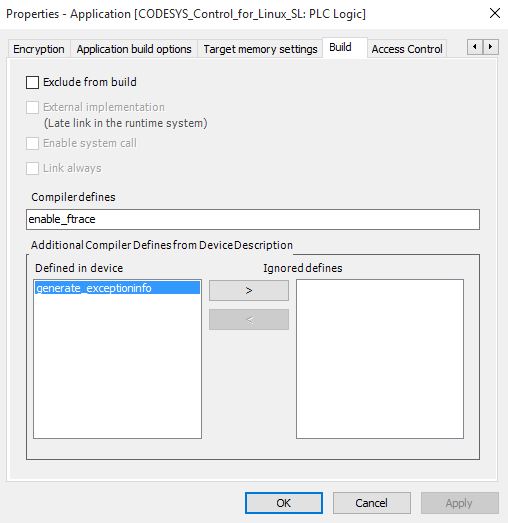
Rebuild the application. Once the trace enabled application is deployed and running you can check
cat /sys/kernel/debug/tracing/tracefor trace messages. For example:# tracer: nop # # nop latency trace v1.1.5 on 4.19.94-rt38-intel-pk-preempt-rt # -------------------------------------------------------------------- # latency: 0 us, #152425/152425, CPU#0 | (M:preempt VP:0, KP:0, SP:0 HP:0 #P:4) # ----------------- # | task: -0 (uid:0 nice:0 policy:0 rt_prio:0) # ----------------- # # _--------=> CPU# # / _-------=> irqs-off # | / _------=> need-resched # || / _-----=> need-resched_lazy # ||| / _----=> hardirq/softirq # |||| / _---=> preempt-depth # ||||| / _--=> preempt-lazy-depth # |||||| / _-=> migrate-disable # ||||||| / delay # cmd pid |||||||| time | caller # \ / |||||||| \ | / <...>-5179 0....... 5988902us : tracing_mark_write: E|3|measure-trace_marker-overhead <...>-5179 0....... 5988905us : tracing_mark_write: E|2|measure-trace_marker-overhead <...>-5179 0....... 5988908us!: tracing_mark_write: E|1|measure-trace_marker-overhead <...>-5179 0....... 5989156us+: tracing_mark_write: B|0|PID 1x (REAL) <...>-5179 0....... 5989215us : tracing_mark_write: X|0|1623806.4|1623806.4 <...>-5179 0....... 5989225us : tracing_mark_write: X|1|165806.4|894806.4 <...>-5179 0....... 5989233us : tracing_mark_write: X|2|160806.4|650139.733333333 <...>-5179 0....... 5989242us : tracing_mark_write: X|3|157806.4|527056.4 <...>-5179 0....... 5989250us : tracing_mark_write: X|4|166806.4|455006.4 <...>-5179 0....... 5989258us : tracing_mark_write: X|5|160806.4|405973.066666667 <...>-5179 0....... 5989266us : tracing_mark_write: X|6|160806.4|370949.257142857 <...>-5179 0....... 5989274us : tracing_mark_write: X|7|161806.4|344806.4 <...>-5179 0....... 5989282us : tracing_mark_write: X|8|160806.4|324361.955555555 <...>-5179 0....... 5989291us : tracing_mark_write: X|9|159806.4|307906.4 <...>-5179 0....... 5989299us : tracing_mark_write: X|10|161806.4|294624.581818182