Application #2: CODESYS OPC UA Publish/Subscribe
The following section is applicable to:

Important
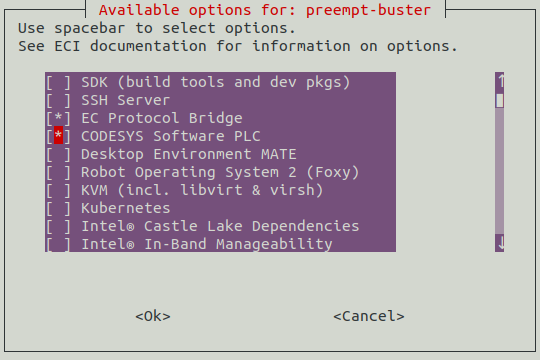
Edge Control Protocol Bridge & CODESYS Software PLC features must be enabled in the ECI image before this section can be completed. Creating an ECI image that contains the Edge Control Protocol Bridge & CODESYS Software PLC features can be accomplished by selecting the EC Protocol Bridge and CODESYS Software PLC feature options during image setup. See section Building ECI Targets for more information.
The OPC UA Publish/Subscribe Example makes use of the CODESYS Software PLC and the ECI Edge Control Protocol Bridge to showcase bridging OPC UA Client/Server Model to OPC UA Publish/Subscribe Model. In this example topology, the EC Protocol Bridge establishes a connection as an OPC UA client to the CODESYS Linux Runtime OPC UA server. Data on this OPC UA client/server protocol is bridged to an OPC UA publish/subscribe protocol, which the EC Protocol Bridge makes available.
Prerequisites
A Windows system (x64 bit) to host the CODESYS IDE
An ECI image with the CODESYS Software PLC and EC Protocol Bridge feature options enabled. (See Building ECI Targets)
A target system with the ECI image installed (See Installing ECI Images)
Ability to modify IP address of both the Windows PC and target system
Ability to connect both the Windows PC and target system via Ethernet network
Note
If the CODESYS IDE has not yet been installed on a Windows system, follow the section CODESYS IDE Installation to install the CODESYS IDE. For more information on CODESYS, see the following section: CODESYS Software PLC
Attention
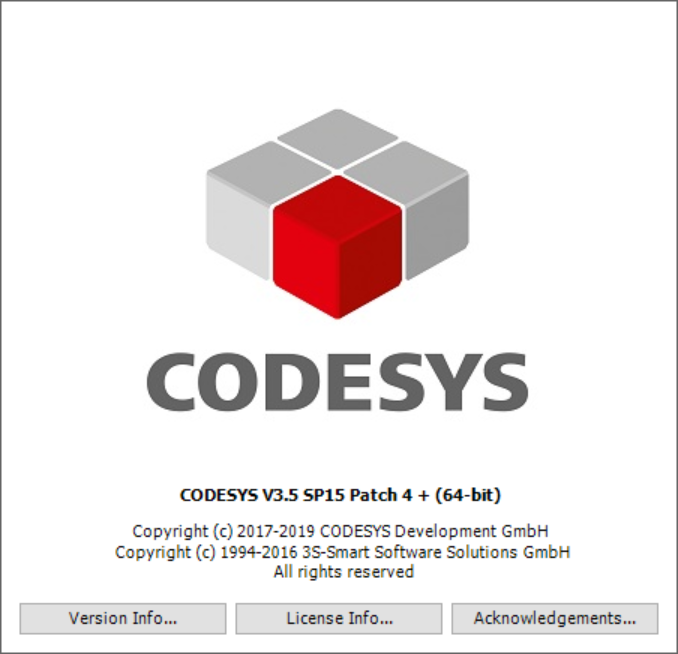
This CODESYS example project was created and validated using CODESYS V3.5 SP15 Patch 4 + (64-bit). Project compatibility differences may occur when changing CODESYS version.
Deploying CODESYS Application
The following section is applicable to:

Extract the “CODESYS_Example_Applications.zip” archive provided with the ECI bundle. Navigate to the OPCUA directory. Double-click on “ec-protocol-bridge_Linux_3.5.15.40.project” to open the project with CODESYS.
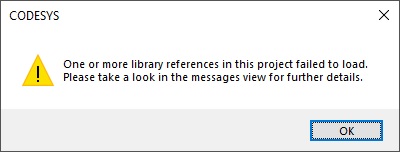
When the project is first loaded, CODESYS may present a message about failing to load library references. This is OK for now, as we will be installing these dependencies in the upcoming steps.
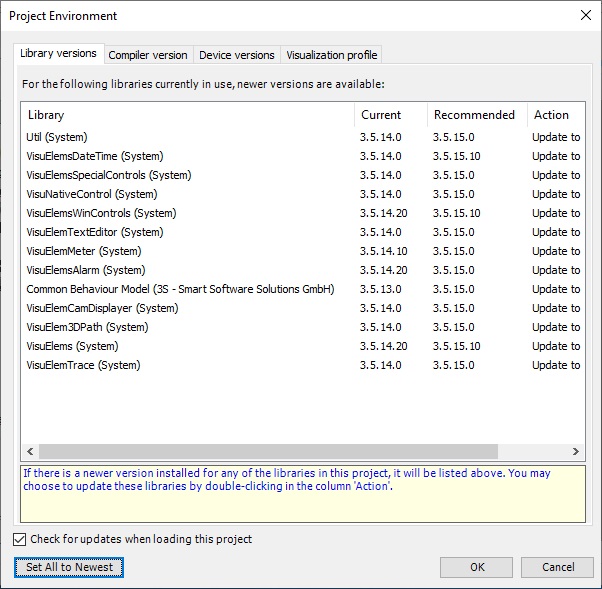
CODESYS may present a dialog prompting about newer library versions. If you prefer, you may update all the suggestions. Performing the update will not break the project.
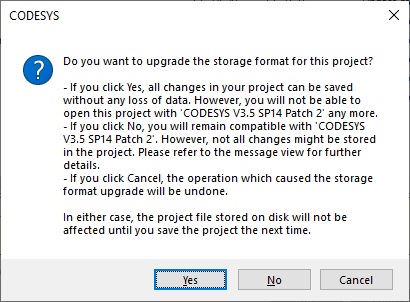
CODESYS may present a dialog asking about storage format. It is recommended to use the format suggested by CODESYS. Press the “Yes” button on the dialog.
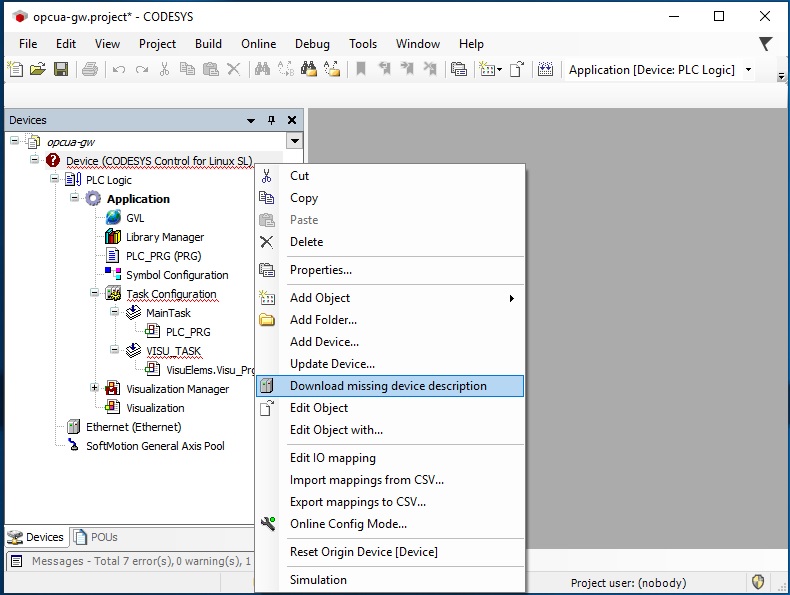
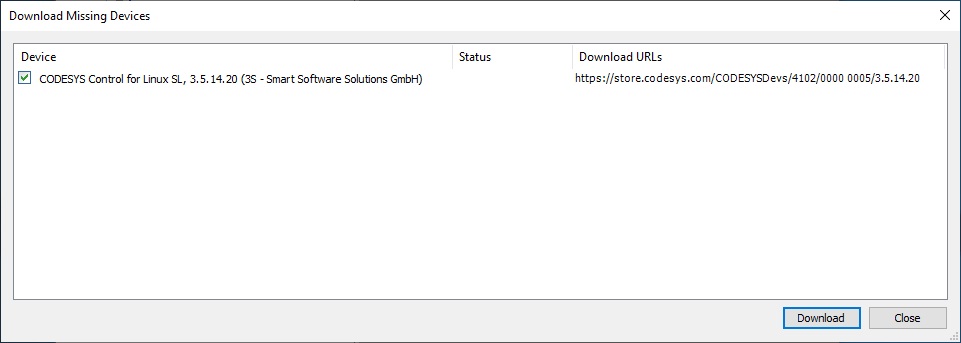
When the project opens, you may see a (?) mark next to “Device (CODESYS Control for Linus SL)” in the Devices pane. If this occurs, right click on “Device (CODESYS Control for Linus SL)” and select “Download missing device description” from the context menu. Follow the prompts to install the missing device.
At this point, a compilation attempt needs to be performed to asses which libraries are missing. Open the “Build” menu and select “Build”.

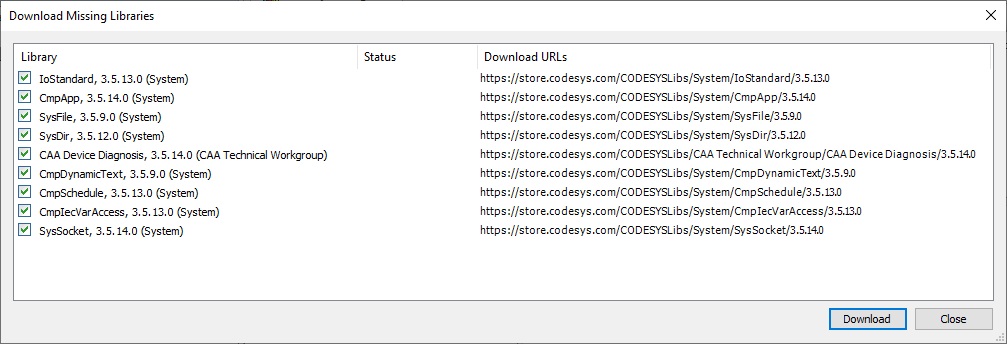
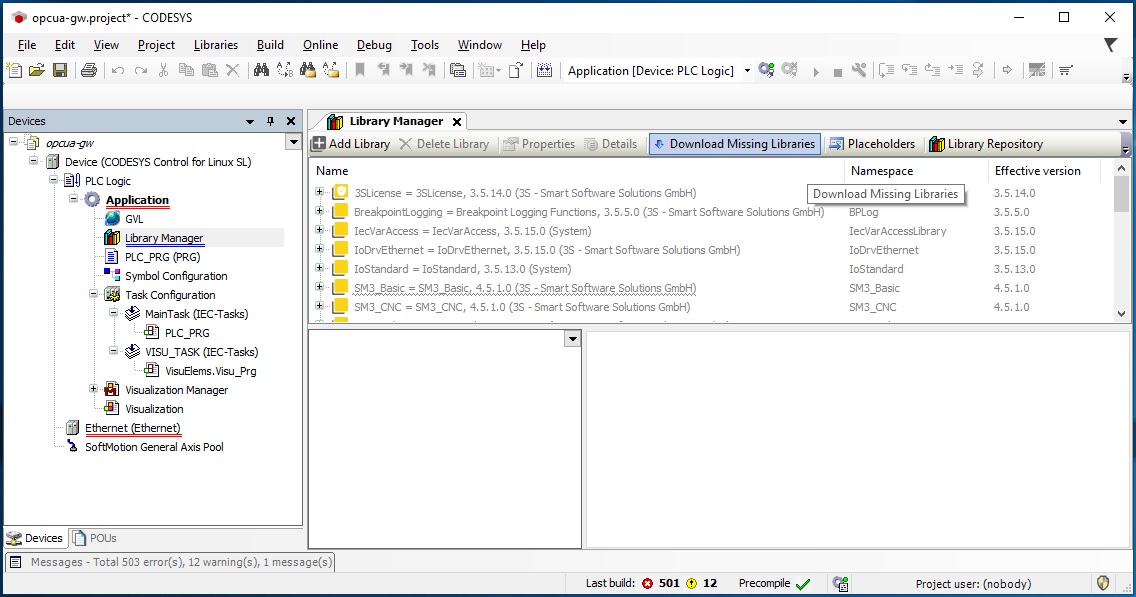
After a build, the “Messages” tab (typically located at the bottom of the IDE) will display an error count. If you have errors, chances are likely libraries are missing. Double-click on “Library Manager” from the Devices pane. A tab will open. You may need to expand the IDE window to see all the available buttons in the tab. You should see a button labeled “Download Missing Libraries”. Click this button.

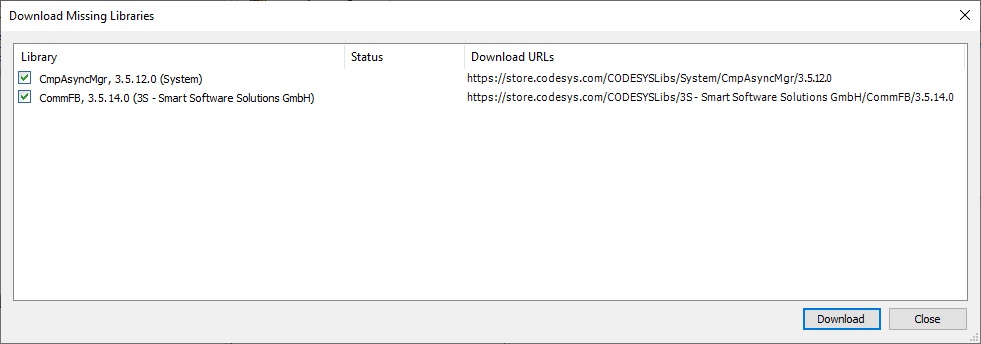
A dialog will appear showing missing libraries. Ensure all missing libraries are checked and click the “Download” button.
At this point, there may still be missing libraries (due to installation order dependency). If the “Download Missing Libraries” button is still available, click it again.
A dialog will appear showing missing libraries. Ensure all missing libraries are checked and click the “Download” button.
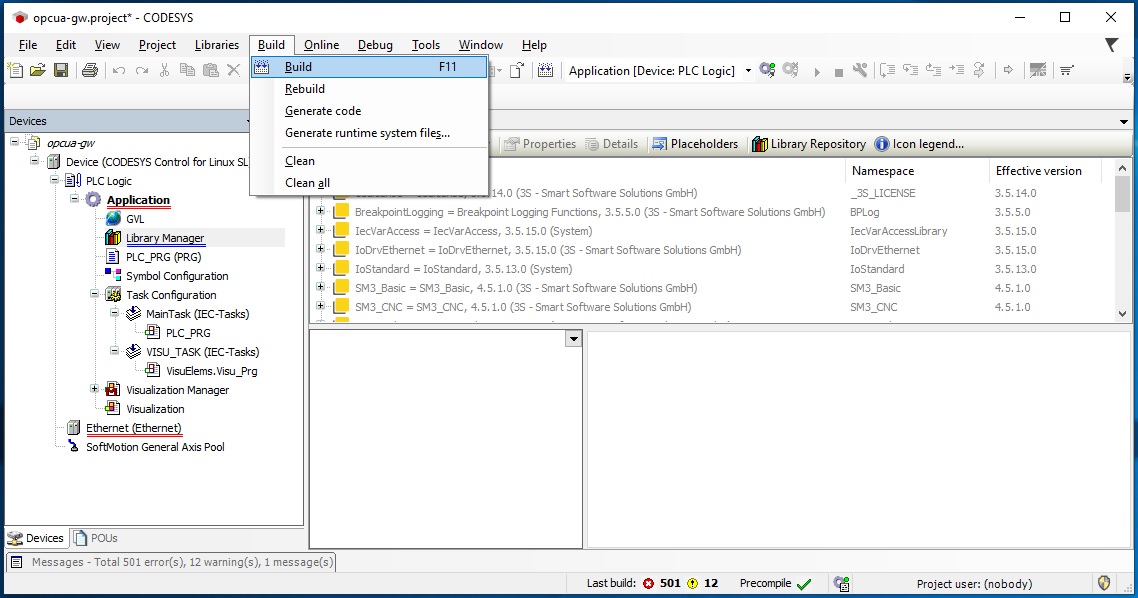
If the “Download Missing Libraries” button disappears, you are ready to build the project again. Open the “Build” menu and select “Build”.
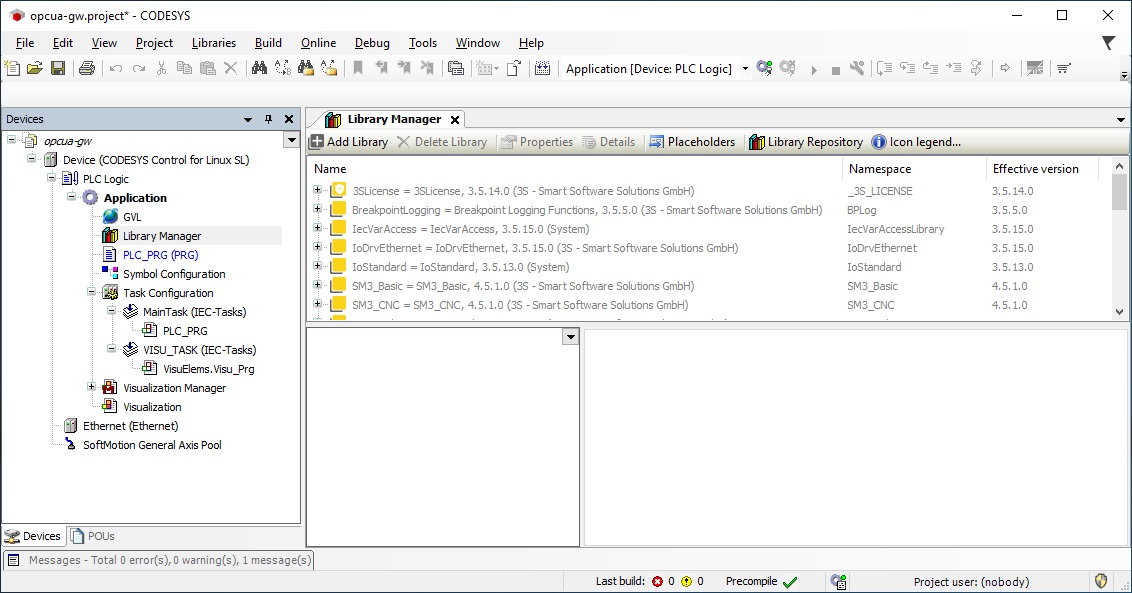
If all dependencies are installed, the build should complete without errors. Check that the “Messages” tab shows 0 errors. You may close the “Library Manager” tab.
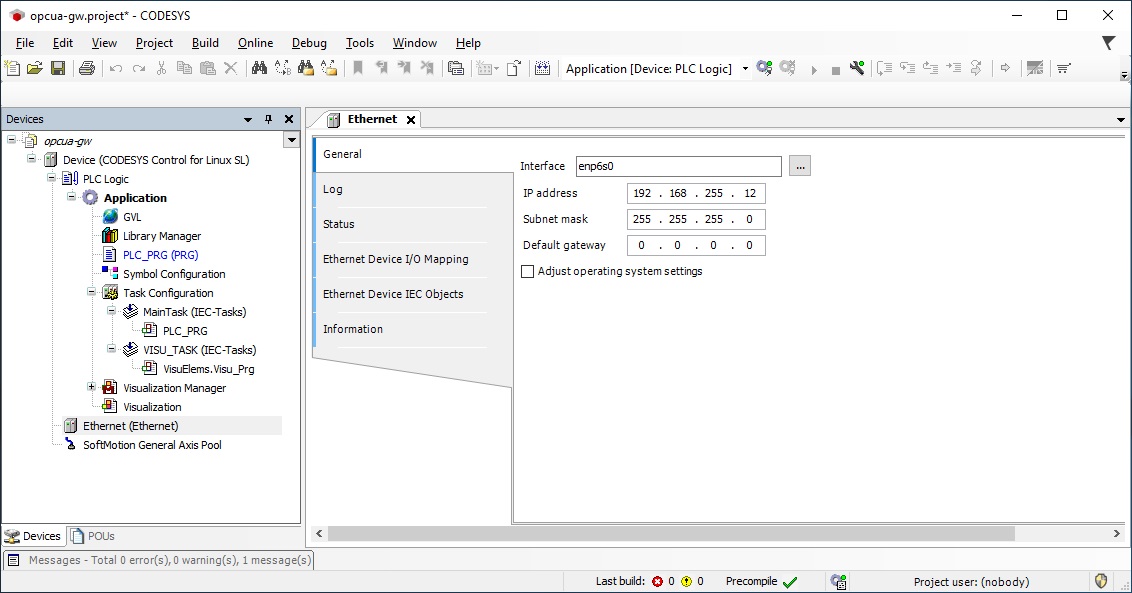
Double-click on “Ethernet” from the Devices pane. You should see “eno1” listed for “Interface”, “192.168.255.12” listed for “IP address”, and “255.255.255.0” listed for “Subnet mask”. This IP address will be the address used by the CODESYS Linux runtime which resides on the target system (with ECI installed).
Attention
If your system uses a different Interface than “eno1”, be sure to update the Interface used by the “Ethernet” device in the CODESYS project.
Connect the Windows PC and the target system together via an Ethernet network. Be sure to use the Ethernet port that corresponds to the Interface used in the previous step.
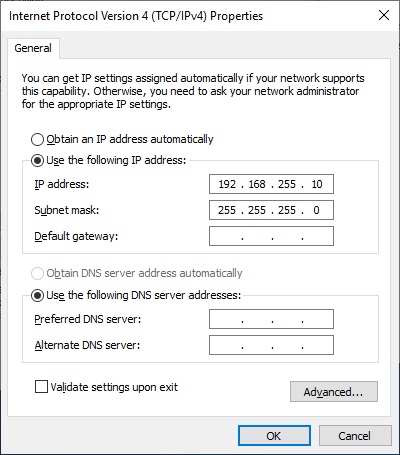
Modify the IP address assigned by Windows for the relevant Ethernet interface. Use IP address “192.168.255.10” and subnet mask “255.255.255.0”.
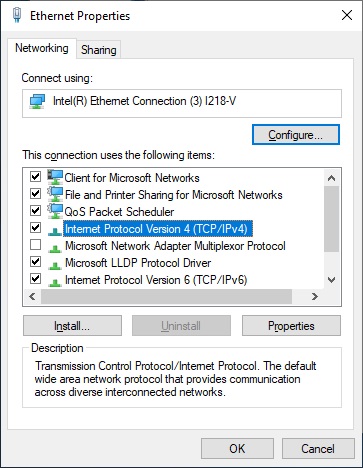
You may also need to modify the Windows firewall to allow traffic to CODESYS from private networks. Open the “Allowed apps” firewall dialog and ensure “CODESYS” and “CODESYScontrol Service” is checked. If the Windows PC and target system are connected correctly, you should be able to ping each system from each other.

The following steps are applicable to:

On the target system, restart the CODESYS Linux runtime by performing the following command:
$ systemctl restart codesyscontrol
The following steps are applicable to:
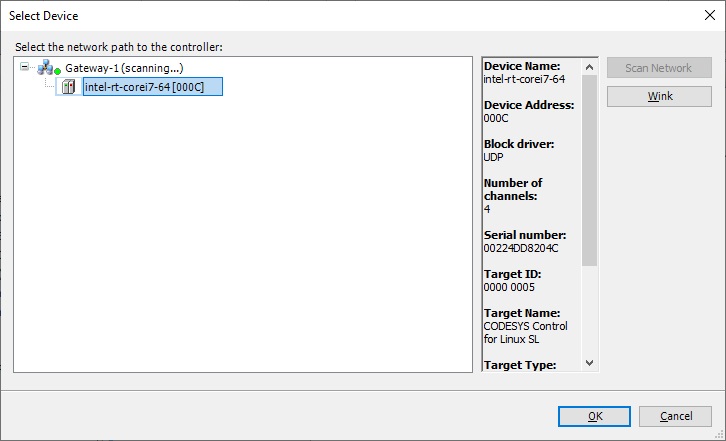
In the CODESYS IDE, double-click on “Device (CODESYS Control for Linux SL)” in the Devices pane. Click the “Scan Network…” button to probe for active CODESYS servers.
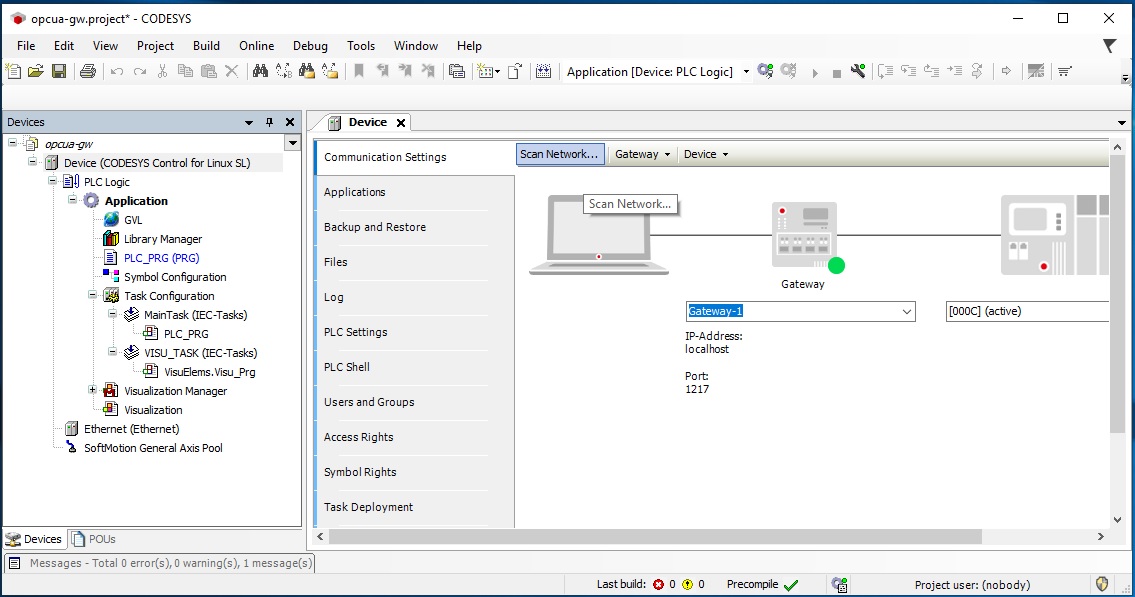
A dialog will appear. There should be a device named “intel-rt-corei7-64…” listed. Select this device and click the “OK” button.
Open the “Online” menu and select “Login”.
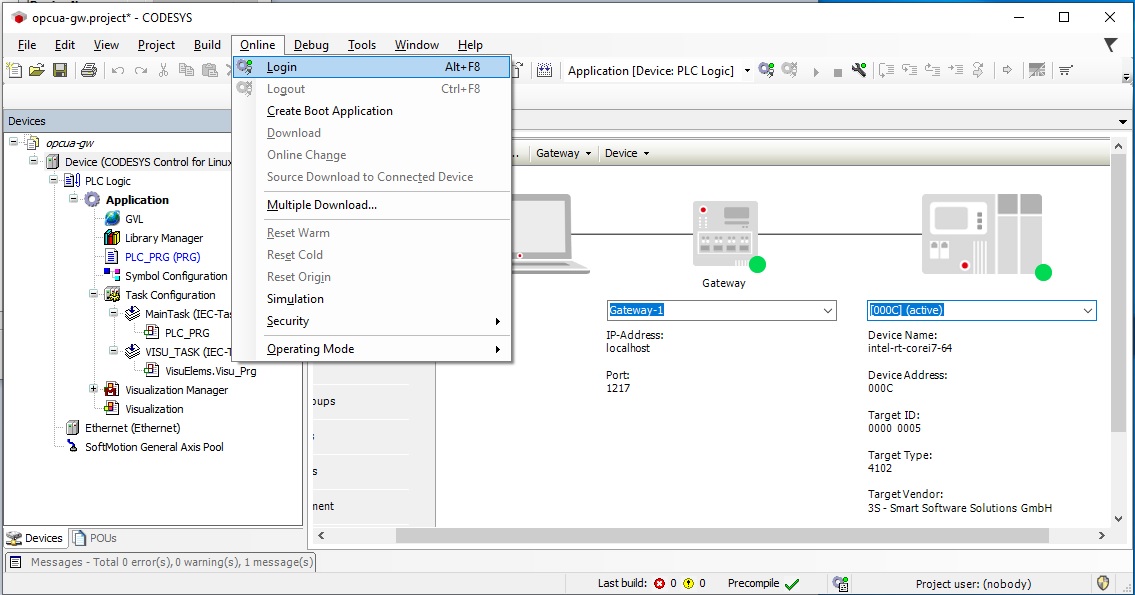
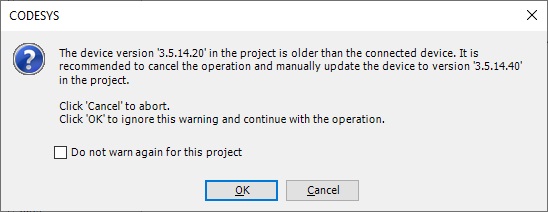
A message may appear warning about a version mismatch. You may safely ignore the warning by clicking “OK”.
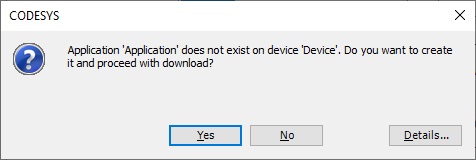
If this is the first time logging into the CODESYS Linux runtime, a message will appear indicating that no application exists on the target device. Click “Yes” to download the application.
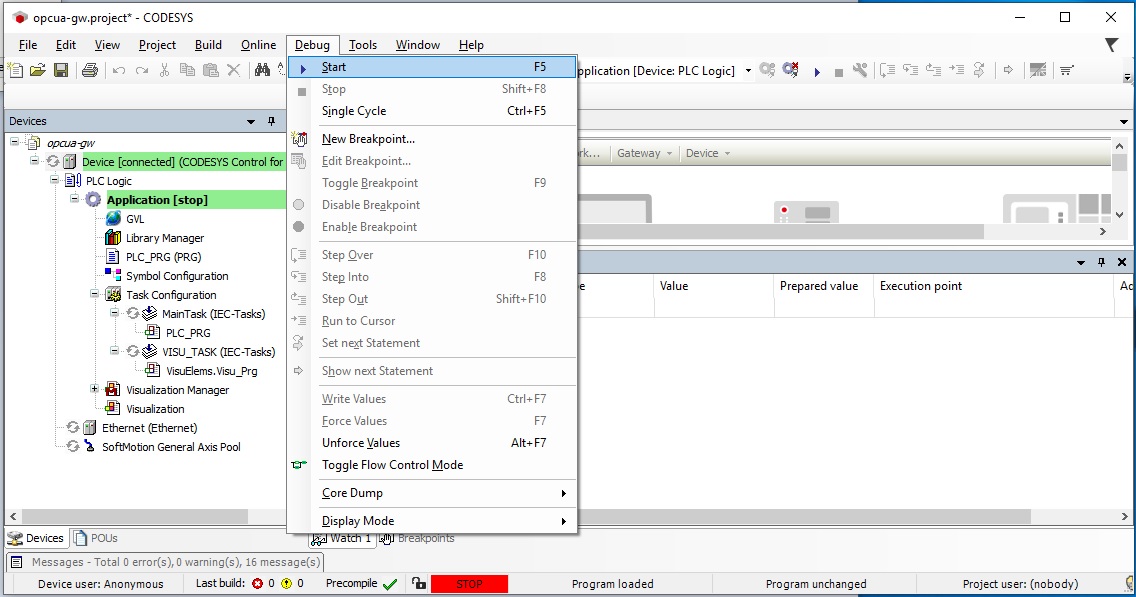
After the application has completed uploading to the CODESYS Linux runtime, open the “Debug” menu and select “Start”.
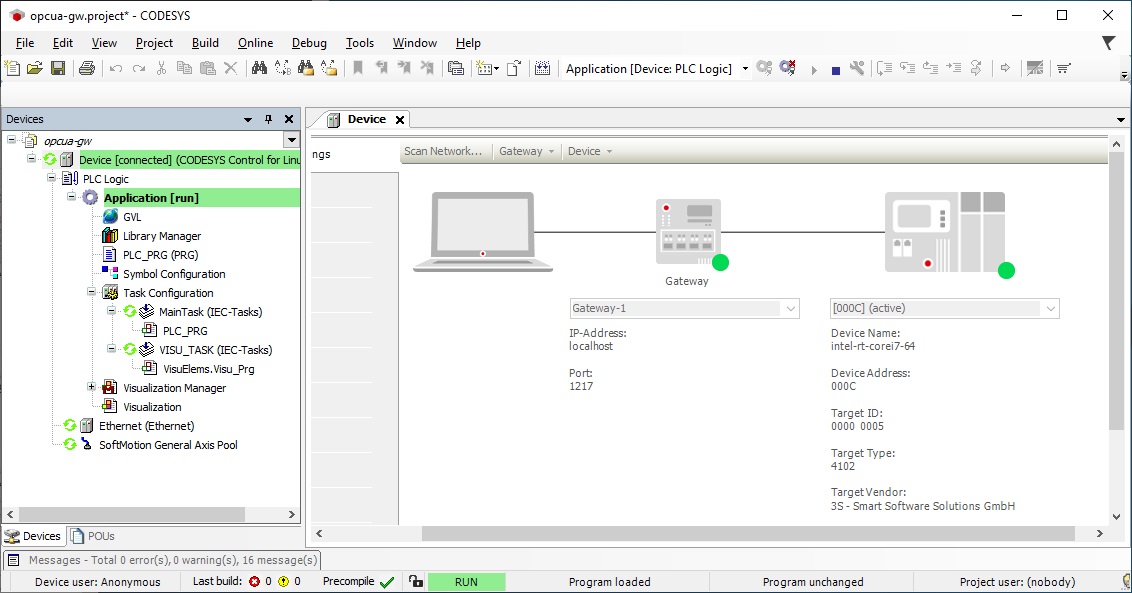
If everything is correct, green indicators will appear next to various components as shown in the image below.
The following steps are applicable to:
On the target system, run the Edge Control Protocol Bridge to bridge OPC UA client/server protocol to OPC UA publish/subscribe protocol.
$ /opt/ec-protocol-bridge/plg-opcua-rt/examples/codesys/startDemo.sh
The script will ask you to connect the PC to a network. This was done in an earlier step, so press Enter.
The script will then prompt you to select an interface. Enter the number that corresponds to the Interface configured in the earlier steps (this example uses Interface “eno1”).
The script will ask if you would like to use the default IP address “192.168.255.12”, enter y. If you are using a different IP address, enter n and input your address when prompted.
The following steps are applicable to:
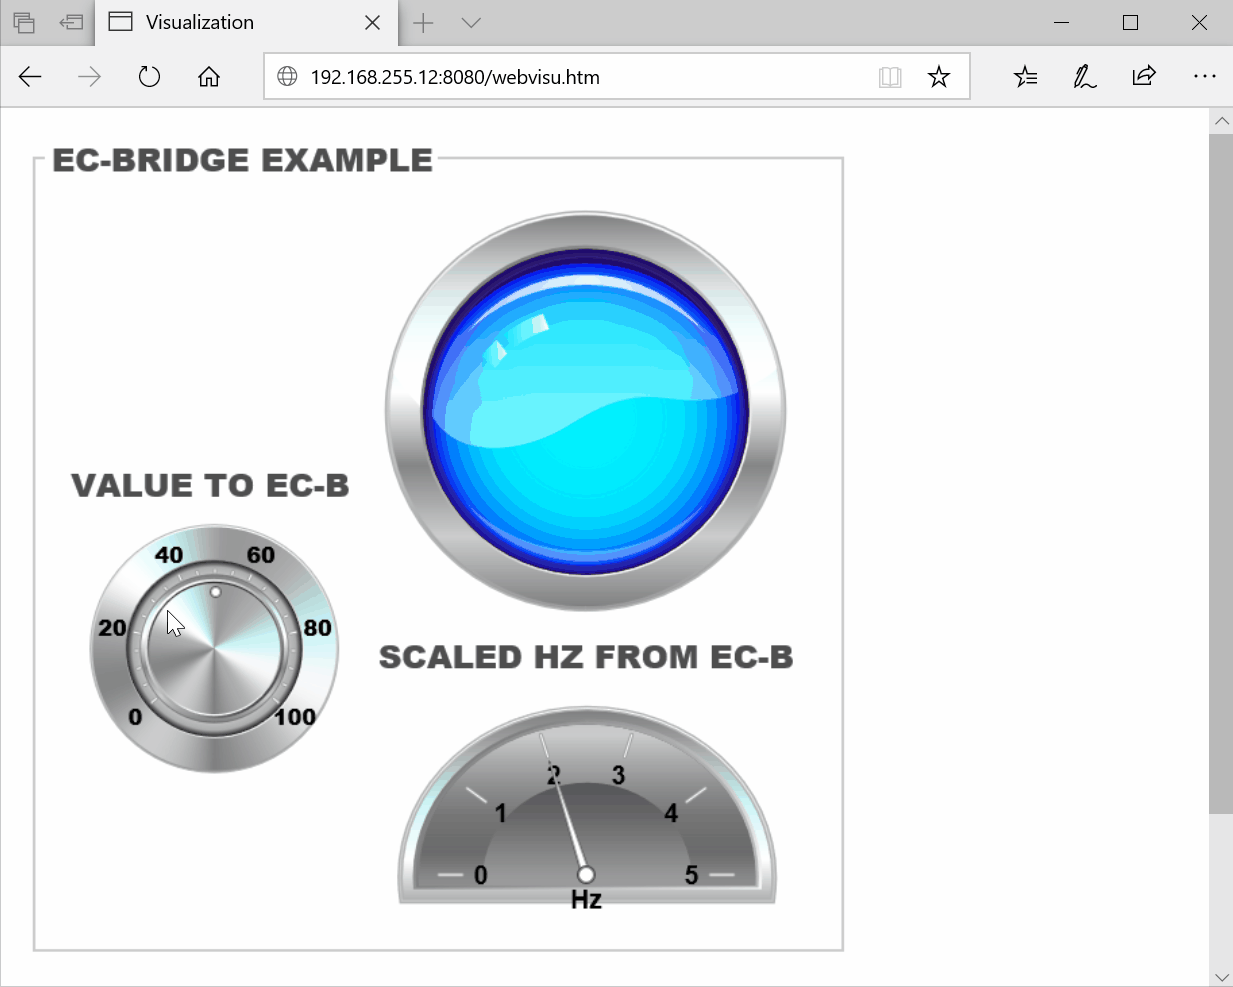
Open a web browser on the Windows PC and navigate to: http://192.168.255.12:8080. You should see the Visualization hosted by the CODESYS Linux runtime. You may rotate the dial to vary the value sent to the OPC UA client.
Note
The CODESYS Linux runtime will continue to run without a license for up to two hours.
If the CODESYS Linux runtime stops running due to the two hour time limit, you may restart it using the following command:
systemctl restart codesyscontrolIf you desire to run the CODESYS Linux runtime beyond two hours, you must purchase a license from the CODESYS Webstore. See section CODESYS Linux Runtime for various licensing options for CODESYS.