Intel® Time Coordinated Computing Tools (Intel® TCC Tools)
Attention
For this Intel® ECI release, Intel® Time Coordinated Computing (Intel® TCC) is only supported on 11th Gen Intel® Core™ and Intel Atom® x6000E Series (as developer preview) processors! Other processors will be supported in future releases. Current version of ECI supports Intel® Time Coordinated Computing Tools 2021.3.
About Intel® TCC Tools
Intel processors are multi-purpose and can serve a wide range of use cases from data analysis in the cloud, to gaming PCs and traditional office laptops, to devices at the edge. Starting with Intel Atom® x6000E Series processors (code name: Elkhart Lake (EHL)) and 11th Gen Intel® Core™ processors (code name: Tiger Lake UP3 (TGL)), Intel is introducing a new set of features called Intel® Time Coordinated Computing (Intel® TCC) to augment the compute performance of its processors with ability to address the stringent temporal requirements of real-time applications. The ongoing industry transformation drives the demand for converged solutions capable of satisfying real-time requirements while staying generally power efficient and leaving sufficient performance for other concurrent tasks. The key value of Intel TCC is performance improvements for latency-sensitive applications when they are running alongside non-time-constrained applications on the same system.
While the Intel TCC features reside in the processor, their full potential is unlocked when the whole solution stack is optimized top-to-bottom. Intel offers a reference real-time software stack that abstracts these hardware features to accelerate hardware configuration and application development.
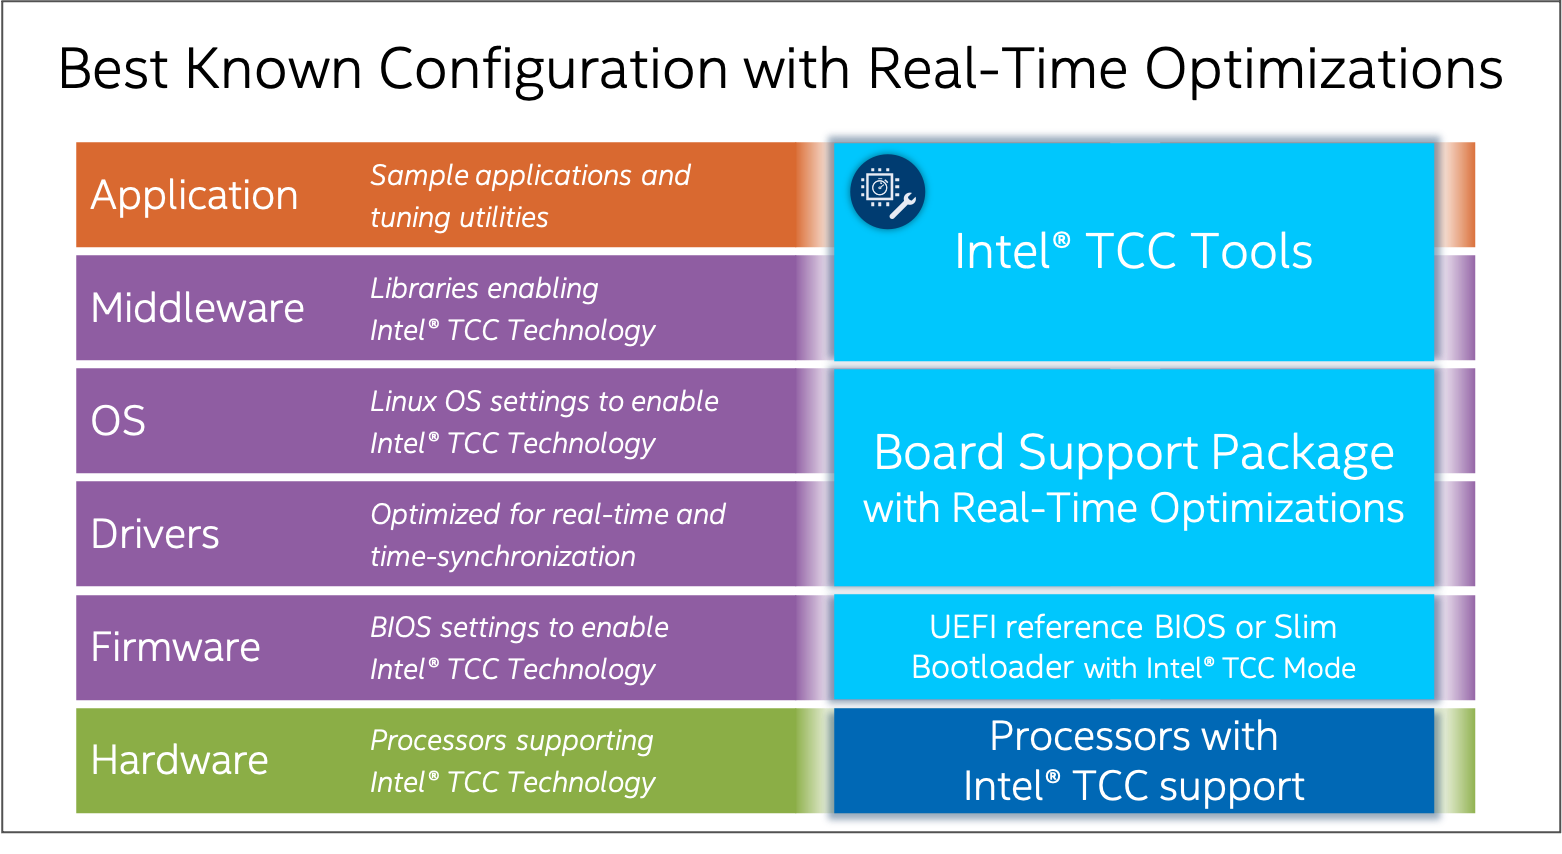
The stack consists of:
Real-time hardware: Intel Atom® and Intel® Core™ processors, optimized for real-time applications (list of supported processors)
System software:
Linux OS: Yocto Project*-based board support package (BSP) with real-time optimizations, also referred to as PREEMPT_RT or RT kernel
Linux OS: Debian Buster with real-time optimization, also referred to as PREEMPT_RT kernel.
ACRN Real Time Hypervisor.
UEFI reference BIOS with Intel TCC Mode
Intel TCC Tools (this product)
Why Intel TCC Tools?
System software optimizations can satisfy many real-time use cases
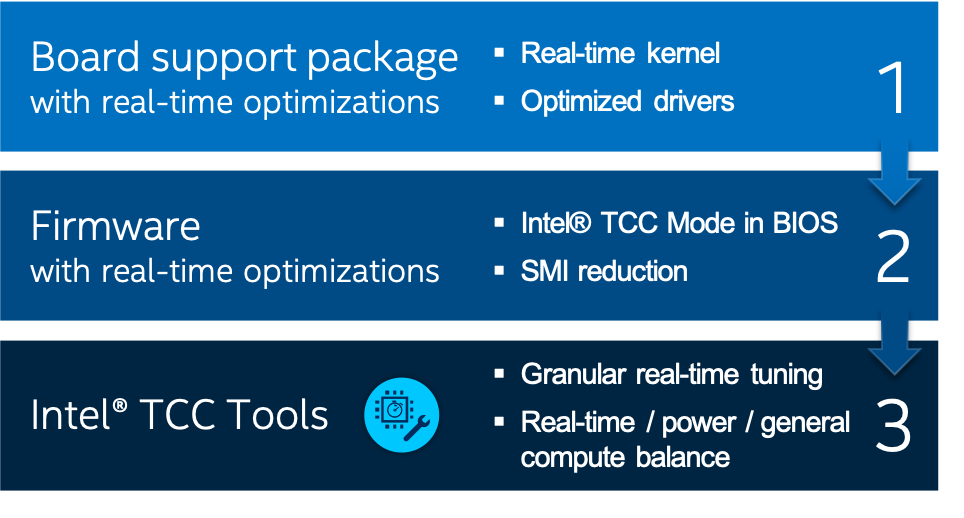
System software has the highest impact on real-time performance. The BSP and UEFI reference BIOS contain optimizations such as Linux kernel build configuration settings and boot parameters, power management settings, and Intel TCC Mode, that help drastically decrease execution latencies and reduce jitter, at times up to several orders of magnitude. System software optimizations, when used with target processors are sufficient to satisfy real-time use cases with a broad range of cycle times for the most common real-time applications.

System software optimizations may be all you need to meet your real-time requirements. To learn more about system software tuning, the BSP, and Intel TCC Mode in BIOS, see the Real-Time Tuning Guide 11th Generation Intel® Core, and Real-Time Tuning Guide Atom® x6000E Series for your target processor.
Intel TCC Tools allow for use case-specific optimizations
For some use cases, meeting real-time requirements is not enough. Some must be mindful of system power consumption or residual compute capabilities for data processing or graphical UI. Optimizing only system software may not be sufficient in these cases. For example, enabling Intel TCC Mode has a strong impact on system power consumption which might not be acceptable.
Optimizations to address the unique demands of some real-time applications or further decrease cycle times require more granular use of Intel TCC features and special tuning techniques, such as advanced cache management and I/O fabric tuning.
Such granular tuning, if unassisted, requires special knowledge of processor architecture including the intricacies of a particular microarchitectural generation which is unattainable and unnecessary information for the majority of developers. Intel TCC Tools facilitates these techniques by offering C application programming interfaces (APIs) and tools.
Furthermore, tuning is usually preceded by debugging and bottlenecks’ identification that involves measurement. Given the nature of real-time applications and their latency sensitivities, conventional measurement tools may not be precise enough and induce overhead impacting measurement results. Latency measurement offered by Intel TCC Tools is free of these limitations and offers high precision while being minimally intrusive.
For information on using and developing with Intel TCC Tools, refer to the Developer Guide
Note: If you do not have access to the Developer Guide, contact your Intel representative for assistance with accessing Intel TCC Tools.
Intel TCC Tools - Resources
Intel TCC Tools is an independent product. For help and support with Intel TCC Tools, refer to the following:
Intel TCC Tools - Prerequisites
Important
If you are using a prebuilt image, there is no need to build an ECI image. You can skip to ‘Step 3’ to locate the Intel TCC Tools offline host system installer.
Intel TCC also recommends using Ubuntu* 20.04 for TCC host installation.
Follow these steps to prepare for Intel TCC Tools:
Build an ECI image that contains the Intel TCC Tools features. To create an ECI image containing the Intel TCC feature, select the
Intel® Time Coordinated Computingfeature option during image setup. For more information, refer to Building ECI Targets.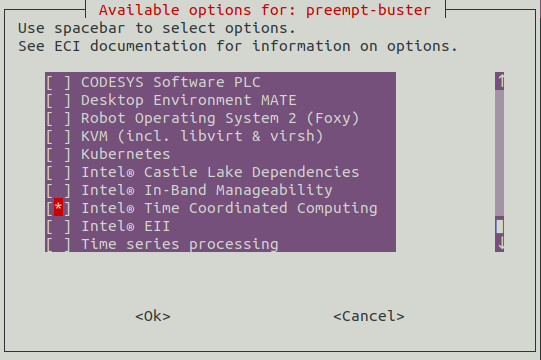
Create a bootable USB flash drive with the ECI image and install to a target system. For more information, refer to Installing ECI Images.
Locate the Intel TCC Tools offline host system installer script in the ECI release package:
/eci-release/Edge-Controls-for-Industrial/Time-Coordinated-Computing/Refer to the Intel TCC Tools Get Started Guide.
Note: In the Intel TCC Tools Get Started Guide, you can ignore Step 1: Build Yocto Project-Based Image and Step 5: Install on Target as these steps have already been completed:
Important
The Target system needs specific BIOS for Intel TCC. Contact your Intel representative for the correct BIOS version for your hardware.
The following table provides the Reference BIOS that will be used for the specific system. Occurrences of “BIOS 2021.1” refers to this table.
The Vecow Tiger Lake (Vecow TGL) system does not have a BIOS for TCC 2021.3. The BIOS that is being used for Vecow Tiger Lake is based on the 2021.1 BIOS referenced below. Vecow Tiger Lake BIOS is referenced from ‘TGLIFUI1.R00.3455.A02.2011240812’
System |
BIOS for TCC 2021.3 |
|
|---|---|---|
EHL-CRB |
EHLSFWI1.R00.3273.A04.2107240322 |
|
TGL-RVP |
TGLIFUI1.R00.4304.A01.2107200604 |
|
Vecow TGL |
E5000XXU3FRT103 |
|
System |
BIOS ACRN TGL RVP |
|
|---|---|---|
TGL-RVP |
TGLIFUI1.R00.4304.A01.2107200604 (Specifically requires TSN) |
|
Intel TCC Tools - Sanity Checks
Prerequisites
As a prerequisite for sanity checks, modify the BIOS configurations. Click the corresponding tab for details.
Go to Intel(R) Advanced Menu > Intel(R) Time Coordinated Computing(R) on the target system and configure the BIOS as listed in the following table:
Setting Name |
Option |
|---|---|
Intel(R) TCC Mode |
Enabled |
Intel(R) TCC Authentication |
Disabled |
For Tiger Lake, go to Intel(R) Advanced Menu > Intel(R) Time Coordinated Computing and configure the BIOS as listed in the following table:
Setting Name |
Option |
|---|---|
Intel(R) TCC Mode |
Enabled |
Intel(R) TCC Authentication |
Disabled |
Software SRAM |
Enabled |
Data Streams Optimizer |
Enabled |
Sanity Check 1: RT Checker
Intel TCC system hardware RT checker is a tool to make sure that the system is ‘RT READY’.
Run RT checker:
$ /usr/bin/tcc_rt_checkerThis will compare your current BIOS configuration with the BKC. If there is a mismatch, the message “NOT RT READY” will be displayed in red right next to it. You need to go into the BIOS and change the setting to the value provided by the output. After making all changes, rerun the RT checker executable to make sure system is ‘RT READY’.
Sanity Check 2: Enabling TCC Drivers and Software SRAM
This sanity check validates integration and hardware configuration. This test requires the execution of a script, which will enable TCC buffer, create a new UEFI boot into RTCM, and update the cache configuration or update the TCC cache BIOS subregion using firmware update mechanism.
Note: If you are using Debian ECI with TCC, run the following commands after booting:
$ dpkg-reconfigure fwupdate
$ cp /boot/efi/EFI/BOOT/bootx64.efi /boot/efi/EFI/BOOT/grubx64.efi
Configure the target system
Connect to the target via SSH:
$ ssh <user>@<target_hostname>
Run the configuration script. For
PLATFORM_NAME, the possibles values are:tgl,ehl. Click each tab for the corresponding scripts:$ /usr/share/tcc_tools/scripts/setup_ssram/tcc_setup_ssram.sh enable
Wait until the system reboots (Buffers for cache allocation library will be create and will boot with slimVMM).
Note: The system should reboot twice.
$ /usr/share/tcc_tools/scripts/setup_ssram/tcc_setup_ssram.sh enable --cpu atom
$ /usr/share/tcc_tools/scripts/setup_ssram_v1/tcc_setup_ssram.sh enable
Wait until the system reboot (Buffers for cache allocation library will be create and will boot with slimVMM).
Note: The system should reboot twice.
Connect to the target via SSH after the target reboots:
$ ssh <user>@<target_hostname>
Run the script to verify system configuration. Click each tab for the corresponding scripts:
$ /usr/share/tcc_tools/scripts/setup_ssram/tcc_setup_ssram.sh enable --verify
$ /usr/share/tcc_tools/scripts/setup_ssram/tcc_setup_ssram.sh enable --cpu atom --verify
$ /usr/share/tcc_tools/scripts/setup_ssram_v1/tcc_setup_ssram.sh enable --verify
Exit from the target:
$ exit
Intel TCC with ACRN
The section will help you set up Intel TCC with ACRN.
Prerequisites
Intel Tiger Lake or Elkhart Lake Industrial SKU
One USB drive (will be used for installing ECI images)
Flashed TSN enabled BIOS
Overview
You will do the following to enable Intel TCC on an ACRN virtual machine (VM):
Install ECI-A onto the Tiger Lake or Elkhart Lake system.
Change the BIOS configuration for the system. This will allow ECI-A to boot up correctly, enable TCC, and also provide the capability to launch a RT VM.
Boot into the ECI-A ‘Linux’ boot option and launch Software SRAM script. This will reboot the system a few times and update the cache configuration on the system.
Boot into the ECI-A ‘Linux’ boot option and make sure that the cache configuration is correct by re-running the Software SRAM script.
Boot into the ECI-A ‘ACRN’ boot option and launch a real-time VM.
Enable
tcc_driver. This will allow the VM to read the cache configuration.Run
tcc_cache_allocation_sampleto verify whether TCC is correctly working in the VM.
Building and Installing ECI
Building ECI Targets
Follow the steps in Building ECI Targets to build ACRN for Tiger Lake or Elkhart Lake.
Note: When selecting the features for ACRN-SOS, you will need to select “Time Coordinated Computing”. If this feature is not selected, you will need to rebuild the image with this feature enabled.
The VM will be ECI-B `with TCC enabled. `ECI-B will be used as the real-time VM. Follow the instructions in Installing ECI-A to install ECI-A onto the target system.
Installing ECI-A
Follow the instructions in the link: Installing ECI-A. This link will instruct the user on how to create a bootable USB and install ECI-A on your target system. When asked about VM profile, choose
TGL-RVPorEHL-CRB-Bprofile.
The next step is to update the BIOS configuration.
Configuring BIOS for ACRN with Intel TCC
Reboot the system and press F2 at boot to access the system BIOS.
Go to BIOS Configuration, click the tab corresponding to the system CPU SKU. Modify the BIOS configuration.
Save the changes.
The next step is to configure the system using Software SRAM.
Configuring System using Software SRAM
Restart the TGL-U RVP board. From the GRUB boot option menu, select Linux and then press Enter.
Now, activate a pre-defined configuration for the Software SRAM. This includes:
Enabling the TCC Driver to be auto-loaded
Creating BIOS capsules with the updated cache configuration, which will be deployed to the BIOS sub-regions when the system is re-booted.
This is equivalent to Step 7: Complete the Target System Setup of the the Intel® TCC Tools Get Started Guide.
# Create BIOS capsules with updated cache configuration and enable TCC Driver to be auto-loaded
cd /usr/share/tcc_tools/scripts/setup_ssram
./tcc_setup_ssram.sh enable
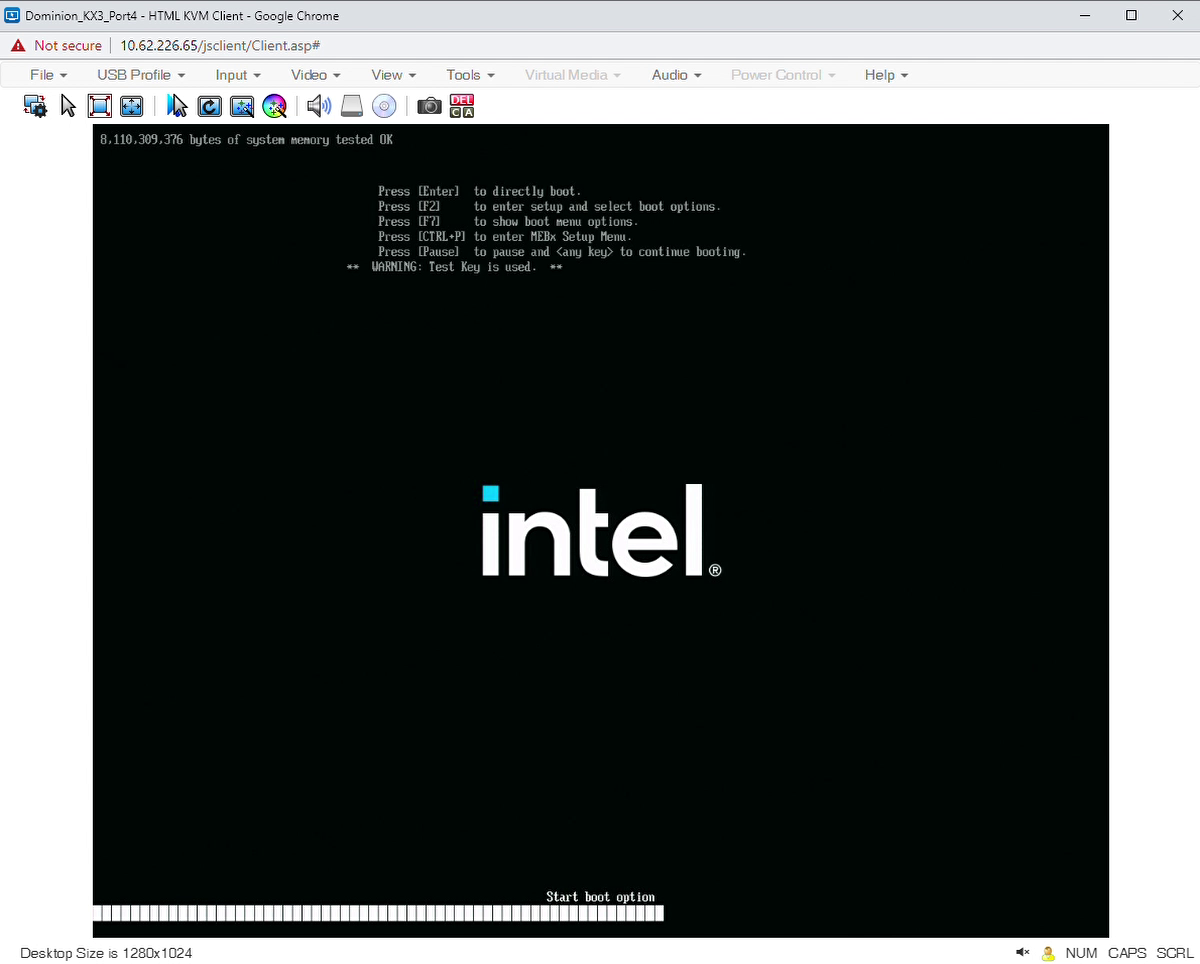
During the reboot process (see figure below), do not press F7, as it would interrupt the deployment of the BIOS capsule.
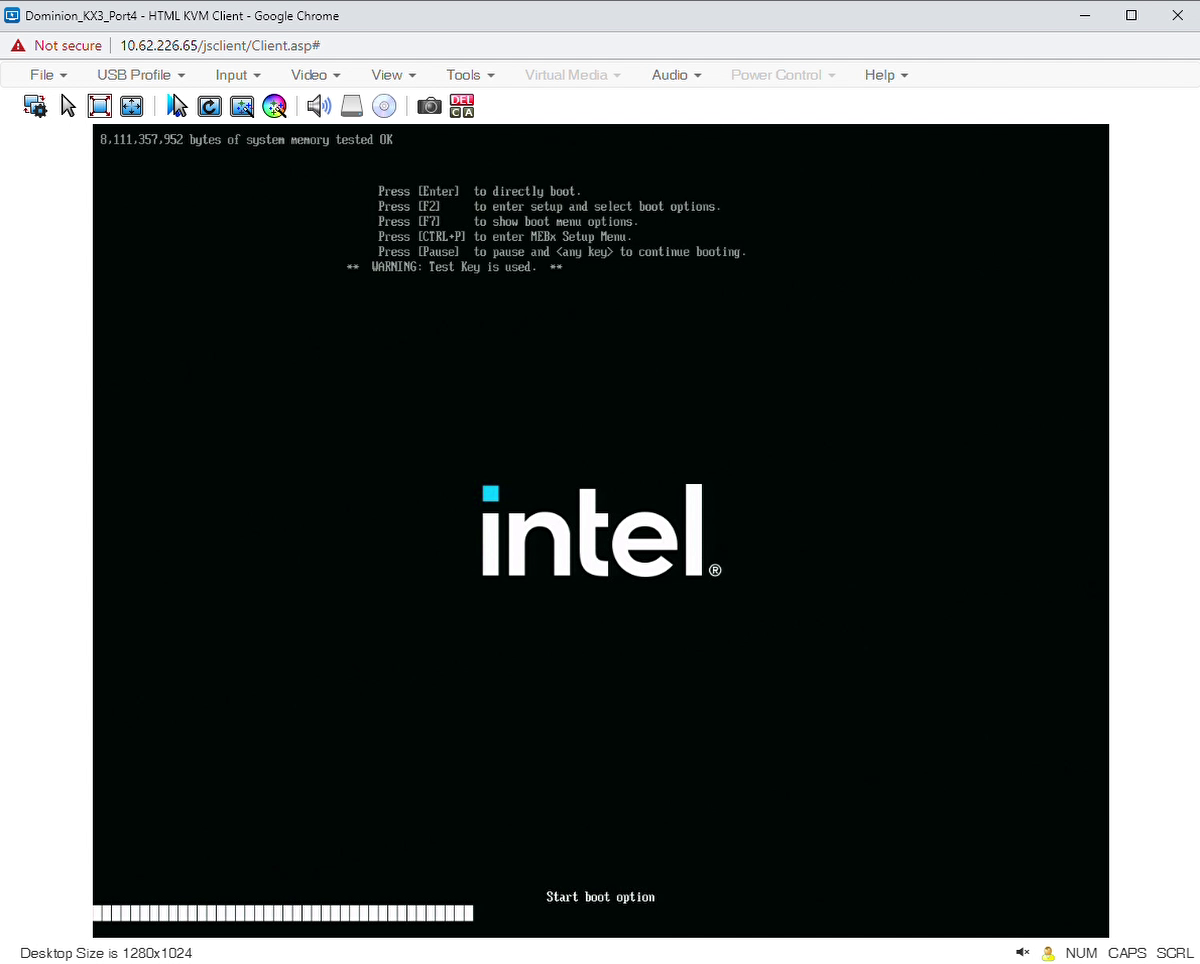
Be patient until you see the message that BIOS capsules have been found (see the following figure).
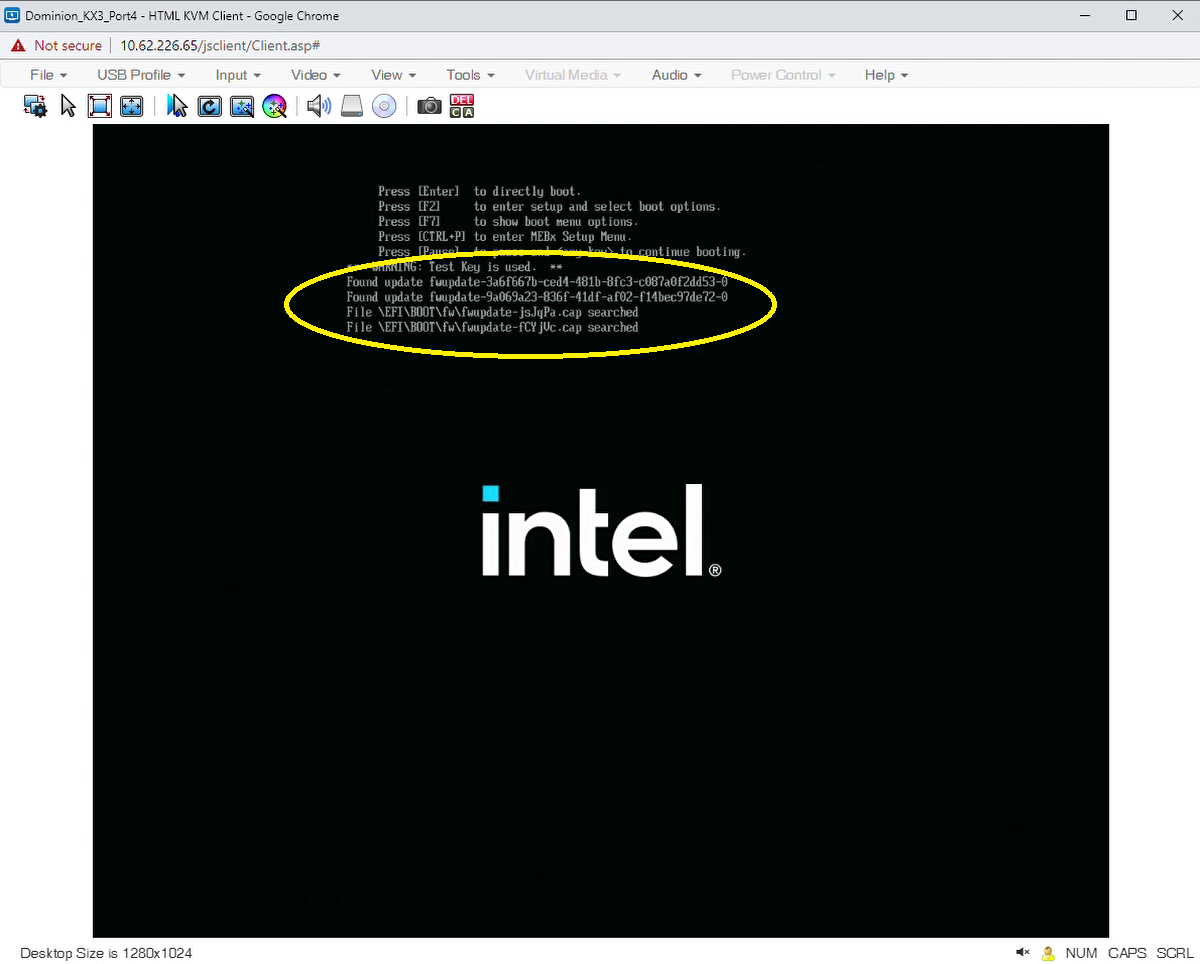
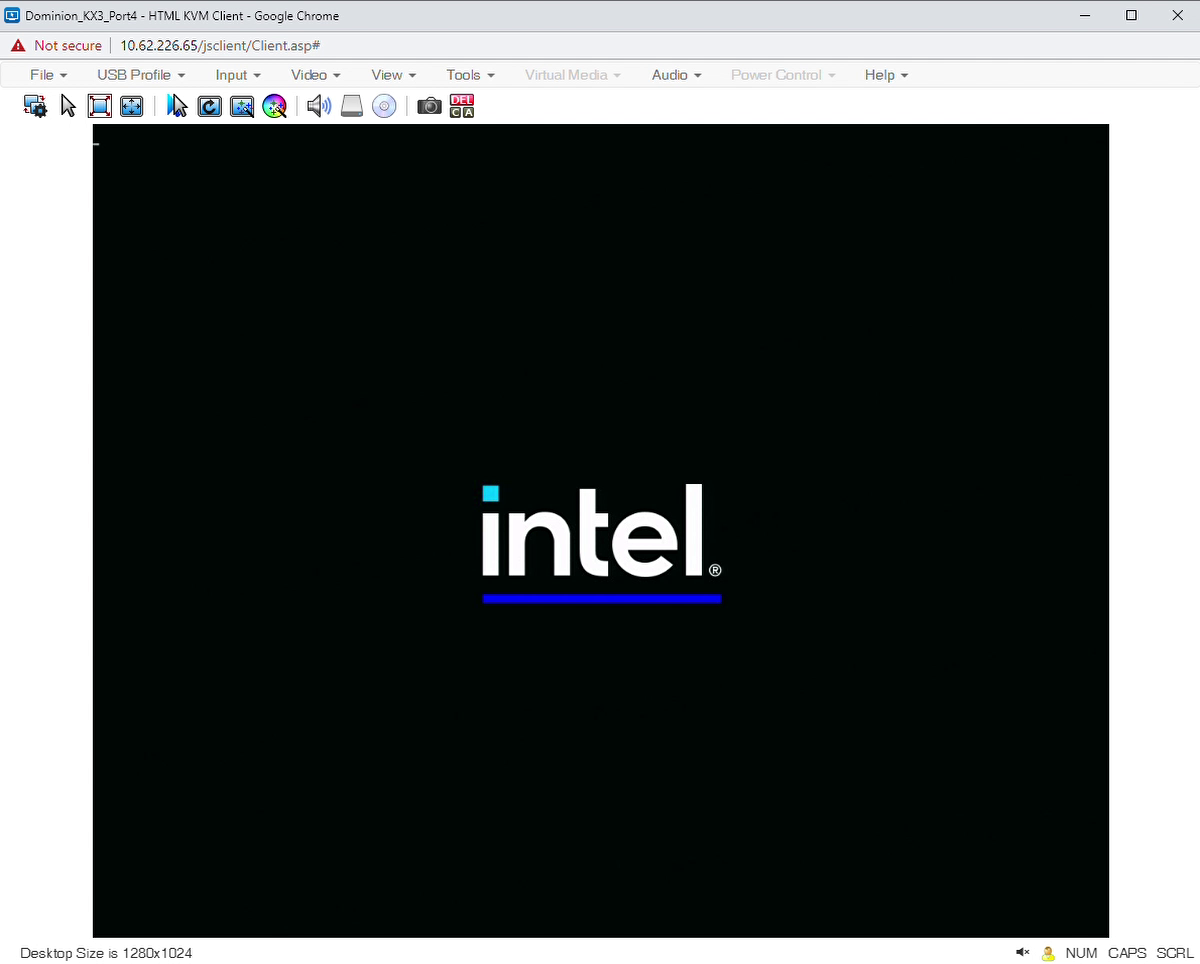
After that, you should see the Intel logo with the blue underline (see the following figure), while the BIOS capsules are applied to the BIOS sub-regions.
The system will boot into ECI-B, by default. Next, verify the target system.
Verifying Target System Setup
After the system has rebooted, boot into the GRUB “Linux” option again. Then, run the following commands to verify whether the system has been configured appropriately:
cd /usr/share/tcc_tools/scripts/setup_ssram/
./tcc_setup_ssram.sh enable --verify
The script verifies whether the TCC Driver is loaded and if the RTCT table, found at
/sys/firmware/acpi/tables/PTCT, complies with the pre-defined Software SRAM configuration.verify [ENABLED ] Driver [ENABLED ] Driver auto-load [VALID ] Cache configuration (from RTCT) SYSTEM CONFIGURATION IS CORRECT
Decode the content of the RTCT table using the following command:
tcc_cache_info_read | grep -C 8 SoftwareSRAMIf the pre-defined Software SRAM configuration is active, this command should report three records with Software SRAM buffers:
{
   "Level": 2,
   "Cache_ID": 2,
   "Base": 1074266112,
   "Size": 262144,
   "Shared": 0,
   "Type": "common.rtct.v2.rtct.SoftwareSRAM"
},
{
   "Level": 2,
   "Cache_ID": 3,
   "Base": 1074528256,
   "Size": 262144,
   "Shared": 0,
   "Type": "common.rtct.v2.rtct.SoftwareSRAM"
},
{
   "Level": 3,
   "Cache_ID": 0,
   "Base": 1074266112,
   "Size": 1048576,
   "Shared": 0,
   "Type": "common.rtct.v2.rtct.SoftwareSRAM"
},
Changing Boot Order (optional)
You can optionally change the boot order of the system. This will reduce the need to enter BIOS to boot from a specific device. Using the following example, you can control the boot order of their system.
After verifying whether the Software SRAM capsule has been applied correctly, you can remove the RTCM boot option as it is not required. Run the following command:
#Replace '<bootnum>' with the number corresponding to "RTCM". Example has been provided below.
efibootmgr -b <bootnum> -B
root@eci-intel-0faa:~# efibootmgr BootCurrent: 0006 Timeout: 5 seconds BootOrder: 0006,0005,0004,0001,0002,0000,0003 Boot0000* Enter Setup Boot0001* Internal UEFI Shell Boot0002* Boot Device List Boot0003* UEFI SanDisk Extreme 4C530001091014102431 Boot0004* UEFI Samsung SSD 970 EVO Plus 500GB S58SNJ0N610041M 1 Boot0005* ECI Boot0006* RTCM root@eci-intel-0faa:~# efibootmgr -b 0006 -B BootCurrent: 0006 Timeout: 5 seconds BootOrder: 0005,0004,0001,0002,0000,0003 Boot0000* Enter Setup Boot0001* Internal UEFI Shell Boot0002* Boot Device List Boot0003* UEFI SanDisk Extreme 4C530001091014102431 Boot0004* UEFI Samsung SSD 970 EVO Plus 500GB S58SNJ0N610041M 1 Boot0005* ECI
Booting into ACRN and Launching RT VM
After validating the system, reboot the system. When the GRUB menu appears, let the system boot normally. The ACRN option will be selected, by default.
Rename the VM before launching the RT VM. When the VM is integrated into the image, it is called
vm1.wic. Rename it tovm0.wicas thelaunch-rtvm.shscript will fail as it will not find the file.Rename the VM:
 cd /var/lib/machines/images/
mv vm1.wic vm0.wic
Launch the RT VM:
cd /var/lib/machines/scripts/
./launch-rtvm.sh
The boot up of RT VM will take couple minutes and will give you a login console. The login for VM is
root. Once the console is available, run the following commands to enable the Intel TCC Driver:cd /usr/share/tcc_tools/scripts/setup_ssram/ ./control_tcc_driver.sh enable
Once the driver is enabled, run the Intel TCC example:
export TCC_LOG_LEVEL=INFO
./tcc_cache_allocation_sample --collect --latency 50 --stress --cpuid 1
Expected output should be similar to the following.
Running with arguments:
    latency = 50 ns,
    stress = internal,
    iterations = 100,
    collector = libtcc_collector.so,
    mask interrupts = true
    :
print_regions_table | Available regions:
print_regions_table | Id          Cache level      Latency, ns  Affinity mask     Entire region size, b  Allocation size from tcc.config, b
print_regions_table | 4294967295  TCC_MEM_DRAM     114          11000000          Regular RAM            Regular RAM
print_regions_table | 2           TCC_MEM_L3       49           11000000          524288                 262144
print_regions_table | 0           TCC_MEM_L2       6            10000000          262144                 98304
print_regions_table | 1           TCC_MEM_L2       6            01000000          262144                 98304
Allocating memory according to the latency requirements
allocators_manager_get_next | Searching for memory to satisfy requirements: latency=50 ns, affinity=01000000
allocators_manager_get_next | Found suitable allocator for request: region #1 (TCC_MEM_L3)
region_allocator_malloc | Calling region malloc with: size=97280
Running workload. This may take a while, depending on sleep and iteration values
Deallocating memory

*** Statistics for workload ****************************
Minimum total latency: 21898 CPU cycles (7811 ns)
Maximum total latency: 24051 CPU cycles (8579 ns)
Average total latency: 22703 CPU cycles (8098 ns)

Minimum latency per buffer access: 43 CPU cycles (15 ns)
Maximum latency per buffer access: 47 CPU cycles (16 ns)
Average latency per buffer access: 44 CPU cycles (15 ns)
********************************************************
Using TCC Cache Configurator
In the previous sections, you set up a pre-defined Software SRAM configuration. The pre-configured BIOS capsules with this Software SRAM configuration was deployed into the BIOS sub-regions as described the Intel® TCC Get Started Guide (Complete Target Setup of Software SRAM). The pre-defined Software SRAM configuration consists of three buffers:
One buffer located in L3 cache guaranteeing a maximum latency of 49 ns.
Two buffers located in L2 cache and guaranteeing a maximum latency of 6 ns.
While this pre-defined Software SRAM configuration represents only an example configuration, you can use the TCC Cache Configurator to create your own Software SRAM configurations and to deploy those onto the target board.
For more information on the working of the TCC Cache Configurator, refer to Cache Configurtor.
The following steps, which provide a practical guide on how to use the cache configurator, correspond to Launch the Cache Configurator of the Intel® TCC Tools 2021.2 Developer Guide.
Preparing Target
Power up the TGL-U RVP board and press F7 to show the EFI boot Manager. In the EFI boot manager, select the boot option that corresponds to the SSD. This will boot ECI Base Poky natively. Login as root and identify its IP address.
The following steps require that the target boots the ECI Base Poky natively several times. To avoid that, manually select the boot option via the EFI boot manager again and again. You can modify the boot order such that the system boots from the SSD, by default.
Enable the tcc_buffer driver (if it is not enabled already):
cd /usr/share/tcc_tools/scripts/setup_ssram/
./control_tcc_driver.sh
Running TCC Cache Configurator
On the TCC Tools host machine, launch the TCC Cache Configurator. You will need to update the sample environment with the correct values for your Tiger Lake machine.
Follow the steps in TCC Cache Configurator to set up cache configuration for the Tiger Lake system.
Troubleshooting
Cache Configuration is INVALID
If the cache configuration is INVALID, it means that the capsules have not been applied to the BIOS sub-regions. In most cases, this occurs if the system does not reboot appropriately and you have to run a power-off/power-on cycle. If the cache configuration is INVALID, you have to boot ECS Base Poky natively again, which was installed on the SSD, and repeat the steps listed in Configuring System using Software SRAM.
Only Driver is Disabled
If only the Driver is disabled, run the following command to enable it:
cd /usr/share/tcc_tools/scripts/setup_ssram/
# Load driver and add it to auto-load
./control_tcc_driver.sh enable
If the above command does not work, run the following command to enable the driver (you need to rerun the command if the system is rebooted):
modprobe tcc_buffer