Installing ECI-B/R/X
You are now ready to deploy the corresponding ECI image on a target system in either of the following cases:
You have built an image for either of the following targets:
base-poky (ECI-B)
preempt-buster (ECI-B)
rts-buster (ECI-R)
rts-poky (ECI-R)
xenomai-poky (ECI-X)
xenomai-buster (ECI-X)
You have a non-ACRN based prebuilt image, such as:
ECI Core
ECI Performance Native
For more information on aliases and targets, refer to Building ECI.
To deploy the image on a target system, you need to do the following:
Create Bootable USB
The following steps are applicable to:

Do the following to create a bootable USB, which you will later use to build and install ECI-B/R/X:
Open a terminal to the ECI directory. In Ubuntu*, you can right-click an empty space in the directory explorer and select Open in Terminal.

Insert a USB drive with at least 12GB capacity into the Linux build system.
Note: For best performance, use a USB 3.1 (or greater) device and port.
Warning
All data on the USB mass storage device will be erased!
At the terminal prompt, run the create_bootable_usb.sh script:
./create_bootable_usb.shIf the message “Please run as root” appears, run the script again with
sudo:sudo ./create_bootable_usb.sh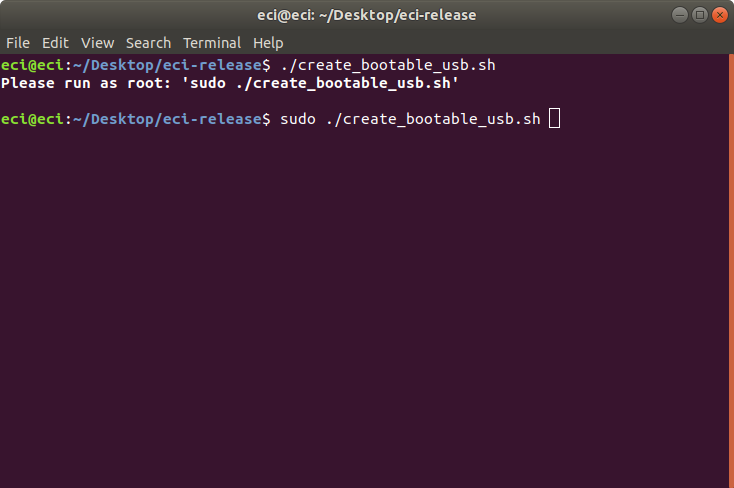
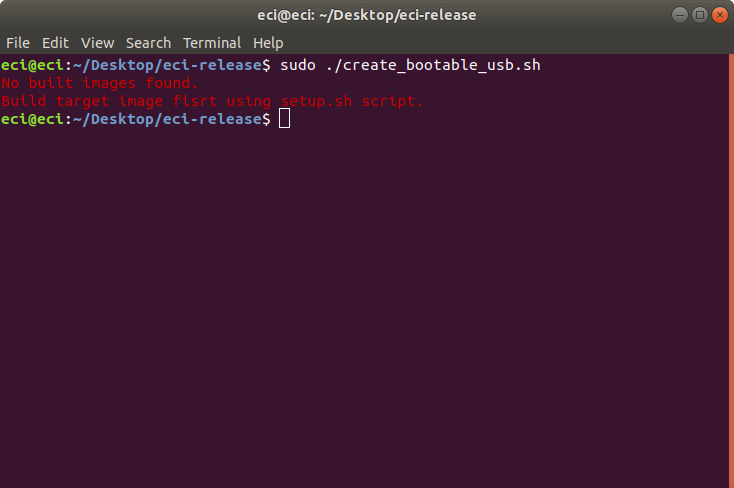
If no ECI images have been built yet, the script will display the message: “No built images found”. Refer to Building ECI and build an ECI image. Then, run the create_bootable_usb.sh script.
The script will display a list of available ECI images. Enter an image name from the list. For example, enter
base-pokyto install an ECI-B image.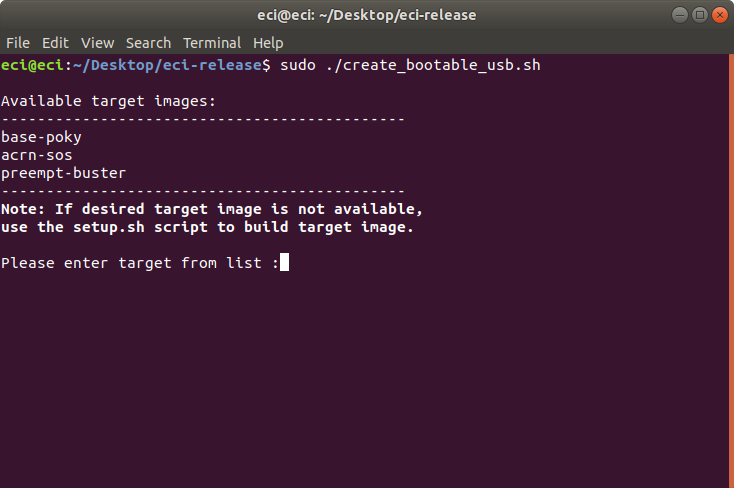
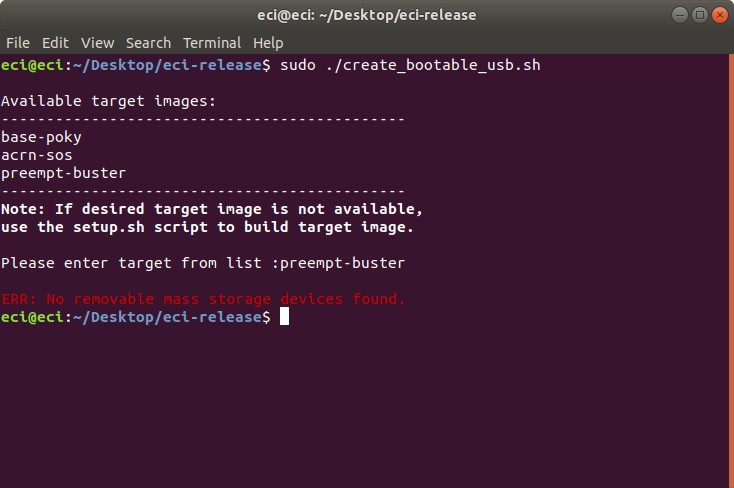
If a mass storage device cannot be located, the script will display the message: “ERR: No removable mass storage devices found”. Insert a USB drive with at least 12GB capacity into the Linux build system and run the create_bootable_usb.sh script again.
The script will display a list of available removable mass storage devices.
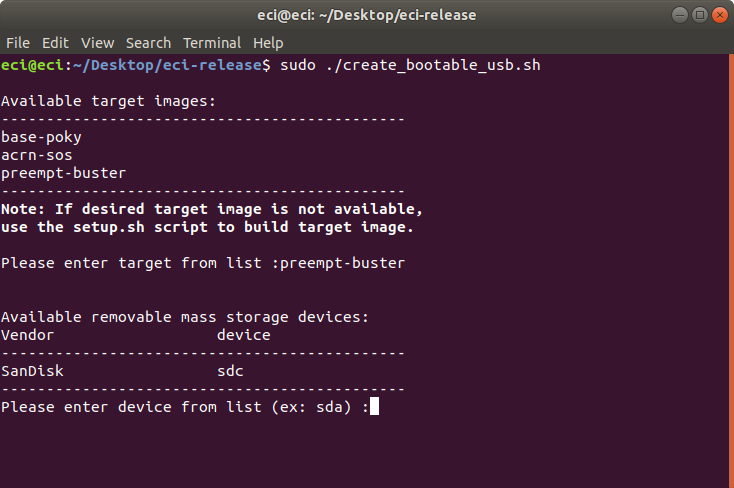
Enter the name of a device from the displayed list. In this example, the device name displayed is
sdc.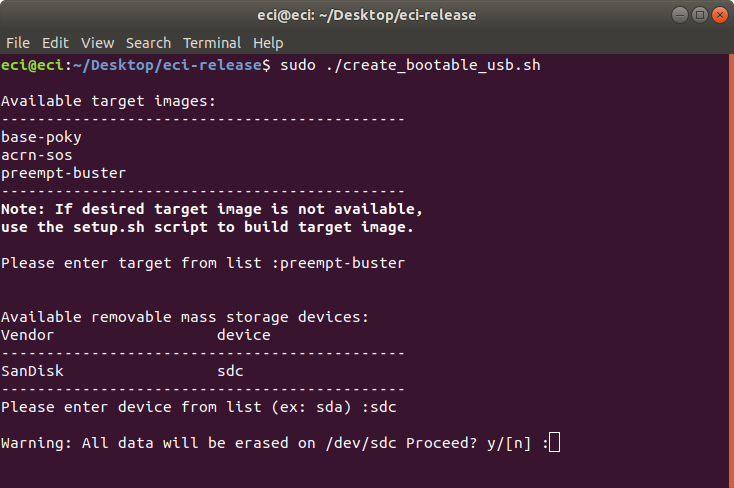
When the warning,
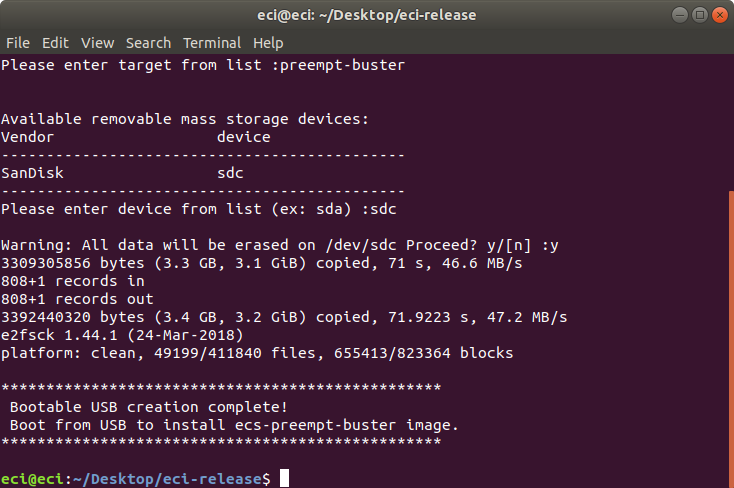
Warning: All data will be erased on <device> Proceed? y/[n]is displayed, enter y to proceed. The target ECI image will be written to the removable mass storage device.After the script completes, you will have a bootable USB drive that can install the target ECI image. You may eject the USB drive from the Linux build system. Follow the next section Boot & Install Image to continue.
Configure Target System BIOS for Determinism
The following section is applicable to:

For ECI, certain BIOS settings need to be configured to achieve real-time determinism. Do the following:
Boot the target system and access the BIOS (typically pressing the delete or F2 keys while booting will open the BIOS menu).
Select Restore Defaults or Load Defaults and then select Save & Exit.
Reboot the target system and open the BIOS again (as per Step 1).
Modify the BIOS configuration as listed in the following table.
Note
The available configurations depend on the platform, BIOS in use, or both. In this case, modify as many configurations as possible.
Setting Name
Option
Setting Menu
Hyper-Threading
Disabled
Intel Advanced Menu ⟶ CPU Configuration
Intel (VMX) Virtualization
Disabled
Intel Advanced Menu ⟶ CPU Configuration
Intel(R) SpeedStep
Disabled
Intel Advanced Menu ⟶ Power & Performance ⟶ CPU - Power Management Control
Turbo Mode
Disabled
Intel Advanced Menu ⟶ Power & Performance ⟶ CPU - Power Management Control
C States
Disabled
Intel Advanced Menu ⟶ Power & Performance ⟶ CPU - Power Management Control
RC6 (Render Standby)
Disabled
Intel Advanced Menu ⟶ Power & Performance ⟶ GT - Power Management Control
Maximum GT freq
Lowest (usually 100MHz)
Intel Advanced Menu ⟶ Power & Performance ⟶ GT - Power Management Control
SA GV
Fixed High
Intel Advanced Menu ⟶ Memory Configuration
VT-d
Disabled
Intel Advanced Menu ⟶ System Agent (SA) Configuration
PCI Express Clock Gating
Disabled
Intel Advanced Menu ⟶ System Agent (SA) Configuration ⟶ PCI Express Configuration
Gfx Low Power Mode
Disabled
Intel Advanced Menu ⟶ System Agent (SA) Configuration ⟶ Graphics Configuration
ACPI S3 Support
Disabled
Intel Advanced Menu ⟶ ACPI Settings
Native ASPM
Disabled
Intel Advanced Menu ⟶ ACPI Settings
Legacy IO Low Latency
Enabled
Intel Advanced Menu ⟶ PCH-IO Configuration
PCH Cross Throttling
Disabled
Intel Advanced Menu ⟶ PCH-IO Configuration
Delay Enable DMI ASPM
Disabled
Intel Advanced Menu ⟶ PCH-IO Configuration ⟶ PCI Express Configuration
DMI Link ASPM
Disabled
Intel Advanced Menu ⟶ PCH-IO Configuration ⟶ PCI Express Configuration
Delay Enable DMI ASPM
Disabled
Intel Advanced Menu ⟶ PCH-IO Configuration ⟶ PCI Express Configuration
Aggressive LPM Support
Disabled
Intel Advanced Menu ⟶ PCH-IO Configuration ⟶ SATA And RST Configuration
USB Periodic SMI
Disabled
Intel Advanced Menu ⟶ LEGACY USB Configuration
Boot & Install Image
The following steps are applicable to:
Insert the bootable USB drive created earlier (see the section Create Bootable USB) into the target system.
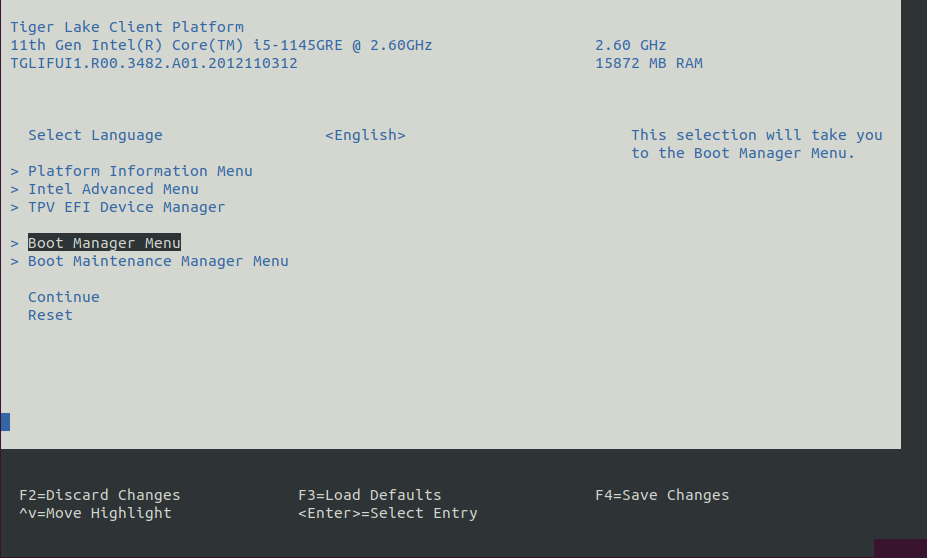
Power on the target system and access the BIOS (typically pressing the delete or F2 keys while booting will open the BIOS menu).
At the BIOS menu, navigate to the Save & Exit tab or open the Boot Manager Menu. On this page, you should see an entry with the prefix “UEFI …”. Select the entry that looks like: UEFI: <vendor>…, where
<vendor>is the vendor of the USB drive.Note: If the USB device does not appear in the boot menu, you might need to enable “Legacy USB Support” in BIOS. Configure the following BIOS setting, then reboot the system for the changes to take effect:
Setting Name
Option
Setting Menu
Legacy USB Support
Enabled
Intel Advanced Menu ⟶ USB Configuration ⟶ Legacy USB Support
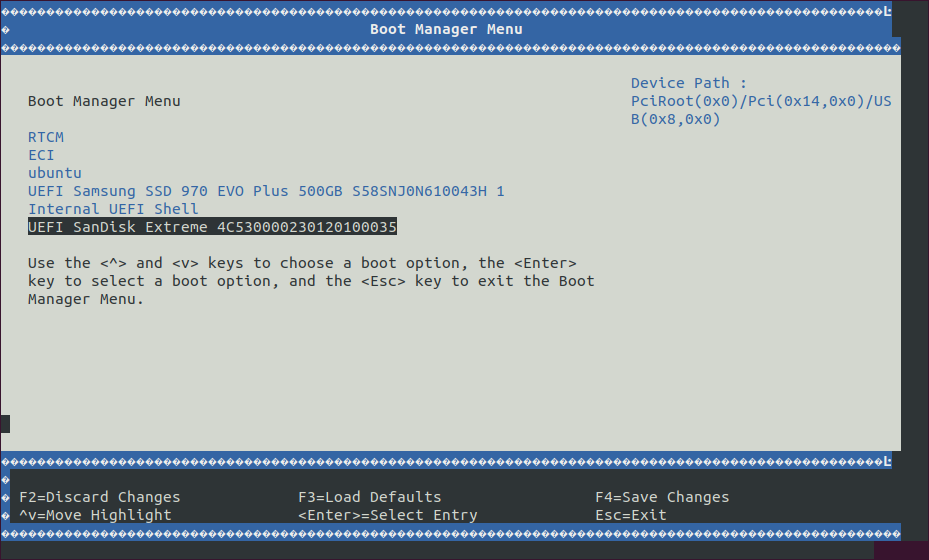
The system will boot from the USB drive. A boot menu will appear with a few options. Choose the install option.
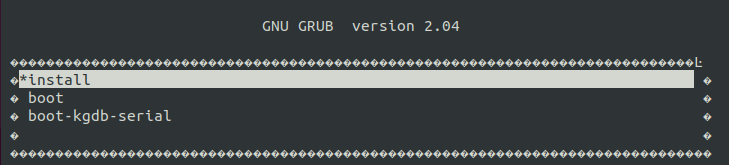
The system will begin the installation process. During the installation, you will be prompted to:
Please select an install target or press n to exit. Enter an available install target (make sure that the target is correct). For example, entersdb.If you see the prompt:
/dev/sdb# contains a ext4 file system … Proceed anyway? (y,N), press y to continue.After the installation is complete, remove the USB drive and press Enter on the keyboard to reboot the system.
Let the system boot completely. Select
bootfrom the GRUB menu (this option will automatically be selected after 5 seconds).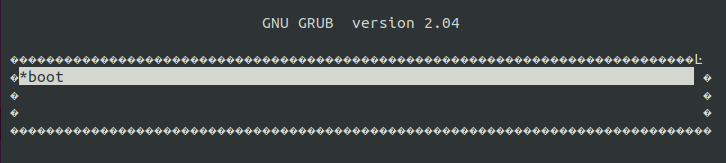
A login prompt will eventually appear. Login with user
rootand passwordroot(if prompted for a password). At the terminal prompt, type:uname -a. Observe the build date to verify whether the image is correct.Note
If SELinux feature option is enabled, login with user
rootand password123456*18.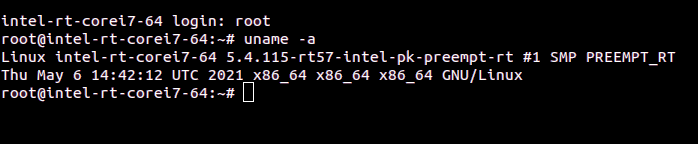
At this point, ECI is ready to use. Follow section Verifying Deployment to explore ECI and run sample applications.
Experimental: Install ECI Debian Packages onto Existing Debian Installation
After building an image (see section Building ECI) of a Debian-based configuration, ECI packages (.deb) will be created. You can deploy the packages onto an existing Debian installation by using a repository and apt.
The following steps are applicable to:
Open a terminal to the ECI directory. In Ubuntu, you can right-click empty space in the directory explorer and select Open in Terminal.
At the terminal prompt, run a Docker container, which will serve the packages over HTTP:
$ docker run -it --rm -p 8080:80 -v "$PWD"/build/ecs-preempt-buster/build/tmp/deploy/isar-apt/ecs-amd64/apt/ecs/:/usr/local/apache2/htdocs/ httpd:2.4
Identify the IP address of this machine (run the command
ip a). In the following example, the IP address is192.168.0.10:$ ip a 1: enp0s2: <BROADCAST,MULTICAST,UP,LOWER_UP> mtu 1500 qdisc fq state UP group default qlen 1000 link/ether a0:e4:e5:32:b6:11 brd ff:ff:ff:ff:ff:ff inet 192.168.0.10/24 metric 1024 brd 192.168.0.255 scope global dynamic enp0s2 valid_lft 42405sec preferred_lft 42405sec
The following steps are applicable to:
Add the repository, you created now, to the
aptconfiguration. Replace 192.168.0.10 with the IP address of your repository.$ echo "deb http://deb.debian.org/debian buster-backports main" >> /etc/apt/sources.list $ echo -e "Package: libzstd1*\nPin: release a=buster-backports\nPin-Priority: 600" > /etc/apt/preferences.d/backports $ echo "deb [trusted=yes] http://192.168.0.10:8080/ isar main" > /etc/apt/sources.list.d/eci.list $ echo -e "Package: *\nPin: origin 192.168.0.10\nPin-Priority: 900" > /etc/apt/preferences.d/isar
Use
aptto install the selected packages or use the following command to install all ECI packages.$ apt update $ apt install -y $(grep ^Package /var/lib/apt/lists/192.168.0.10\:8080_dists_isar_main_binary-amd64_Packages | grep -v '\-dbgsym' | awk '{print $2}')
Experimental: Create a Debian Live Build Image containing ECI Debian Packages
After building an image (see section Building ECI) of a Debian-based configuration, ECI packages (.deb) will be created. You can deploy the packages into a Debian Live Build ISO image. You can use this image to run a live ECI system on a target or to run the Debian installer on the target. Do the following to generate the Debian Live Build ISO deployed onto an existing Debian installation by using a repository and apt.
The following steps are applicable to:
Open a terminal to the ECI directory. In Ubuntu, you can right-click empty space in the directory explorer and select Open in Terminal.
At the terminal prompt, run Docker to build the container image which will be used to generate the Debian Live Build ISO:
$ docker build targets/docker/eci-create-debian-live/ -t eci-create-debian-live --build-arg http_proxy
This Docker image can now be instantiated to generate the Debian Live Build ISO automatically:
$ docker run -it --rm -v "$PWD":"$PWD" -e DIR_ECI="$PWD" -e http_proxy --pid=host --privileged eci-create-debian-live
Once the generation is complete, the Debian Live Build ISO with ECI package will be available at:
build/ecs-preempt-buster-live-image/live-image-amd64.hybrid.iso. You can flash this image on a USB stick, from which the target will boot.