Intel® In-band Manageability
Important
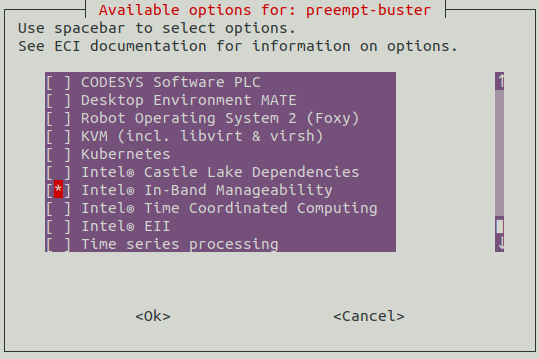
Intel® In-band Manageability features must be enabled in the ECI image before Intel® In-band Manageability can be used. Creating an ECI image that contains the Intel® In-band Manageability features can be accomplished by selecting the Intel® In-band Manageability feature option during image setup. See section Building ECI for more information.
In-Band Manageability Framework (a.k.a INB) is a Software running on edge IoT Device which enables an administrator to perform critical Device Management operations over-the-air remotely from the cloud. It also facilitates publishing of telemetry and critical events and logs from the Edge IoT device to the cloud enabling the administrator to take corrective actions if, and when necessary. The framework is designed to be modular and flexible ensuring scalability of the solution across preferred Cloud Service Providers (e.g., Azure* IoT Central, Telit DeviceWISE, ThingBoard.io, and so on).
Some of the key advantages of Intel® In-band Manageability solutions are:
Out-of-box cloud support: Azure IOT Central, Telit DeviseWise, ThingsBoard.io.
Single interface to handle OS, FW and Application (Docker container) updates.
Scalable across Intel® x86 (Intel® Atom and Intel® Core) architectures SoCs and on Vision platforms from Intel.
The Device Management use-cases covered by the In-Band Manageability Framework are listed in the table below:
Use-cases |
Notes |
|---|---|
Software-over-the-air (SOTA) |
OS Update |
Firmware-over-the-air (FOTA) |
Platform FW update |
Telemetry |
System attributes, Events, Devices States, Usage data |
Power Control |
System Reboot/Shutdown |
Embedded within the In-Band Manageability Framework are features which ensure Security and Diagnostics aspects:
Feature |
Notes |
|---|---|
Security |
ACL for trusted repositories, Mutual TLS authentication between services, TPM to store framework secrets |
Diagnostics |
Pre and Post OTA update checks, Periodic system checks |
Castle-Lake Workload-Orchestrator in In-band Manageability
This section describes the CSL path’s mentioned in In-band Manageability Configuration file.
The /etc/intel_manageability.conf file under the orchestrator tags mention various CSL paths indicating the CSL Manager IP, Token and Certs file path. The mentioned paths are present on any completely functional CSL worker nodes.
Below is the snippet of CSL orchestrator default tags their description from the intel_manageability.conf file .. list-table:
* - CSL Orchestrator Tags
  - Description
* - ``<orchestrator name="csl-agent"> ``
  - Specifies the Castle Lake(CSL) workload orchestrator Service name
* - ``<orchestratorResponse>``
  - This tag indicates a boolean value to determine whether or not to proceed with the OTA update if CSL fails to shift the workloads on the device.
* - ``<ip>``
  - This tag specifies the absolute path of CSL Manager IP address file
* - ``<token>``
  - This tag specifies the absolute path of CSL Manager Token file
* - ``<CertFile>``
  - This tag specifies the absolute path of CSL CA Cert file
Note
Users are allowed to set orchestratorResponse boolean value in the intel_manageability.conf file based on their preference. As default we set it to true, specifying that any OTA update on a CSL-enabled device needs to wait until CSL shifts the workloads to other nodes before proceeding with the OTA update
In-band Manageability User Guides
To get started managing your ECI device, your device will need to be registered to a supported DMS. Please follow the Developer/User Guide below corresponding to the desired DMS (Telit, Azure or Thingsboard).
Document |
Description |
|---|---|
Developer Guide containing info on Extending FOTA to a new platform, debug, logging, code structure, and adding a new agent to the framework. |
|
|
User guide for provisioning device to Telit and performing OTA usecases. |
User guide for provisioning device to Azure and performing OTA usecases. |
|
User guide for provisioning device to Thingsboard and performing OTA usecases. |
Provisioning In-band Manageability Framework
The following section is applicable to:

Important
Intel® In-band Manageability features must be enabled in the ECI image before Intel® In-band Manageability can be used. Creating an ECI image that contains the Intel® In-band Manageability features can be accomplished by selecting the Intel® In-band Manageability feature option during image setup. See section Building ECI for more information.
To provision the edge devices with the cloud provider of your choice, follow the section below corresponding to your choice. Note that an account with the provider is needed to generate a token for provisioning.
See section Provision for Telit for connecting edge device to Telit Device Cloud provider. (Not recommended for Production use.)
See section Provision for Azure for connecting edge device to Azure IOT Central
See section Provision for ThingsBoard for connecting edge device to Thingsboard cloud service
Provision for Telit
See also
These steps are also available from section 2.7 Provisioning with Telit DeviceWISE Token of the following document: In-Band Manageability User Guide - Telit DeviceWISE v2.8.pdf.
Note
Telit provisioning is not recommended for production use.
Perform the following command:
# provision-tcThe provisioning scripts first detects the OS that its running on and checks for TPM access, post which it starts the MQTT broker service which is the message bus used by the In-band Manageability framework services.
root@eci-intel-7004:~# provision-tc
Detected Yocto; skipping Docker configuration
Detecting TPM (can take up to 10 seconds)...
TPM detected. Enabling TPM for provisioning.
Enabling and starting mqtt (this may take some time to generate secrets)...
Created symlink /etc/systemd/system/multi-user.target.wants/mqtt.service → /etc/systemd/system/mqtt.service.
A prompt will appear asking which cloud service to use; press 1 and [ENTER] for Telit:
Please choose a cloud service to use:
1) Telit Device Cloud 3) ThingsBoard

2) Azure IOT Central  4) Custom
Select which Telit host to use:
Please select Telit host to use:

1. Production (api.devicewise.com)
2. Development (api-dev.devicewise.com)
When prompted, paste the token copied from Developer -> Applications Tab on Telit:
Provide Telit token:Either enter a desired Thing Key (a unique identifier), or press enter to generate one:
Provide Telit Thing Key (leave blank to autogenerate):The provisioned Thing Key will then appear, in case the key was generated.
Note
Save this somewhere to identify the device on the Telit portal
Thing Key: my-thing-123If everything works correctly, the following message will appear, informing that the cloud service was configured successfully:
Successfully configured cloud service!A Yes/No user prompt appears requesting for a certificate verification on an OTA package. Choose ‘Y’ and provide path to ota cert file if FOTA or Config load packages need to be verified using signature, else choose ‘N’.
Signature checks on OTA packages cannot be validated without provisioning a cert file.

Do you wish to use a pre-provisioned cert file for signature checks for OTA packages? [Y/N]
In-Band Manageability Framework services are enabled and started as seen below:
Enabling and starting agents...

Created symlink /etc/systemd/system/multi-user.target.wants/configuration.service → /etc/systemd/system/configuration.service.

Created symlink /etc/systemd/system/multi-user.target.wants/dispatcher.service → /etc/systemd/system/dispatcher.service.

Created symlink /etc/systemd/system/multi-user.target.wants/diagnostic.service → /etc/systemd/system/diagnostic.service.

Created symlink /etc/systemd/system/multi-user.target.wants/cloudadapter.service → /etc/systemd/system/cloudadapter.service.

Created symlink /etc/systemd/system/multi-user.target.wants/telemetry.service → /etc/systemd/system/telemetry.service.

Turtle Creek Provisioning Complete
Note
If the device does not provision successfully, please refer to section
5.0 Issues and TroubleshootingofIn-Band Manageability User Guide - Telit DeviceWISE v2.8.pdffor troubleshooting.
Provision for Azure
See also
These steps are also available from section 2.4 Provisioning a Device of the following document: In-Band Manageability User Guide - Azure v2.8.pdf.
Perform the following command:
# provision-tcRead through the license and press Y to accept. If the device was previously provisioned, the following message will appear. To override the previous cloud configuration, press Y:
A cloud configuration already exists: "telit"
Replace configuration?
[Y/N]
A prompt will appear asking which cloud service to use; press 2 and [ENTER] for Azure:
Please choose a cloud service to use:
1) Telit Device Cloud 3) ThingsBoard

2) Azure IOT Central  4) Custom
Prompts will now appear asking for the Scope ID, Device ID and the Shared Access Key; use the information collected in section 2.4 of
In-Band Manageability User Guide - Azure v2.8.pdfPlease enter the device Scope ID: dEviCeScopeID1234 Please enter the Device ID: Device-ID-1234
Then, the user is required to select the authentication mechanism; choose the option and [ENTER] .. code-block:: console
Please choose provision type 1. SAS key authentication 2. X509 authentication
When the user selects 1: SAS key authentication, a prompt to enter SAS key is seen; enter the SAS key and [ENTER]. The SAS key information can be obtained by following the steps in section 2.4.1 of
In-Band Manageability User Guide - Azure v2.8.pdfPlease enter device SAS primary keyIf the user selects 2: X509 authentication, the following prompt appears to confirm that the user has the device certificates generated.
Configuring device to X509 auth requires device certificate verification

Are device certs and keys generated? [Y/N]
#. If the user selects ‘N’, the provisioning exits stating that the device certificates are required to proceed further. If the device certificates are already generated, select ‘Y’ and the user is requested to upload the certificates; enter the certificate path and [ENTER]
Please enter a filename to import.
Input path to Device certificate file (cert.pem):
/home/certs/device_cert.pem
Now a prompt to enter the device key file is seen; enter the path to device key file and [ENTER]
Please enter a filename to import.
Input path to Device key file (key.pem):
/home/certs/device_key.pem
If the cloud provisioning is successful, the following will appear:
Successfully configured cloud service!A Yes/No user prompt appears requesting for a certificate verification on an OTA package. Choose ‘Y’ and provide path to ota cert file if FOTA or Config load packages need to be verified using signature, else choose ‘N’.
Signature checks on OTA packages cannot be validated without provisioning a cert file.

Do you wish to use a pre-provisioned cert file for signature checks for OTA packages? [Y/N]
The script will then start the INB services; when the script finishes, the device should be able to be interacted with its associated IoT Central Application. To verify whether the device is provisioned to the right device on the Azure portal, check the status of the device created in section 2.4 of
In-Band Manageability User Guide - Azure v2.8.pdf. The device will be shown as ‘Provisioned’ on the top right corner. Refer to section 2.5 ofIn-Band Manageability User Guide - Azure v2.8.pdfTo verify the connectivity, check to see if telemetry/events are appearing or trigger a command like Reboot; see section 2.6 of
In-Band Manageability User Guide - Azure v2.8.pdf. If at any time the cloud service configuration needs to be changed or updated, run this provisioning script again
Note
If the device does not provision successfully, please refer to section
5.0 Issues and TroubleshootingofIn-Band Manageability User Guide - Azure v2.8.pdffor troubleshooting.
Provision for ThingsBoard
See also
These steps are also available from section 2.5 Provisioning a Device of the following document: In-Band Manageability User Guide - ThingsBoard v2.8.1.pdf.
Perform the following command:
# provision-tcRead through the license, and press Y to accept:
Do you accept the demo license? [Y/N] YIf the device was previously provisioned, the following message will appear. To override the previous cloud configuration, press Y:
A cloud configuration already exists: "telit"
Replace configuration?
[Y/N]
A prompt will appear asking which cloud service to use; press 3 and [ENTER] for ThingsBoard:
Please choose a cloud service to use:
1) Telit Device Cloud 3) ThingsBoard

2) Azure IOT Central  4) Custom
A prompt will now appear asking for the IP address and Port set up in section 2.0 of
In-Band Manageability User Guide - ThingsBoard v2.8.1.pdf. Note that the server port entry can be left empty to use the default port. Note that the server port entry can be left empty to use the default port.Please enter the server IP: 127.000.000.1 Please enter the server port (default 1883): 8883
A prompt for Device provision type appears; select the type of device authentication preferred:
Please choose provision type.

1: Token authentication

2: X509 authentication
Choosing option 1. Token Authentication requires user to enter the token; use the token copied from section 2.4 of
In-Band Manageability User Guide - ThingsBoard v2.8.1.pdf:Please enter the device token:Choosing option 2. X509 Authentication requires user to have device certificate and key generated from from section 2.4.1 of
In-Band Manageability User Guide - ThingsBoard v2.8.1.pdf:Configuring device to use X509 auth requires device certificate verification. Are device certs and keys generated? [Y/N] Y Input Device certificate from file? [Y/N] y Please enter a filename to import Input path to Device certificate file (*nopass.pem): [The file path of the file with extension nopass.pem is entered here.] /home/abc/device_cert_nopass.pem
An option for TLS will appear; press Y if the server was configured to use TLS. Otherwise, press N and skip to step 9
Configure TLS?Choose an input method for the *.pub.pem file. The “Absolute file path” option requires a path to the file that does not include wildcards like ~. The “Console input” option will ask for the file to be input into the console; note that all lines preceding a line break cannot be edited:
Choose *.pub.pem input method:
1) Absolute file path

2) Console input
If the cloud provisioning is successful, the following will appear:
Successfully configured cloud service!A Yes/No user prompt appears asking for a certificate verification on an OTA package. Choose ‘Y’ and provide cert file path if FOTA/Config load packages need to be verified using signature else choose ‘N’.
Signature checks on OTA packages cannot not be validated without provisioning a cert file.
Do you wish to use a pre-provisioned cert file for signature checks for OTA packages? [Y/N]
In-Band Manageability Framework Services are enabled and started as seen below:
Enabling and starting agents...

Created symlink /etc/systemd/system/multi-user.target.wants/configuration.service → /etc/systemd/system/configuration.service.

Created symlink /etc/systemd/system/multi-user.target.wants/dispatcher.service → /etc/systemd/system/dispatcher.service.

Created symlink /etc/systemd/system/multi-user.target.wants/diagnostic.service → /etc/systemd/system/diagnostic.service.

Created symlink /etc/systemd/system/multi-user.target.wants/cloudadapter.service → /etc/systemd/system/cloudadapter.service.

Created symlink /etc/systemd/system/multi-user.target.wants/telemetry.service → /etc/systemd/system/telemetry.service.

Turtle Creek Provisioning Complete
The device can be now be managed via the ThingsBoard dashboard; see section 2.6 of
In-Band Manageability User Guide - ThingsBoard v2.8.1.pdf. If at any time the cloud service configuration needs to be changed or updated, run this provisioning script again.
Note
If the device does not provision successfully, please refer to section
5.0 Issues and TroubleshootingofIn-Band Manageability User Guide - ThingsBoard v2.8.1.pdffor troubleshooting.